مادة تدريبية: تجهيز بيانات من خرائط ورقية
9. Digitizing Vector Layers from a Georeferenced Backdrop
9.1. Digitize Peaks
First we have to create an empty GeoPackage layer.1. From the main menu select Layer | Create Layer | New GeoPackage Layer.
2. In the New GeoPackage Layer dialogue, first select the Database filename by clicking the ![]() button. Browse to the folder where you want to store the GeoPackage and save it to
button. Browse to the folder where you want to store the GeoPackage and save it to Mount_Marcy.gpkg. For Table name choose Peaks. For Geometry type choose Point. Make sure EPSG:26718
is chosen as the projection. Create a new field with the Name Elevation, Type Whole Number (integer) and click![]() .
.
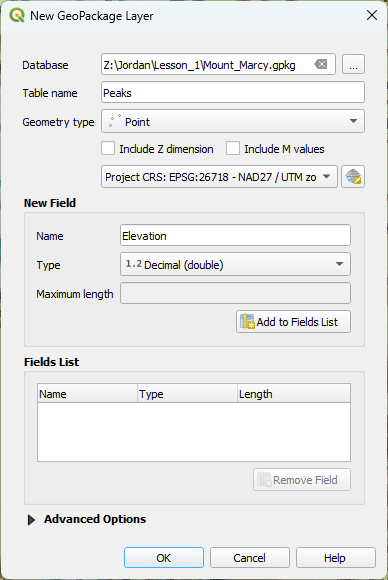
3. Add a second new field with a Type Text named Name. Make sure to click the Add to Fields List button. Then click OK.
The empty layer has now been added to your layers list:

In order to start digitizing, you have to toggle editing mode on.
4. Click on the Peaks layer so it is selected. Click on![]() in the toolbar to toggle to editing mode. You can also right-click on the layer and choose Toggle Editing from the context menu to place the layer into edit mode.
in the toolbar to toggle to editing mode. You can also right-click on the layer and choose Toggle Editing from the context menu to place the layer into edit mode.
Now the buttons on the Digitizing Toolbar become active. A pencil icon also appears next the layer in the Layers Panel indicating the layer is in edit mode.
5. On the topographical map navigate to a mountain. If a geodetic datum is present on top there will be an X and an elevation value.
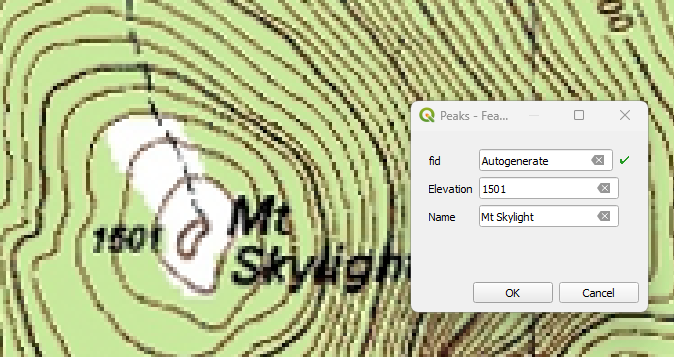
6. When you have found one, zoom in and click the Add Point Feature button ![]() . The cursor changes in a crosshair. Move the mouse to the mountain top. Click on the mountain top.
. The cursor changes in a crosshair. Move the mouse to the mountain top. Click on the mountain top.
A dialogue with a form shows up. fid is the feature id that is automatically generated. It’s a unique integer number for each feature. The other attributes that we have to fill in are Elevation and Name.
7. In this example we type 1501 and Mt Skylight for Elevation and Name respectively. If you map a peak without a labeled elevation, determine the elevation based on the contour lines.
8. Repeat this step for a few other peaks.
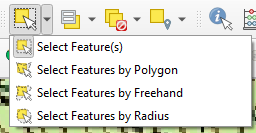
If you made a mistake, you can use the Vertex Tool ![]() to move
the feature or use one of the select options to select the point feature (see screenshot below) and click
to move
the feature or use one of the select options to select the point feature (see screenshot below) and click  to delete the selected point feature. These buttons
 ![]() can be used to undo/redo editing actions. Use
can be used to undo/redo editing actions. Use
![]() to save the edits.
to save the edits.
9. When done, click again on the ![]() button to toggle editing off. If you didn’t save edits yet, it
will ask you to Save or Discard. With Discard you can always undo your edits until the last time it was saved.
button to toggle editing off. If you didn’t save edits yet, it
will ask you to Save or Discard. With Discard you can always undo your edits until the last time it was saved.
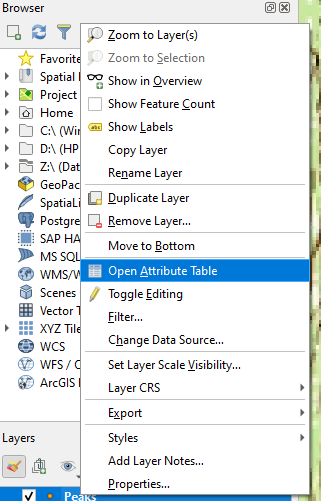
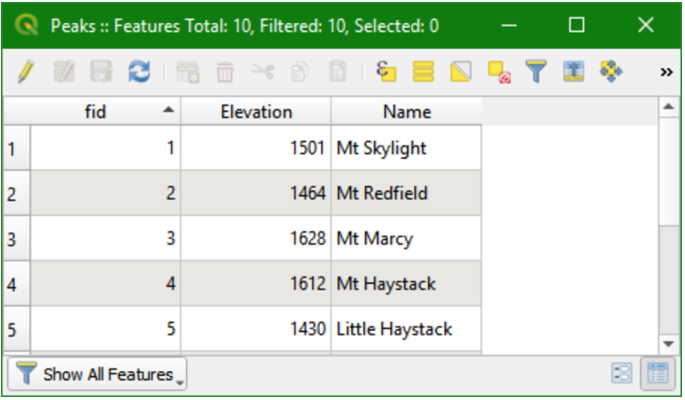
10. You can check the attribute table of your new point vector layer by right-clicking on the layer name (Peaks) and selecting Open Attribute Table.
Now you can see the attributes that you have added and their fid, Elevation and Name values:
Watch this video to check the steps of this chapter: