مادة تدريبية: تجهيز بيانات من خرائط ورقية
9. Digitizing Vector Layers from a Georeferenced Backdrop
9.2. Digitize Rivers
Your next task is to digitize line features (rivers). The procedure is similar to creating a point layer.
1. In the New GeoPackage Layer dialogue first browse to the existing Database, Mount_Marcy.gpkg.
2. Give a new Table name of Rivers and a Geometry type of LineString. Change the projection to the one of the project. As a new attribute we add Name with the type Text data. Don't forget to click the ![]() . Check if the dialogue resembles the figure below and click OK.
. Check if the dialogue resembles the figure below and click OK.
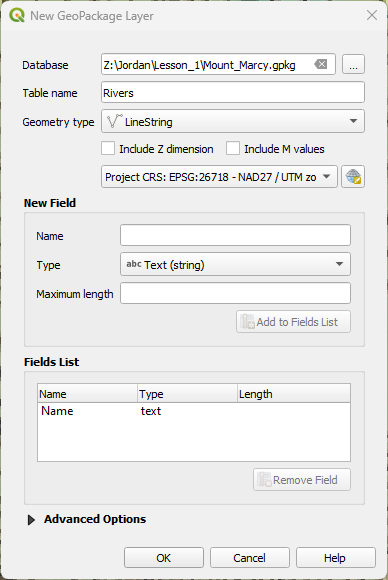
A New GeoPackage Layer window will open informing you that the file already exists.
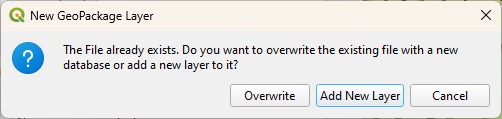
3. Choose Add New Layer.
The Rivers layer is now added to the Layers panel.
4. Toggle editing to start adding rivers. Click on the Add Line Feature![]() button to add a new river feature. Zoom and pan on the map to find a stream to digitize.
button to add a new river feature. Zoom and pan on the map to find a stream to digitize.
Always start digitizing from the upstream to downstream. The direction will be stored in the layer. Always place a vertex when a tributary joins a larger stream. That's important when connecting the tributary later.
5. Click on the starting point of the line (node) and click when necessary to make a vertex.
You can use the zoom and pan buttons to trace the stream. You can use the Spacebar to pan during digitizing. With Backspace you can delete the last node while digitizing.
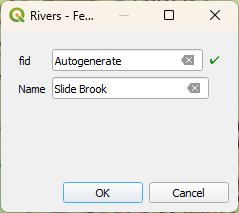
6. After you place the end node of the line, right click to complete the feature. Now you can enter the attribute data in the form.
Now you are going to digitize a tributary. First you have to set the snapping options.
7. In the main menu choose View | Toolbars | Snapping Toolbar (alternatively right-click on a toolbar and choose Snapping Toolbar). Click ![]() to enable snapping. Choose to snap to vertices of the active layer with a tolerance of 15 meters.
to enable snapping. Choose to snap to vertices of the active layer with a tolerance of 15 meters.
![]()
8. Now digitize the tributary from upstream to where it joins the higher order river. You will see that the line will snap to the node that you placed before on the main river.
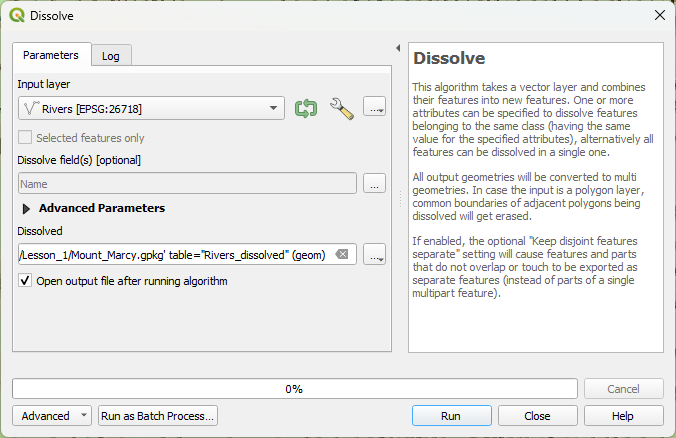
If you want all tributaries to be one single feature, you need to dissolve the features.
9. When you have given all tributaries the same name, you can dissolve them by choosing Vector | Geoprocessing Tools | Dissolve from the menu. Use the ![]() button to choose
button to choose Name as the Dissolve field and save the result in a GeoPackage layer with the name Rivers_dissolved.
Click Run.
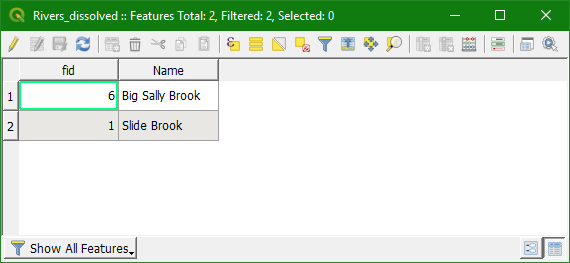
10. Check the attribute table of the result before and after dissolving: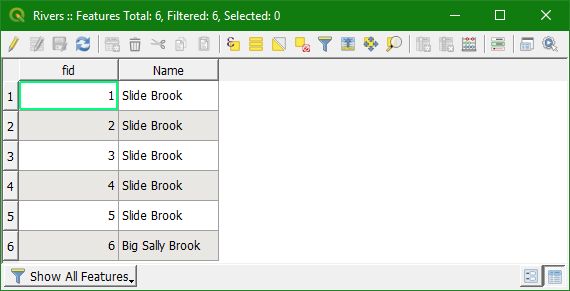
Watch this video to check the steps in this section: