Tutorial: Remote Sensing Image Classification with QGIS
5. Using the Semi-Automatic Classification Plugin
5.2. Download a Sentinel 2 Image
With the SCP plugin we can easily download Sentinel 2 images.
- In the SCP Dock, click
 to go to the dialog for downloading satellite images.
There are different ways to go to the same dialog. You can click
in the SCP toolbar to open the main SCP dialog. From there you can choose the Download products tab. Another way is to go to the main menu and choose SCP | Download products.
SCP allows you to download the following products:
- Sentinel-2
- Landsat_MPC
- Sentinel-2_MPC
- Landsat_HLS
- Sentinel-2_HLS
- MODIS_09Q1_MPC
- MODIS_11A2_MPC
- ASTER_MPC
- Copernicus_DEM_30_MPC
HLS stands for Harmonized Landsat and Sentinel‑2.
This is a NASA product family that:
- Harmonizes Landsat 8/9 and Sentinel‑2 surface reflectance
- Applies consistent atmospheric correction
- Aligns spectral bands
- Resamples to a common grid (typically 30 m)
- Makes the two missions interoperable for time‑series analysis
SCP can download these directly, which is useful for multi‑sensor classification or temporal analysis.
MPC stands for Mission Performance Centre.
In the context of SCP, MPC products are datasets distributed through the ESA Mission Performance Centres, which provide:
- Pre‑processed, analysis‑ready versions of satellite data
- Consistent metadata
- Standardized formats
- Quality‑controlled products for scientific use
These are typically Level‑2 or analysis‑ready datasets, depending on the mission.
We will use the Sentinel-2_MPC product for our crop type classification.
First we need to select the extent in the Search parameters.
2. In the dialog under Search parameters, click the ![]() icon.
icon.
3. In the map canvas, click with the left mouse button in the upper left corner of the extent you want to use. Click with the right mouse button in the lower right corner of the extent you want to use.
You can further adjust it with the same mouse buttons.
Back in the dialog you will see that the coordinates have been filled in using the Geographic Coordinate System.

Now we can select the data product.
4. Use the drop-down menu at Products to choose Sentinel-2_MPC.
We need to limit our search to the season for which the ground truth was collected.
5. Set the date range to 1 May 2024 - 30 September 2024 and use a Max cloud cover of 20%.
Before we can search for images, we need to give our login details.
6. In the dialog, go to the Login data tab.

7. Type your credentials or if you don't have an account yet, click the link to create one. Also check the box to remember your account details.
Now we can search the images.
8. Go back to the Search tab and click the Find ![]() icon.
icon.
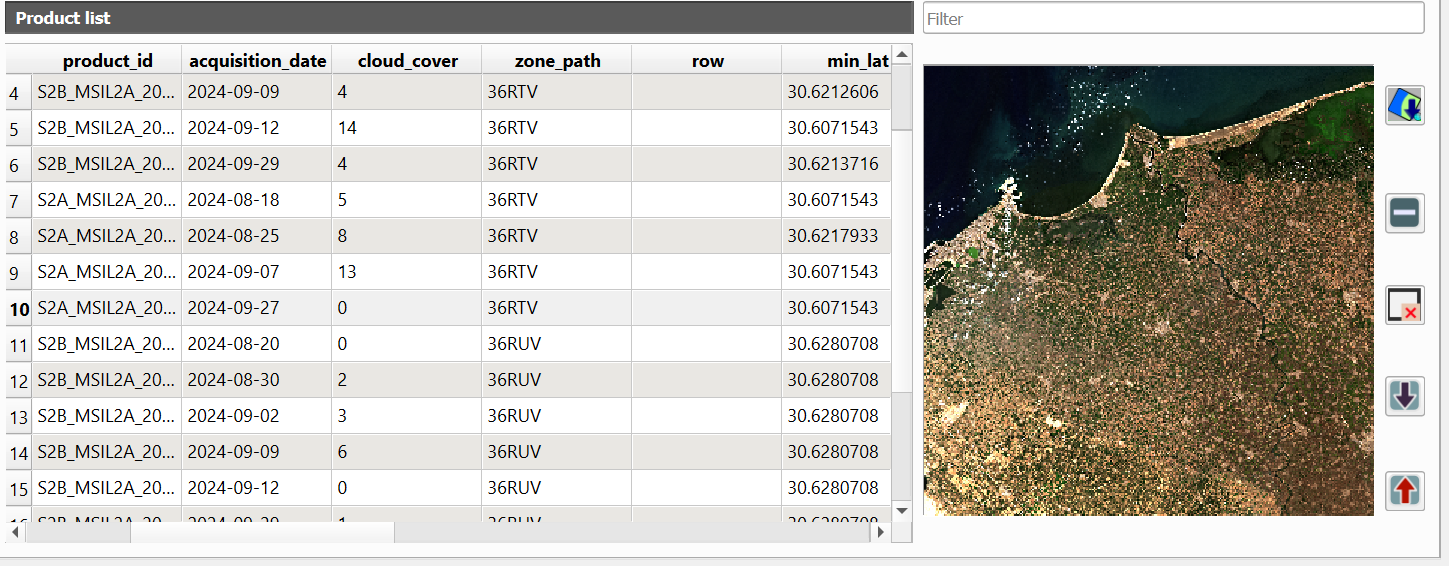
The dialog will return max 20 images in the Product list table. The table shows useful info such as acquisition date and cloud cover.
Let's check the images with 0% cloud cover first.
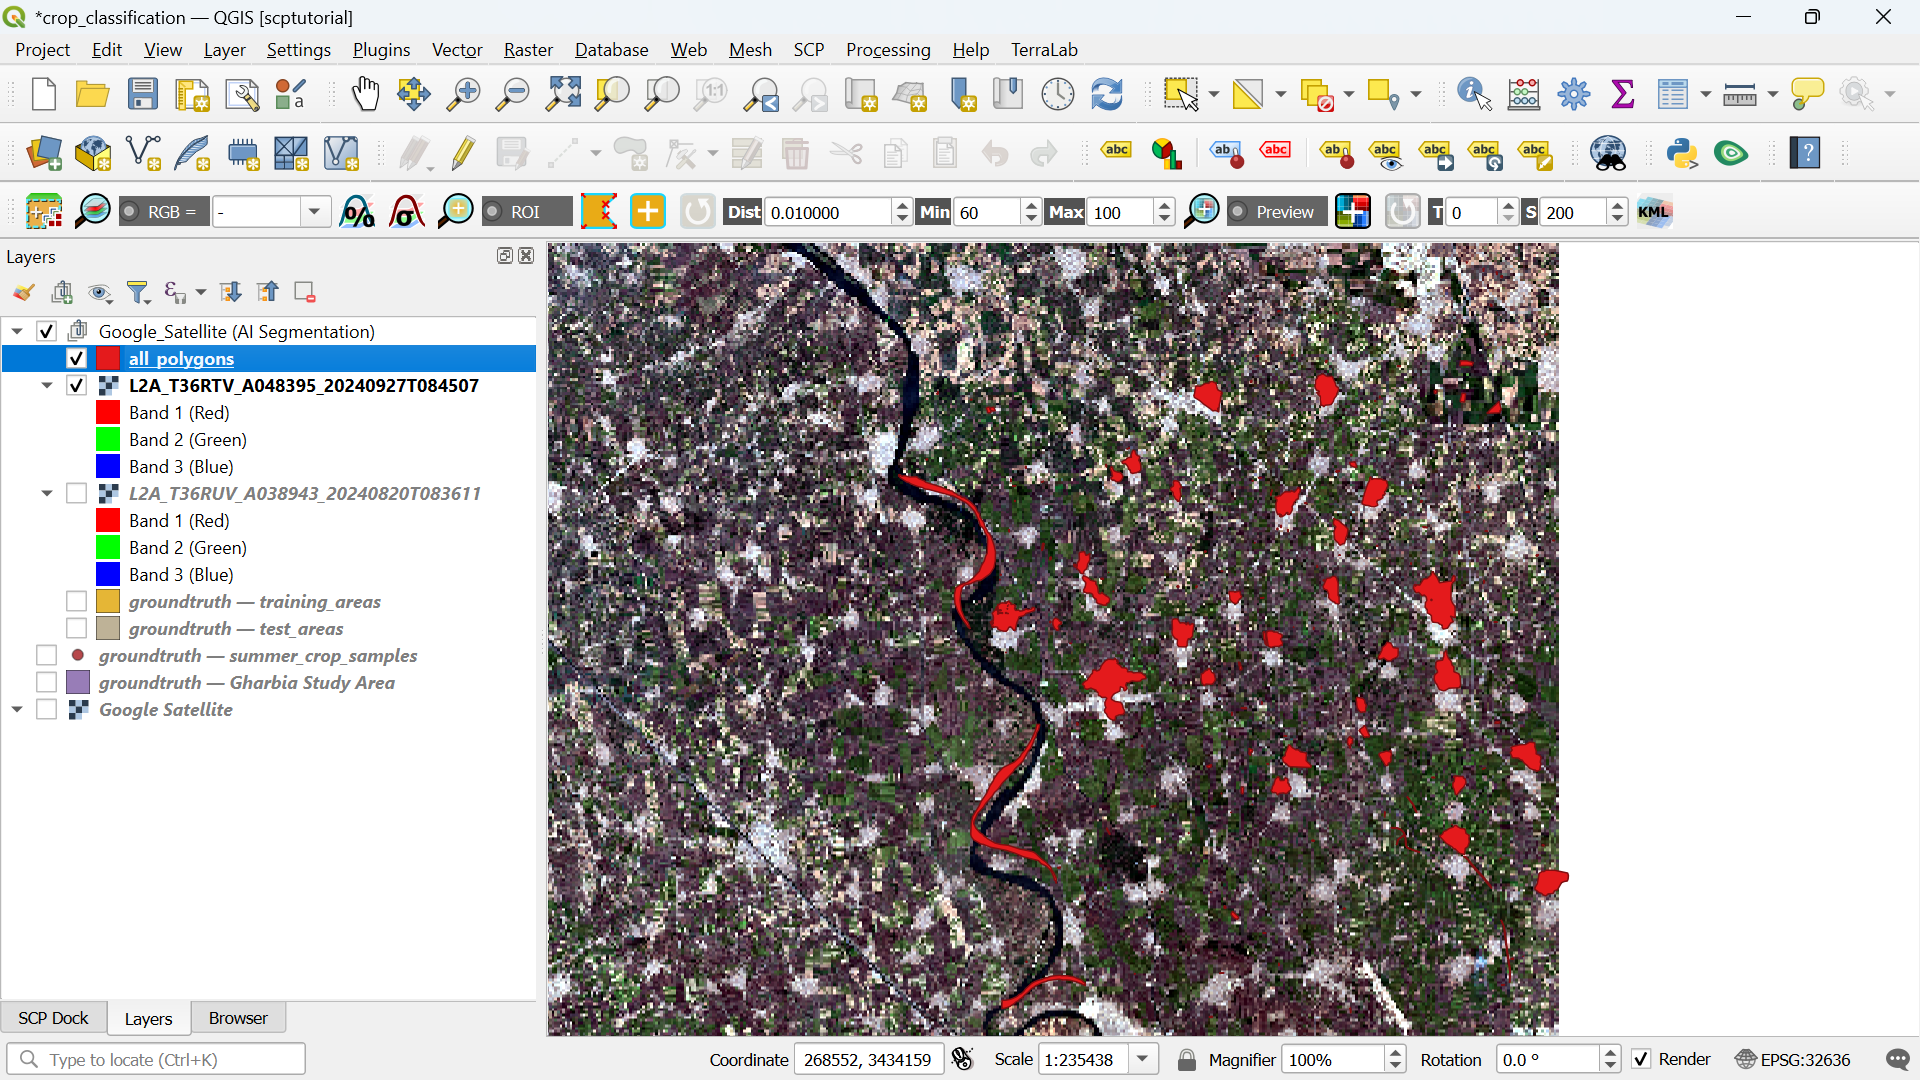
9. Click on the row of an image with 0% cloud cover and a preview will load in the panel on the right side.
If you found a clear image you can add the preview to the map canvas to check if the extent covers our ground truth data.
10. Click on ![]() to add the preview to the map canvas. Repeat this until you have found an image that covers well our ground truth data.
to add the preview to the map canvas. Repeat this until you have found an image that covers well our ground truth data.
We can also choose which bands we want to download.
For a balanced, high‑performance classification, use:
10 m bands:
- B2 (Blue)
- B3 (Green)
- B4 (Red)
- B8 (NIR)
20 m bands (resampled to 10 m by SCP or QGIS):
- B5, B6, B7 (Red‑edge)
- B8A (Narrow NIR)
- B11, B12 (SWIR)
This gives you 10 bands, which is ideal for crop mapping without overwhelming the classifier.
11. At the bottom of the dialog choose bands 2, 3, 4, 5, 6, 7, 8, 8A, 11 and 12.

12. Keep the Only if preview in Layers and Preprocess images checked and make sure the other boxes are unchecked.
The Only if preview in Layers setting checks if you have loaded a preview in your map canvas. Only those images will be downloaded. For this exercise make sure you have only one preview image in your project.
Although the MPC is preprocessed, we still need to check the Preprocess images box, otherwise the reflectance values are not scaled correctly.
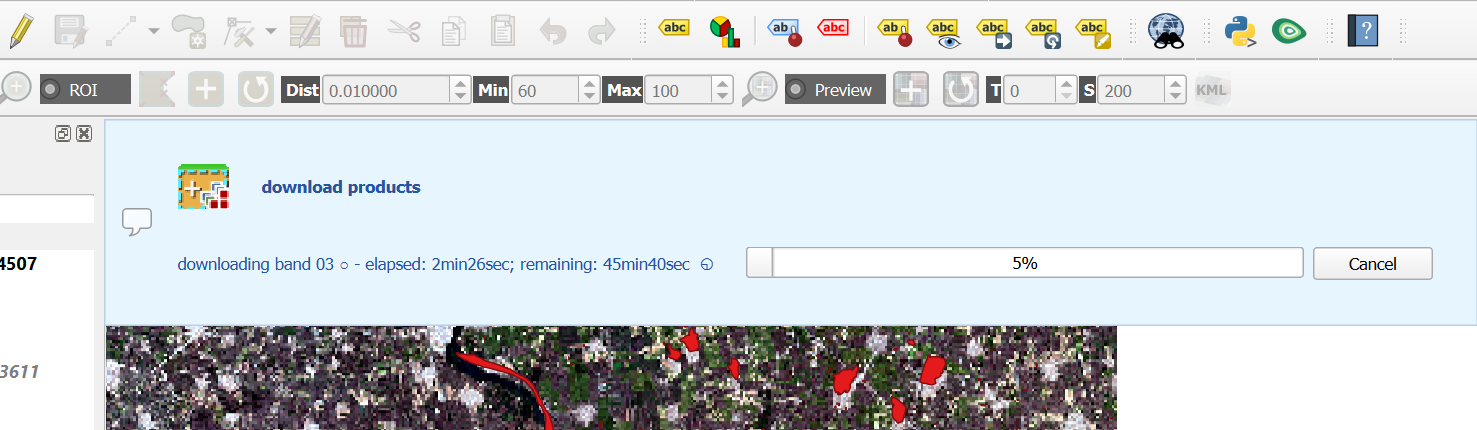
13. Click Run to download the bands. Select the folder where you want to store the files and wait until the download has been completed.
You can see the status of downloading and processing in the main QGIS window.
If your study area is on multiple image tiles, you need to mosaic (merge) them prior to classification. SCP provides a tool for this (out of scope for this tutorial).
If the wifi in the classroom is not working well for downloading the image, please ask the lecturer for the data on a USB stick.
Watch this video for an overview of downloading products with SCP:
After downloading the image, we can proceed with creating the band set.