Tutorial: Remote Sensing Image Classification with QGIS
2. Create a New QGIS Profile
Before we start, we'll first create a new QGIS profile. A QGIS profile is a self‑contained workspace that stores all your personal QGIS settings, including:
- Installed and enabled plugins
- Toolbar and panel layouts
- Language settings
- Font and icon sizes
- Processing settings
- Color ramps, styles, and favorites
- Authentication settings
- Python console history
- Custom forms and templates
Each profile behaves like its own mini‑QGIS environment. This means you can create different profiles for different tasks, for example, one for cartography, one for teaching, and one for remote sensing.
Some plugins, such as the Semi‑Automatic Classification Plugin (SCP), add many toolbars, panels, and processing providers. They are powerful, but they can also:
- Slow down QGIS startup
- Add visual clutter
- Load tools you don’t need for other workflows
- Conflict with other plugins, resulting in strange Python errors
By creating a dedicated Remote Sensing profile, QGIS will only load the plugins required for that workflow. Your default profile stays clean, and QGIS will start faster because it doesn’t have to load everything.
Tip: When you get strange errors, the first solution is to try if QGIS works again properly in a clean profile. Often conflicting plugins cause errors. Reinstalling QGIS does not solve the problem, because it doesn't replace your profiles!
Let's create a dedicated profile for remote sensing analysis.
- Start QGIS Desktop.
- In the main menu, go to Settings | User Profiles | New Profile....
- Give your profile a simple name without spaces or accents, for example remote_sensing.
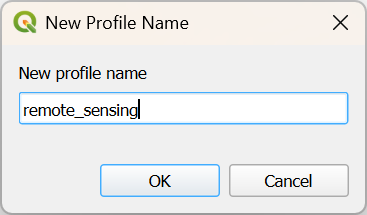
- Click OK.
QGIS will now open a new window with your profile.
5. Close the other QGIS window.
From now QGIS will open with your new profile.
At any time, you can switch profiles via the main menu: Settings | User Profiles | [choose profile]
You can identify the current project by its name in square brackets in the upper left of your QGIS window.
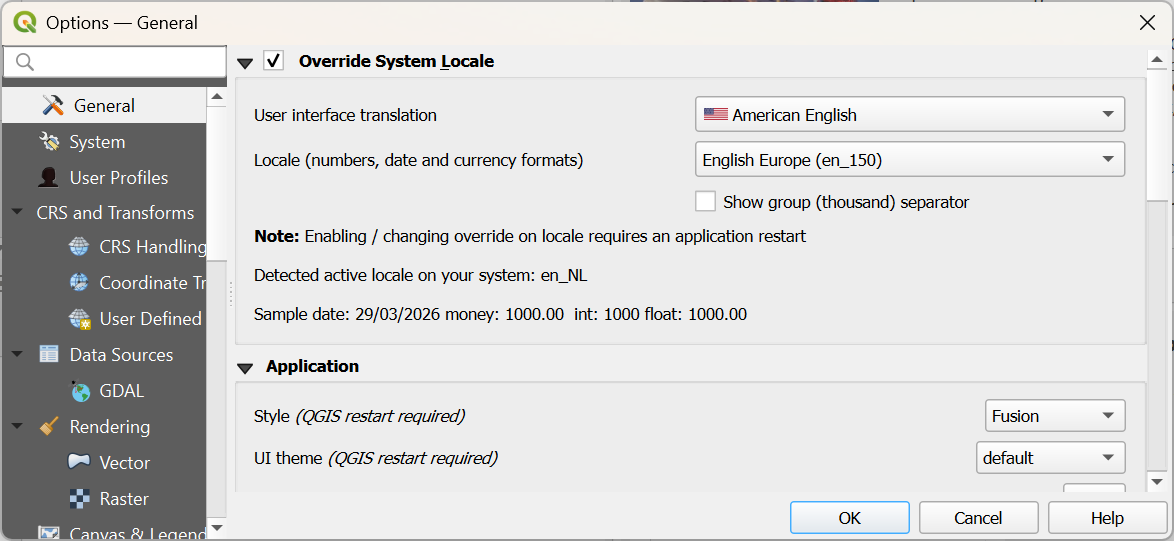
If your QGIS is not in English, you can also change it now for this profile, so the screenshots in the tutorial match with what you see on your computer. You can change the language by choosing in the main menu: Settings | Options.... In the General tab, check the box before Override System Locale and choose the appropriate User interface translation and Locale.
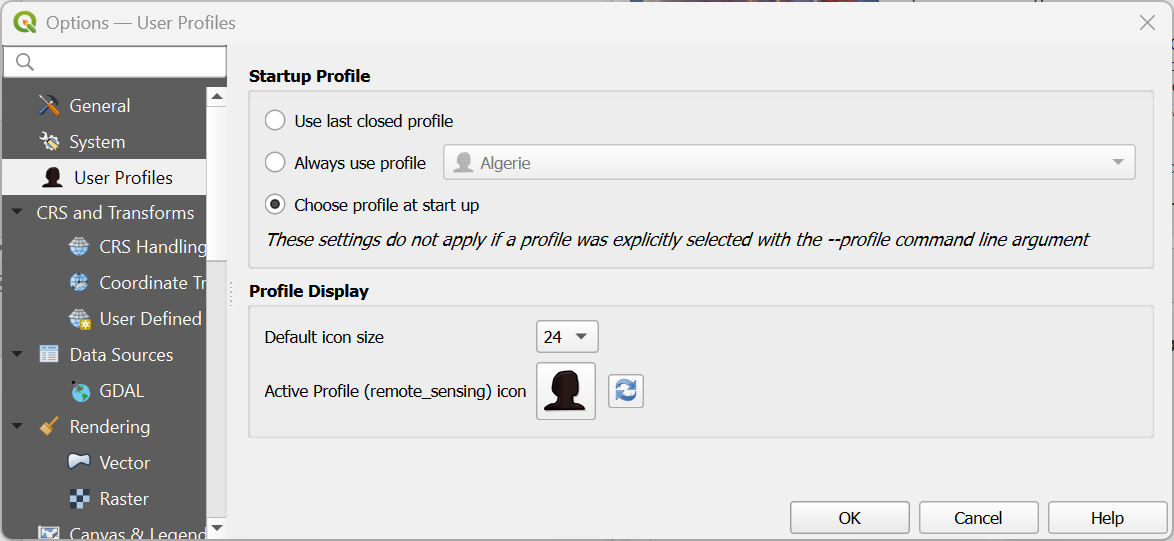
If you have many profiles, you can also use a setting to start QGIS with a popup to let you choose which profile you want to use. You can do this by choosing from the main menu Settings | Options.... Under the User Profiles tab, you can select Choose profile at start up.

More info about setting up profiles in this video:
This video shows how to change language settings: