Tutorial: Remote Sensing Image Classification with QGIS
5. Using the Semi-Automatic Classification Plugin
5.3. Create Band Set
In the previous section, we have downloaded the Sentinel-2 bands as separate GeoTIFF files. For remote sensing, it is however important to consider all bands as a single multispectral image. For this purpose we need to create a band set. A band set is a collection of raster bands that you group together so the Semi‑Automatic Classification Plugin (SCP) can treat them as a single multispectral image. Think of a band set as a virtual satellite image you assemble inside QGIS.
SCP needs to know which bands belong together so it can:
- Compute vegetation indices (NDVI, EVI, etc.)
- Run supervised classification
- Perform PCA, band math, and spectral signatures
- Resample 20 m bands to 10 m if needed
- Keep the correct band order for machine learning
A band set is simply the list of bands you want SCP to use, in the order you choose. A band set stores:
- The file paths to each band
- The band order (important for classification)
- The spatial resolution (SCP can resample automatically)
- Optional cloud masks
- Optional band names or aliases
It does not duplicate data, it just references the rasters you already downloaded.
Let's create our band set.
- Choose the Band set tab. We assume that you were still in the dialog at the Download products tab.
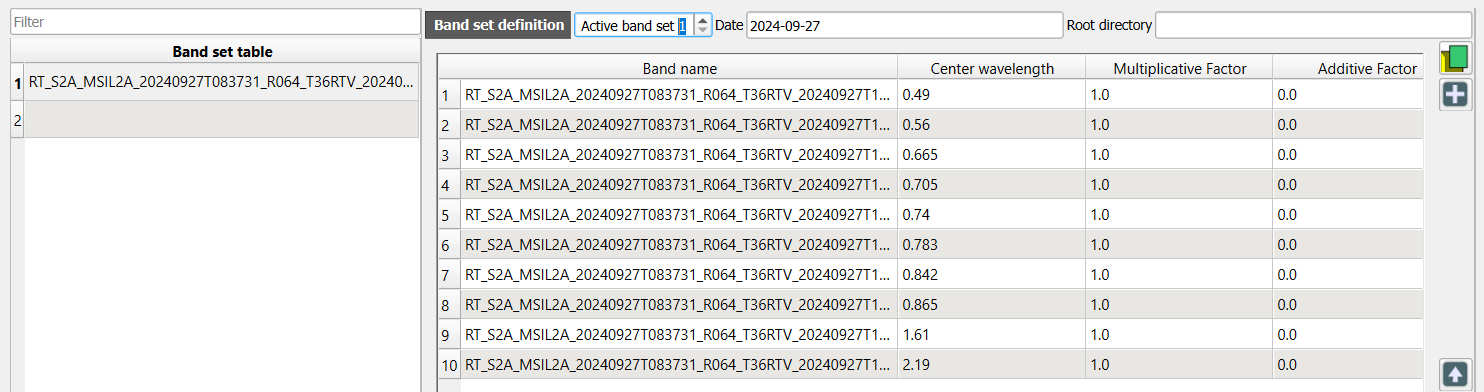
You can see that the band set has been automatically defined as Active band set 2.
If you're not seeing this, you can add the individual bands to the band set by clicking
. In this way you can add already downloaded bands to a band set.
In our case the center wavelengths, units and year are automatically applied to the band set. If this is not the case we can add the center wavelengths and the acquisition date manually to the band set. Under Band quick settings, use the drop-down menu at Wavelength to choose Sentinel-2. At Wavelength unit choose µm and change the Date to the date of the downloaded image, for example 27 September 2024. You can now see that the Band set definition is automatically updated.
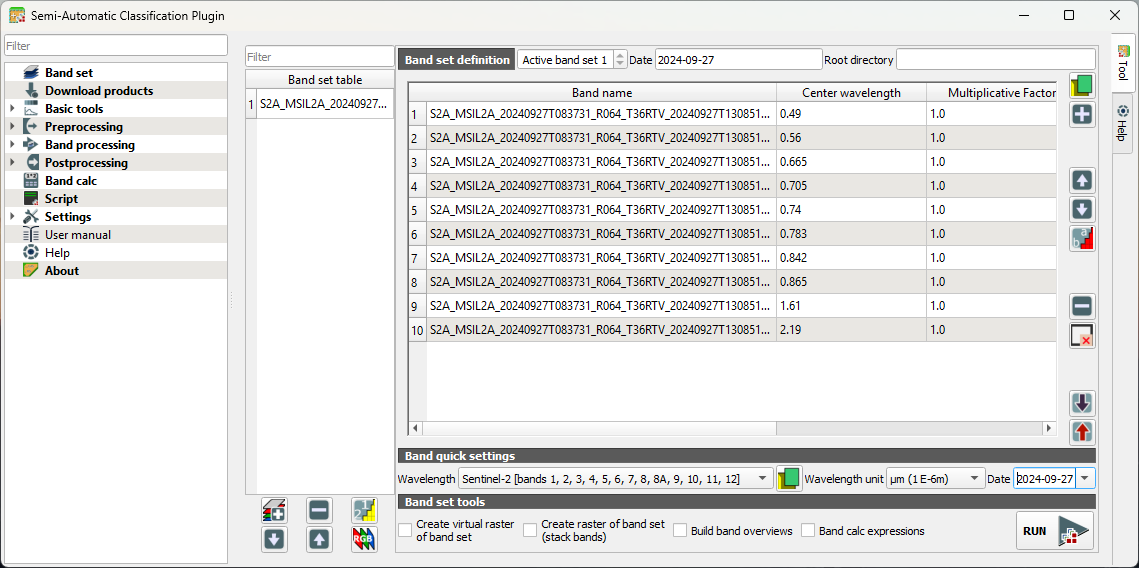
2. Under Band set tools, leave everything unchecked.
Note that our band set is automatically assigned to Active band set 2. Let's make it band set 1.
3. In the Band set table, select the band set that we've just created.
4. Click  to move the band set to the first position.
5. Under Band set definition use the arrows to select Active band set 1.
6. Click  to display the composite in the map canvas.
You can now visualise band combinations from the band set.
9. In the SCP toolbar, you can use the drop down menu to choose a band combination or type the bands with dashes in between.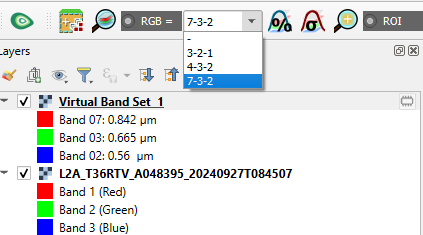
📝 Visualise some composites and try to interpret the results.
Watch this video for more details about band sets in SCP:
Now our remote sensing image is ready and we can proceed with defining the training areas.