Course Introduction
| Site: | OpenCourseWare for GIS |
| Course: | Create a Fire Risk Map with QGIS and Remote Sensing |
| Book: | Course Introduction |
| Printed by: | Guest user |
| Date: | Thursday, 16 July 2026, 1:40 AM |
1. Introduction
In this course remote sensing will be used for determining how susceptible an area of land is to fire. Remote sensing is a way of gathering information about an area from a distance, using satellites. These satellites gather the information from emitted and reflected radiation bouncing off the earth. In this course, the goal will be to learn how to create a Fire Risk Map in QGIS using remote sensing. You will learn how to set up a project in QGIS, how to gather and prepare data for use in the programme and how to perform analyses and calculations with said prepared data. Meanwhile, you will also be learning about the impact and consequences of forest fires. As well as what environmental factors contribute to a higher likelihood of a fire starting in an area and how important they are in the creation of the final Fire Risk Map.
1.1. Remote sensing
Remote sensing involves measuring the properties of objects and features on Earth from a distance. This can be done using photographs or sensors on satellites, aircraft or drones, for example. These sensors detect electromagnetic radiation (such as visible light, infrared, and radar) that is reflected, absorbed, or emitted by the atmosphere or the Earth's surface.
Remote sensing enables us to map changes to the landscape, water quality, temperature, vegetation, urban growth and natural disasters, to name a few. It is a powerful tool for environmental monitoring, spatial planning and agriculture, as well as for predicting risks such as floods and forest fires. As it can collect large amounts of data regularly, remote sensing helps us better understand Earth's processes and respond more quickly to changes.

For example, what you see in the image is that a satellite picks up reflected light and radiation. We collect this data, transform it into a map, analyze it, and present it in a way that anyone reading the map can understand. This is exactly what you’ll learn in this course.
Learn more about remote sensing here.
1.2. QGIS
In this course, we will work with remote sensing data using QGIS, a free and open-source Geographic Information System (GIS). QGIS is widely used around the world to view, edit, analyze, and visualize spatial data.
With QGIS, you can create maps from satellite images or vector files, combine data from various sources such as aerial photos, shapefiles, and spreadsheets, and perform spatial analyses like elevation profiles, distance calculations, or land use patterns. You can even expand its functionality with plugin. For example, for hydrological analysis or advanced remote sensing tools.
QGIS is used in many fields, including:
-
Urban planning: mapping buildings, roads, and zoning plans
-
Environmental science: monitoring natural areas and analyzing CO₂ emissions
-
Water management: modeling water systems and mapping flood risks
-
Remote sensing: processing and interpreting satellite imagery
-
Research and education: supporting studies in geography, ecology, and planning
QGIS offers powerful tools for exploring our planet and you’ll soon learn how to use them.
When you click here you can learn more about QGIS.
2. Preperation
Before you get started, you’ll need to download QGIS and make sure it’s set up with the correct settings. You’ll also learn how to organise your project using a clear and effective map structure. This will be explained in more detail in this chapter.
2.1. QGIS download instruction
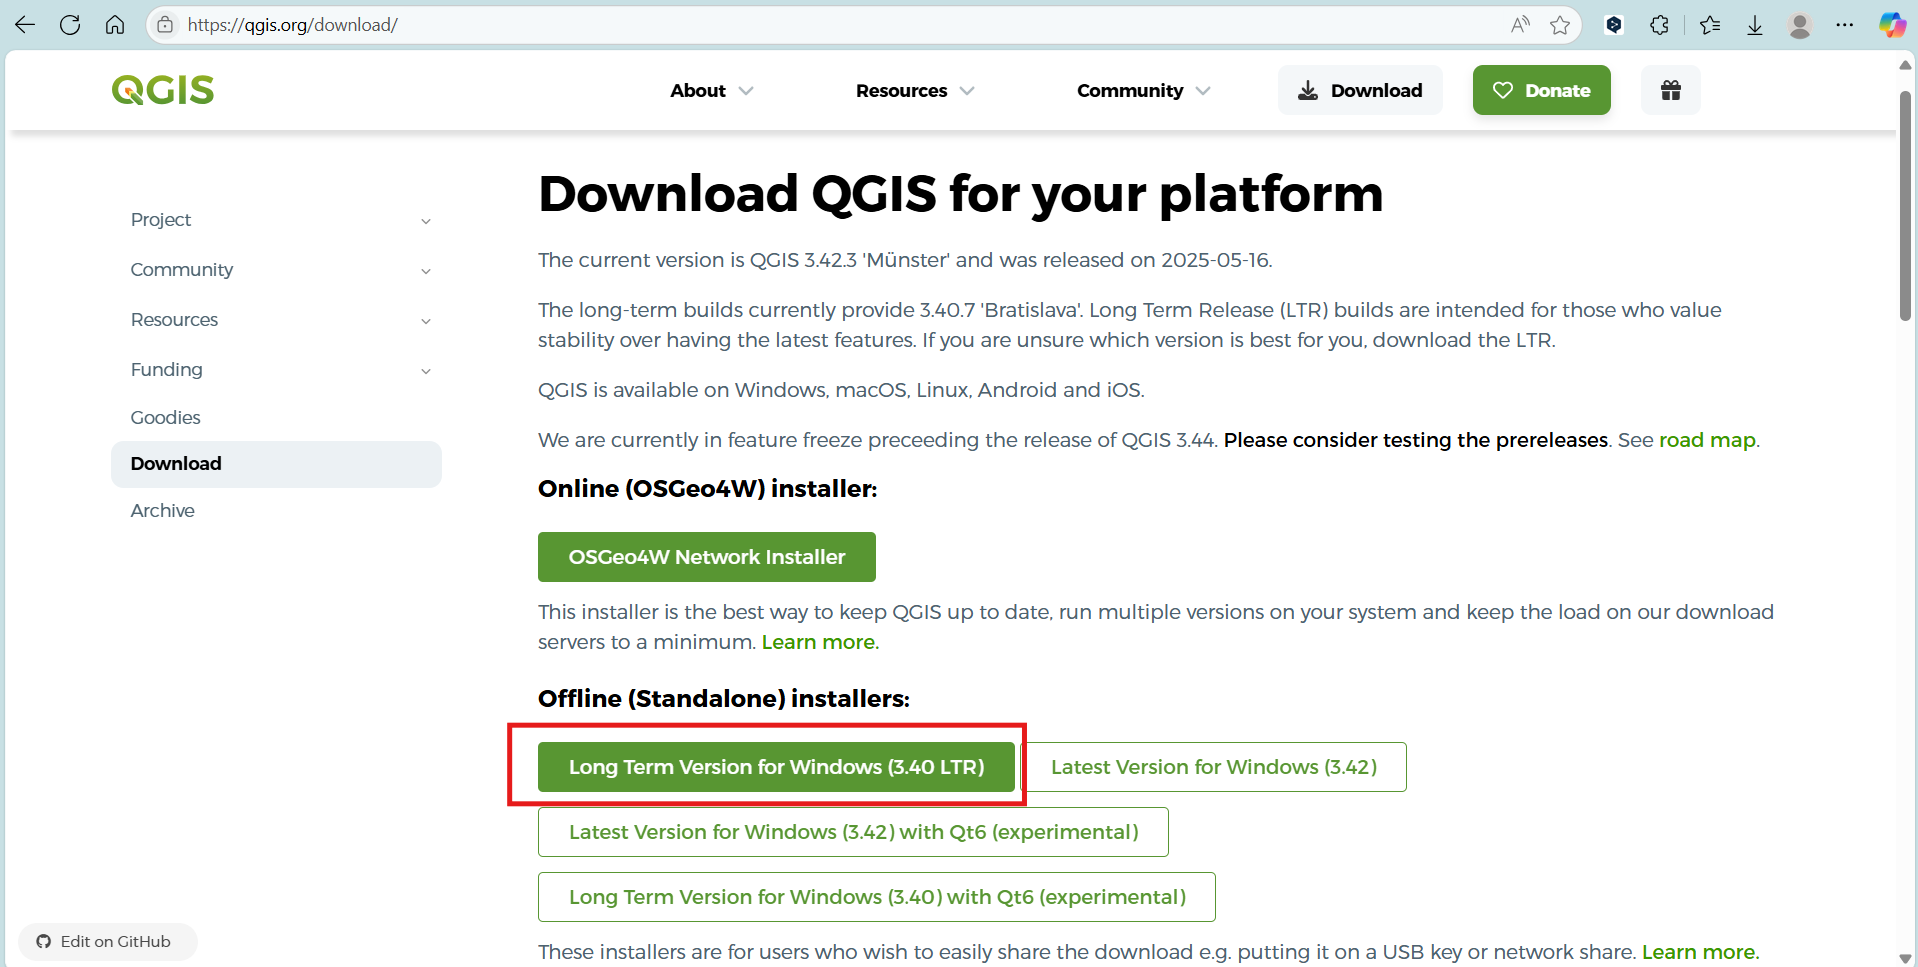
Go to the official QGIS website: https://qgis.org/download/ and read the information for your download option.
-
If you are using a Windows computer or laptop, download the Long Term Version for Windows (version 3.40 LTR).
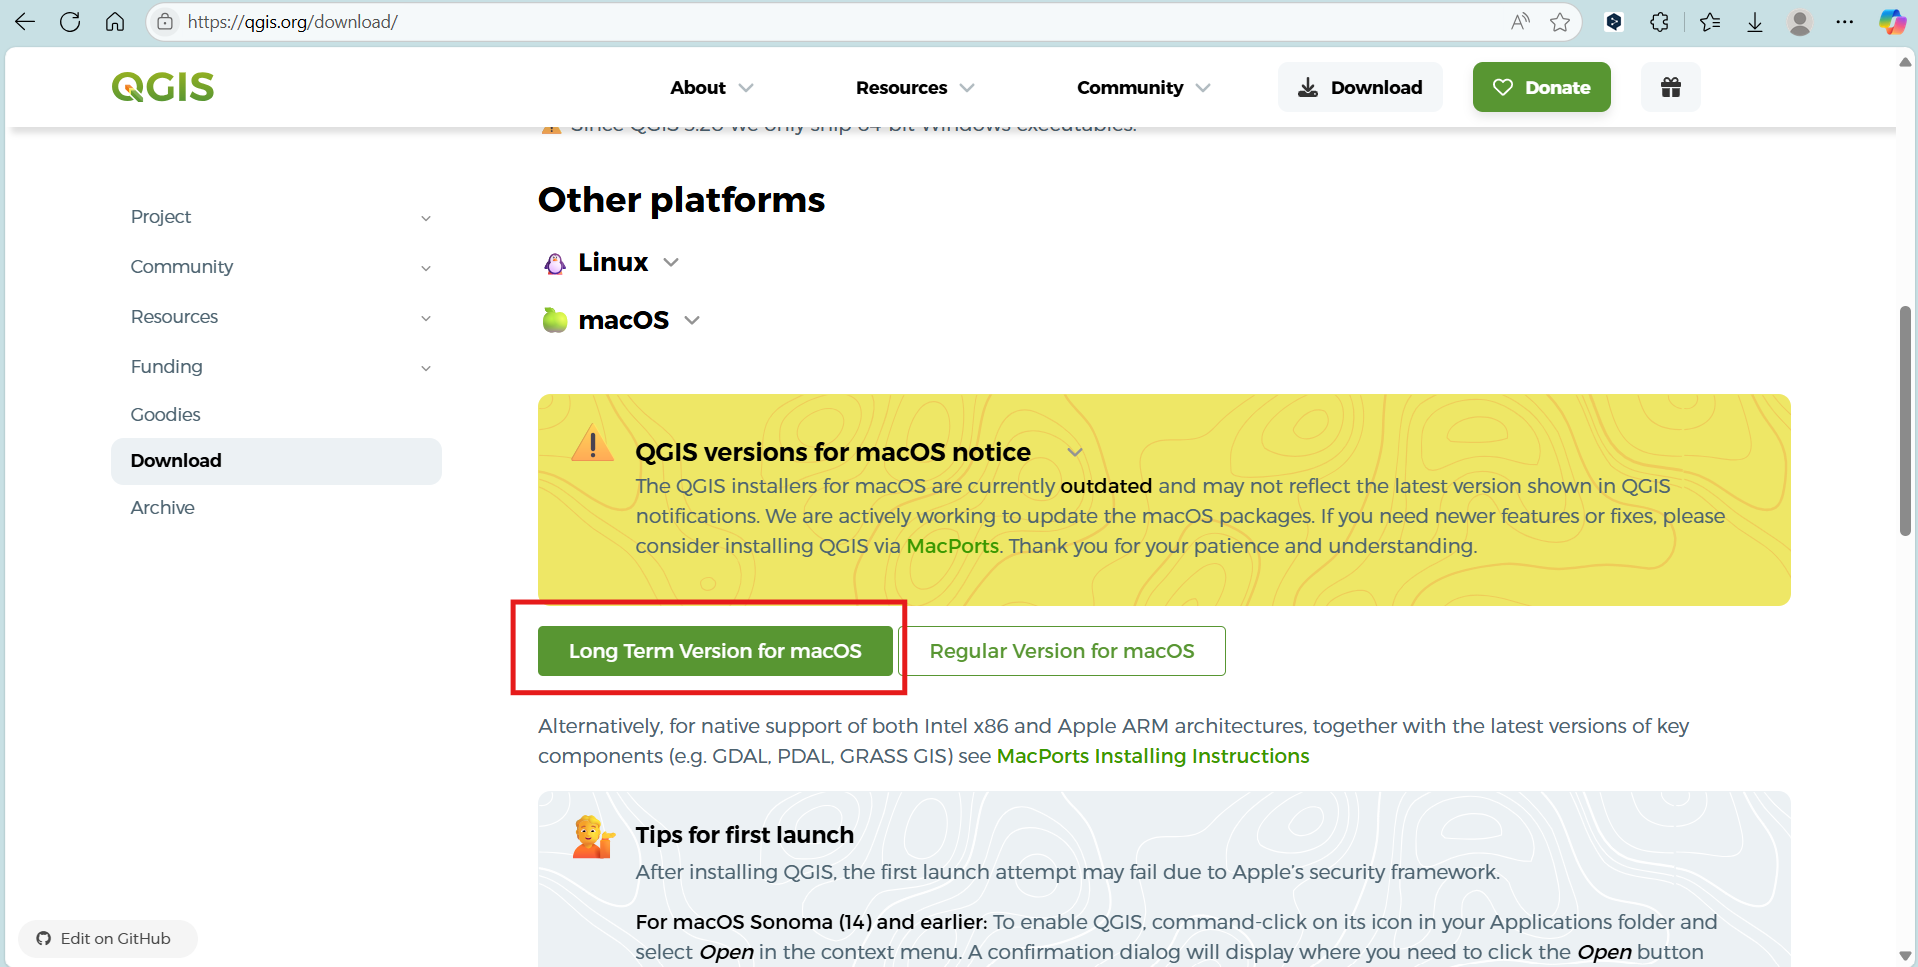
-
If you are using macOS, download the Long Term Version for macOS.
Follow the installation instructions on your device. Make sure the software is fully installed before continuing.
Once QGIS is installed, you can move on to the next chapter to set the correct language in case your QGIS is not yet in English.
2.2. QGIS language settings
Before you start the first module, it’s helpful to change the language of QGIS to American English. This will make it easier to follow the instructions and find the correct buttons and settings. This module will be completed using QGIS in English.
Follow these steps to change the language to American English, or check if it is already set correctly:
-
Open QGIS and go to Settings > Options.
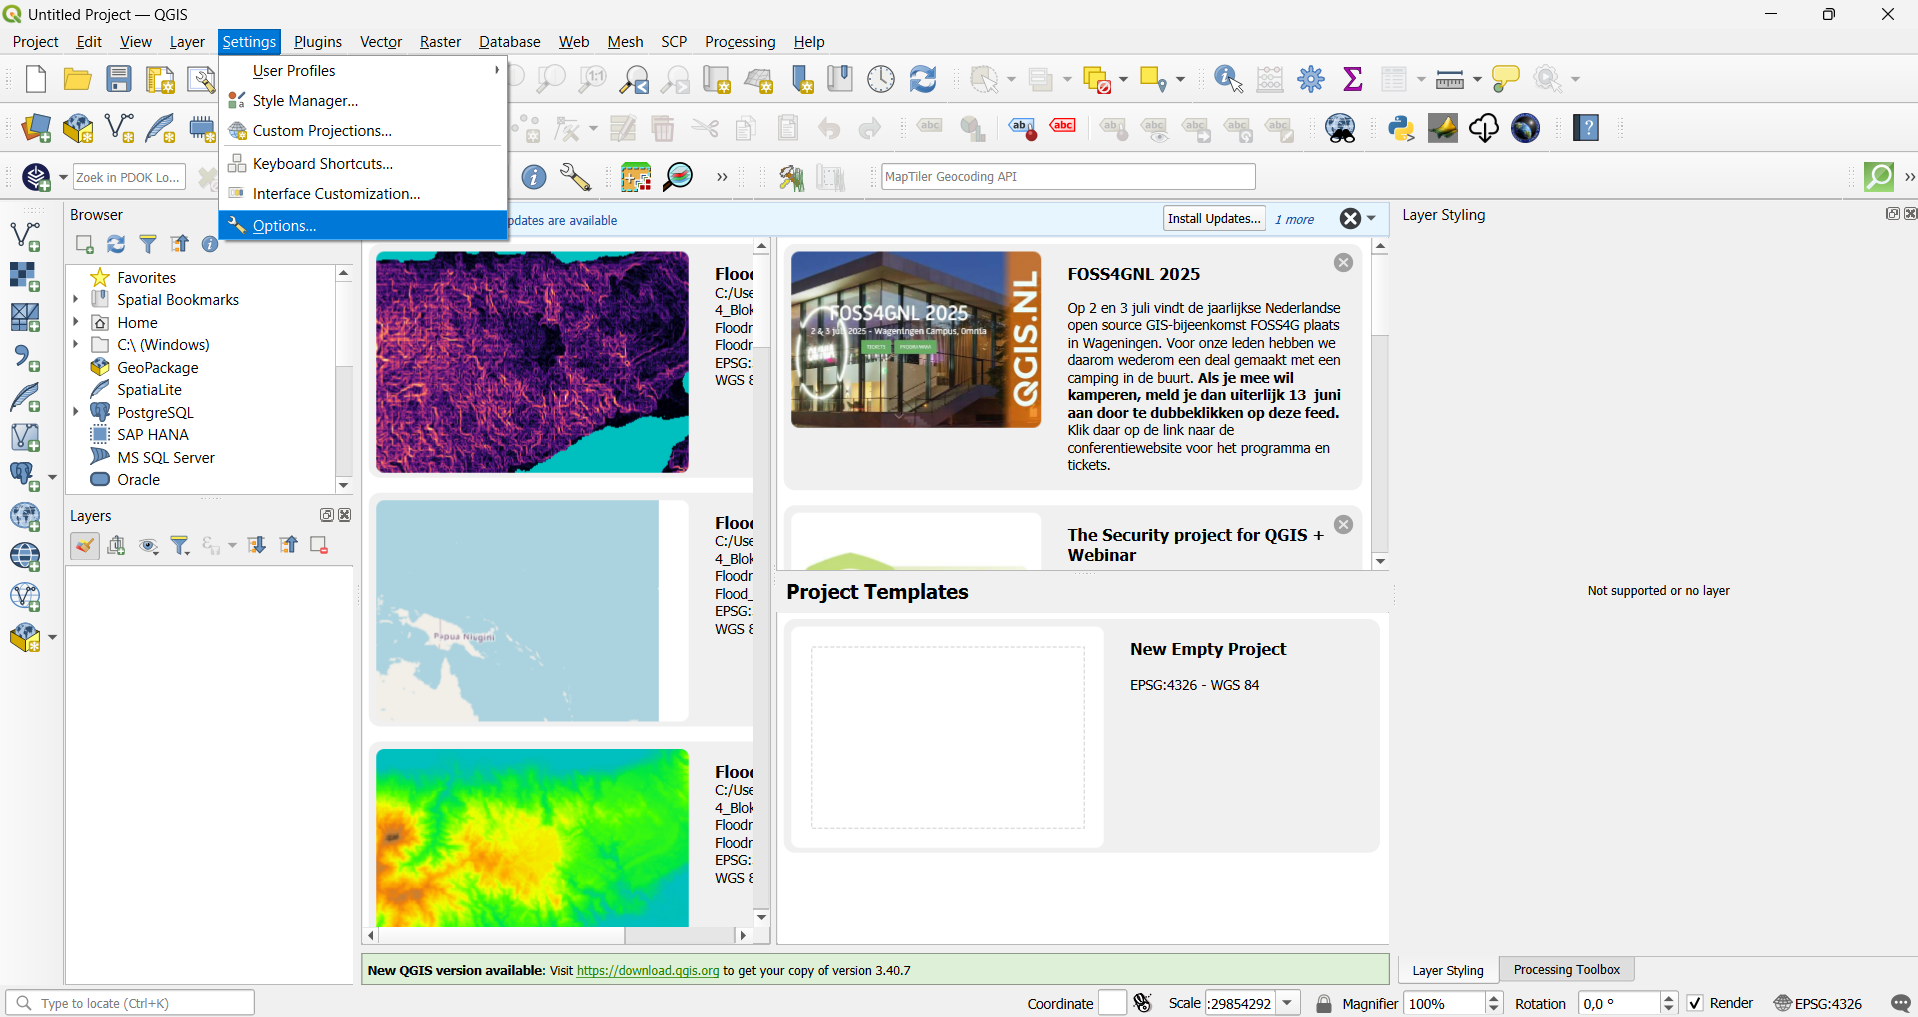
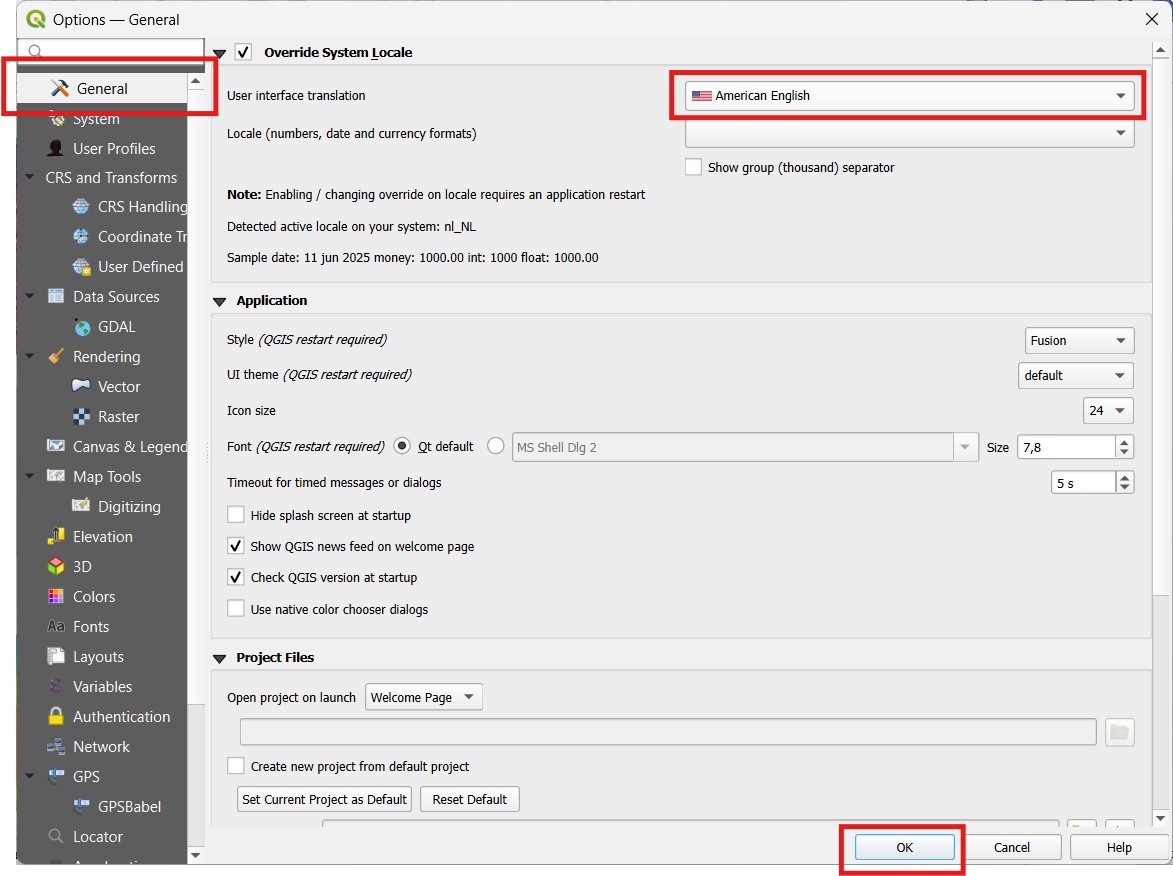
2. Click on the General tab.
3. Under User interface translation, select American English from the dropdown menu.
4. Click OK to apply the changes.
You can go on to the next chapter to learn more about a good mapstructure.
You are now ready to start the first module: Floods, to make a Floodriskmap
2.3. Good practice
Instructions for Creating and Managing GIS Layer Files
-
Create a Dedicated Folder
Before starting your GIS work, create a dedicated folder in an easily accessible location on your computer (e.g., your project directory or desktop). This folder will store all your GIS layer files and associated files to keep your project organized and easy to manage. -
Use Underscores Instead of Spaces in Filenames
When naming your GIS files, never use spaces. Instead, use underscores (_) to separate words.
Example:
Useriver_network.shpinstead ofriver network.shp
This practice ensures compatibility across different GIS software and prevents errors during file processing. -
Keep Related Files Together
GIS shapefiles consist of multiple related files with the same name but different extensions (e.g.,.shp,.shx,.dbf). Always keep these files together in the same folder to avoid data loss or errors. -
Adopt a Clear Naming Convention
Use meaningful and consistent names for your files to easily identify their contents. For example:-
buildings_2025.shpfor building data from 2025 -
roads_main.shpfor main roads
Avoid special characters or very long filenames.
-
Watch this video to learn more best practices and gain a better understanding of GIS files: