Introduction to Python
| Site: | OpenCourseWare for GIS |
| Course: | Programming Basics for QGIS Users |
| Book: | Introduction to Python |
| Printed by: | Guest user |
| Date: | Wednesday, 15 July 2026, 10:18 AM |
1. Introduction
Now we know how to use the Command Line, navigate through are files and directories, understand absolute/relative paths and some GDAL commands, it's time to use a scripting language. Today you'll make your first steps with Python, a high level programming language. You'll learn about the concepts using a so called Jupyter Notebook tutorial. The Jupyter Notebook gives you theory and you can run real Python code through a web page.
In the next chapters you'll learn how to install Jupyter Lab, download Jupyter Notebooks from GitHub and to use Jupyter Notebooks.
2. Install Jupyter Lab with OSGeo4W
We can run Jupyter Notebooks from the OSGeo4W shell after installing the necessary packages. Watch this video:
3. Download Jupyter Notebooks from GitHub
Now you've installed Jupyter Lab in your QGIS OSGeo4W environment, you want to use it with Jupyter Notebooks.
- Go to Jupyter Notebook Introduction to Python 3 (GitHub)
- Click on Code and then on Download ZIP. Extract the ZIP-file to a folder where you want to work for this tutorial, e.g. Z:\Python_tutorials.

3. Start QGIS Desktop.
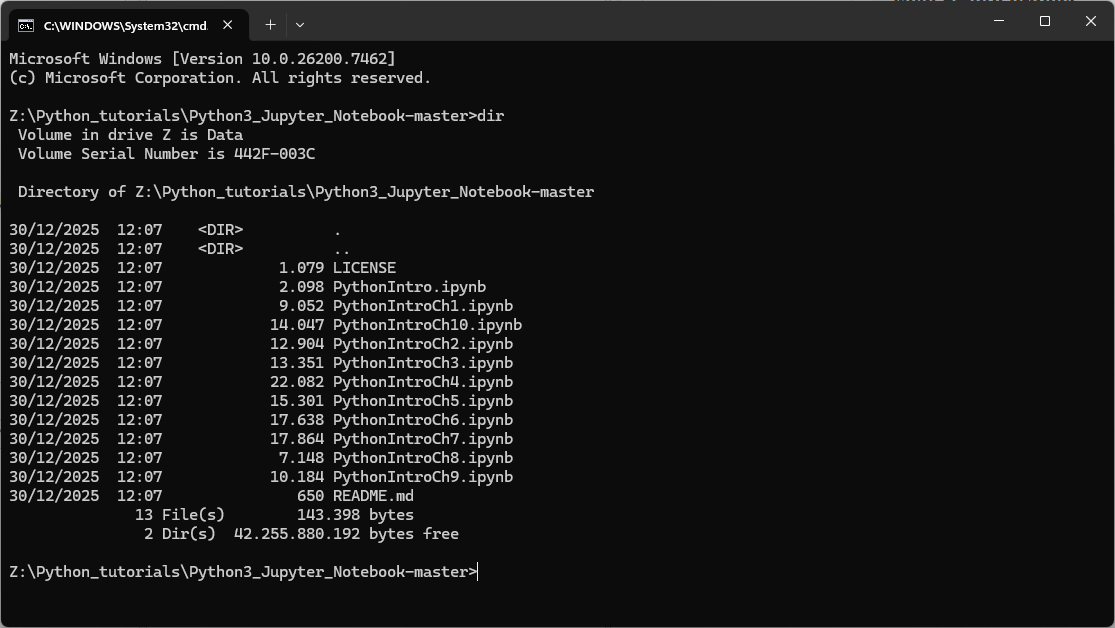
4. Navigate in the Browser panel to the folder with the Jupyter Notebooks, click right and choose Open in Terminal... from the context menu.

5. Check if the Jupyter Notebooks are there, using the dir command.
In the next chapter, you'll learn how to run and use Jupyter Notebooks.
4. Run JupyterLab from the OSGeo4W Shell
Now we're ready to run Jupyter Notebooks. These notebooks run on a server, in this case your local computer (localhost). We can access the notebooks through our web browser. For this we need to run JupyterLab.
- Execute the following command in the OSGeo4W Shell:
jupyter lab
Now you see something like this:
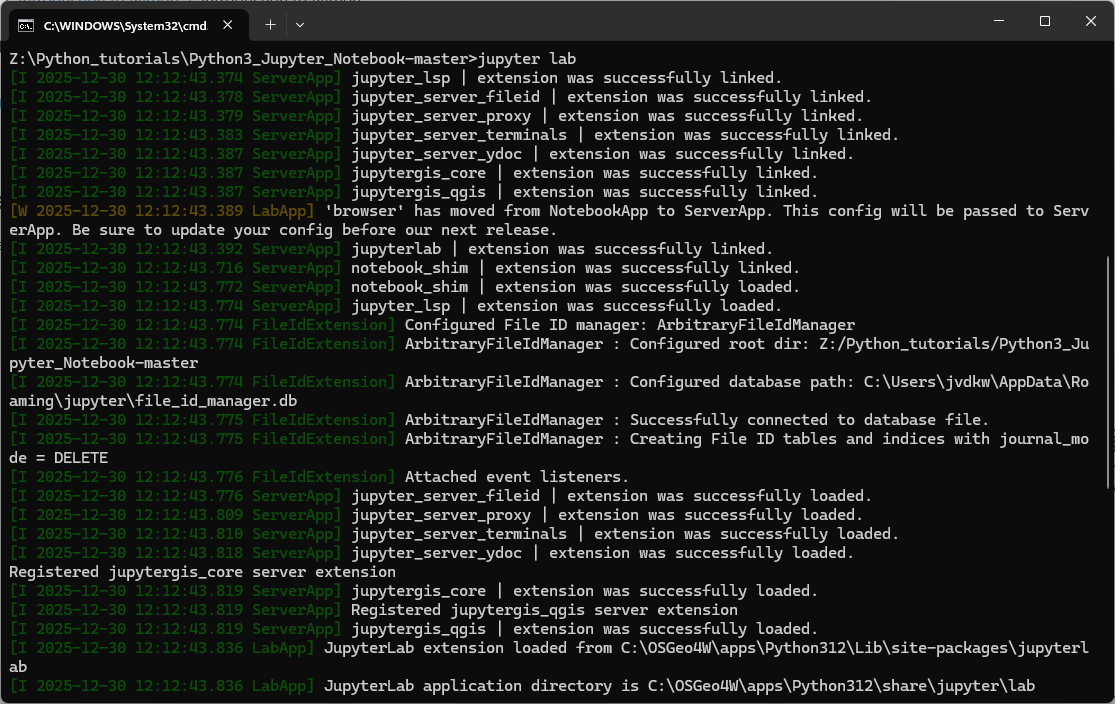
This is starting the server. When it's ready, it will open Jupyter Lab in your browser.
If this doesn't happen, you need to find the URL with http://localhost:8888/lab?token=XXXXXX and then Ctrl-Click with the left mouse button to open the link in your browser.
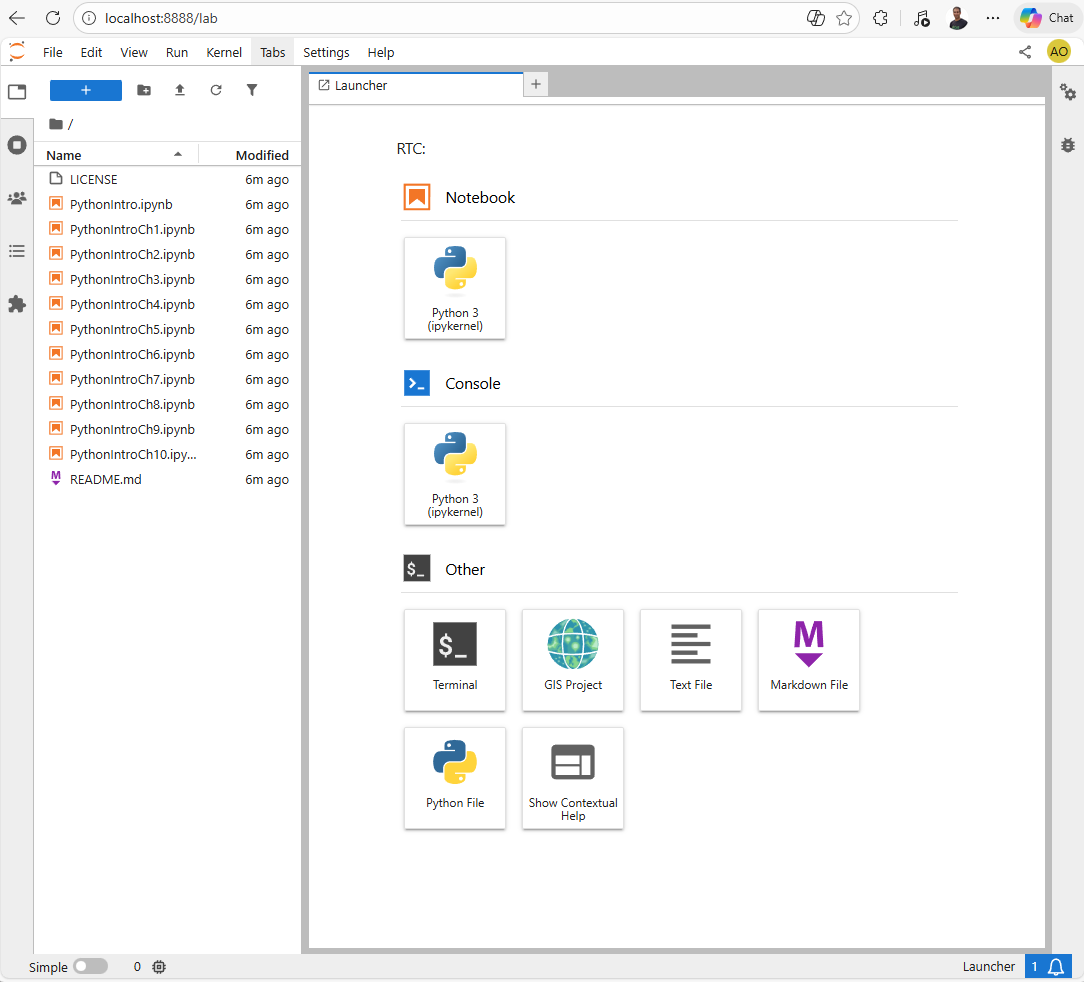
Now you'll see the following web page.
JupyterLab is a web-based interactive development environment that lets you work with code, data, and documents all in one place.
It’s part of the broader Project Jupyter, which provides tools for interactive computing.
It has the following features:
-
Interactive notebooks: You can write code (Python, R, Julia, etc.), run it, and immediately see the results alongside text, equations, and visualizations.
-
Multi-panel layout: JupyterLab lets you arrange notebooks, terminals, text files, and data viewers side by side in tabs or split screens.
-
Rich media support: It integrates charts, maps, images, and even interactive widgets directly into your workflow.
-
Customizable and extensible: You can add extensions to tailor JupyterLab for data science, machine learning, GIS, or teaching.
In practice, JupyterLab is widely used by data scientists, researchers, and educators because it combines coding, documentation, and visualization into a single, shareable environment.
Let's run our first Jupyter Notebook in this JupyterLab environment.
5. Use Jupyter Notebooks
In the left panel in JupyterLab, you can find the files in the folder where we have started the JupyterLab server. We see Jupyter Notebooks with the ipynb file extension:

- Double-click on PythonIntro.ipynb to launch the Jupyter Notebook.
It appears now in a tab on the right.
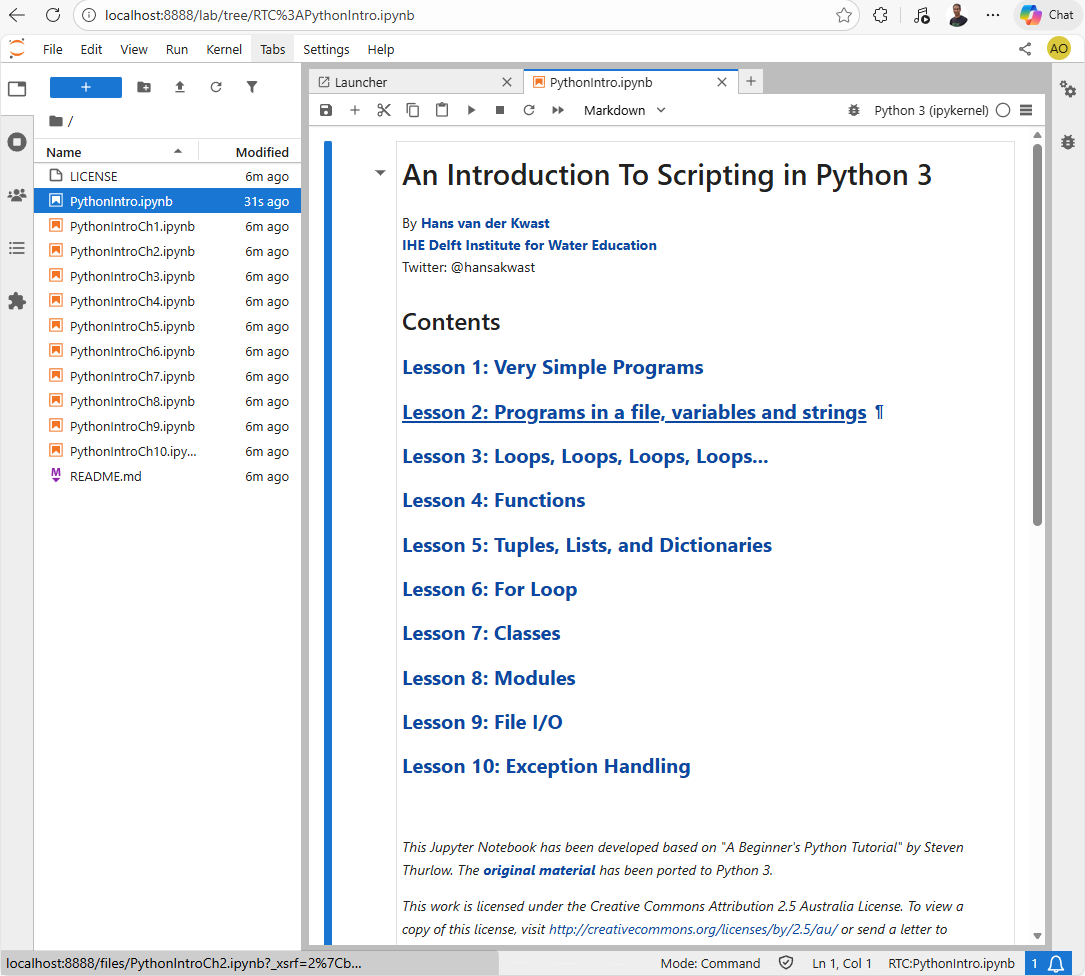
This first Jupyter Notebook has the table of contents of this tutorial.
2. Click on Lesson 1.

3. Follow the instructions in the Jupyter Notebook and complete the entire tutorial (all notebooks in the folder).
6. Conclusion
Now that you’ve taken your first steps into Python scripting, you’ve built the foundation for everything that follows in this course. In the next module, you’ll deepen these skills by creating your own scripts and applying Python within QGIS. You’ll see how Python can automate workflows, enhance spatial analysis, and help you build reproducible, shareable tools.