Tutorial: Stream and Catchment Delineation
4. Reproject DEM
The DEM is in its original Lat/Lon Geographic Coordinate System (GCS) with datum WGS 84 (EPSG: 4326). It is not recommended to use a GCS for DEM analysis, because the z units (e.g. meters) are different than the x and y units (degrees). We need to choose
a projection for our project. If the project covers one country we can choose a national projection. In our case, however, the project covers multiple countries (Germany, the Netherlands, and Belgium). Therefore we will use a global projection: UTM
Zone 32 North, with WGS-84 as datum.
We can find the EPSG codes at http://www.spatialreference.org
1. Use the website to search for UTM 32N wgs 84. You can leave
QGIS running and open a browser.
The figure below shows the result.
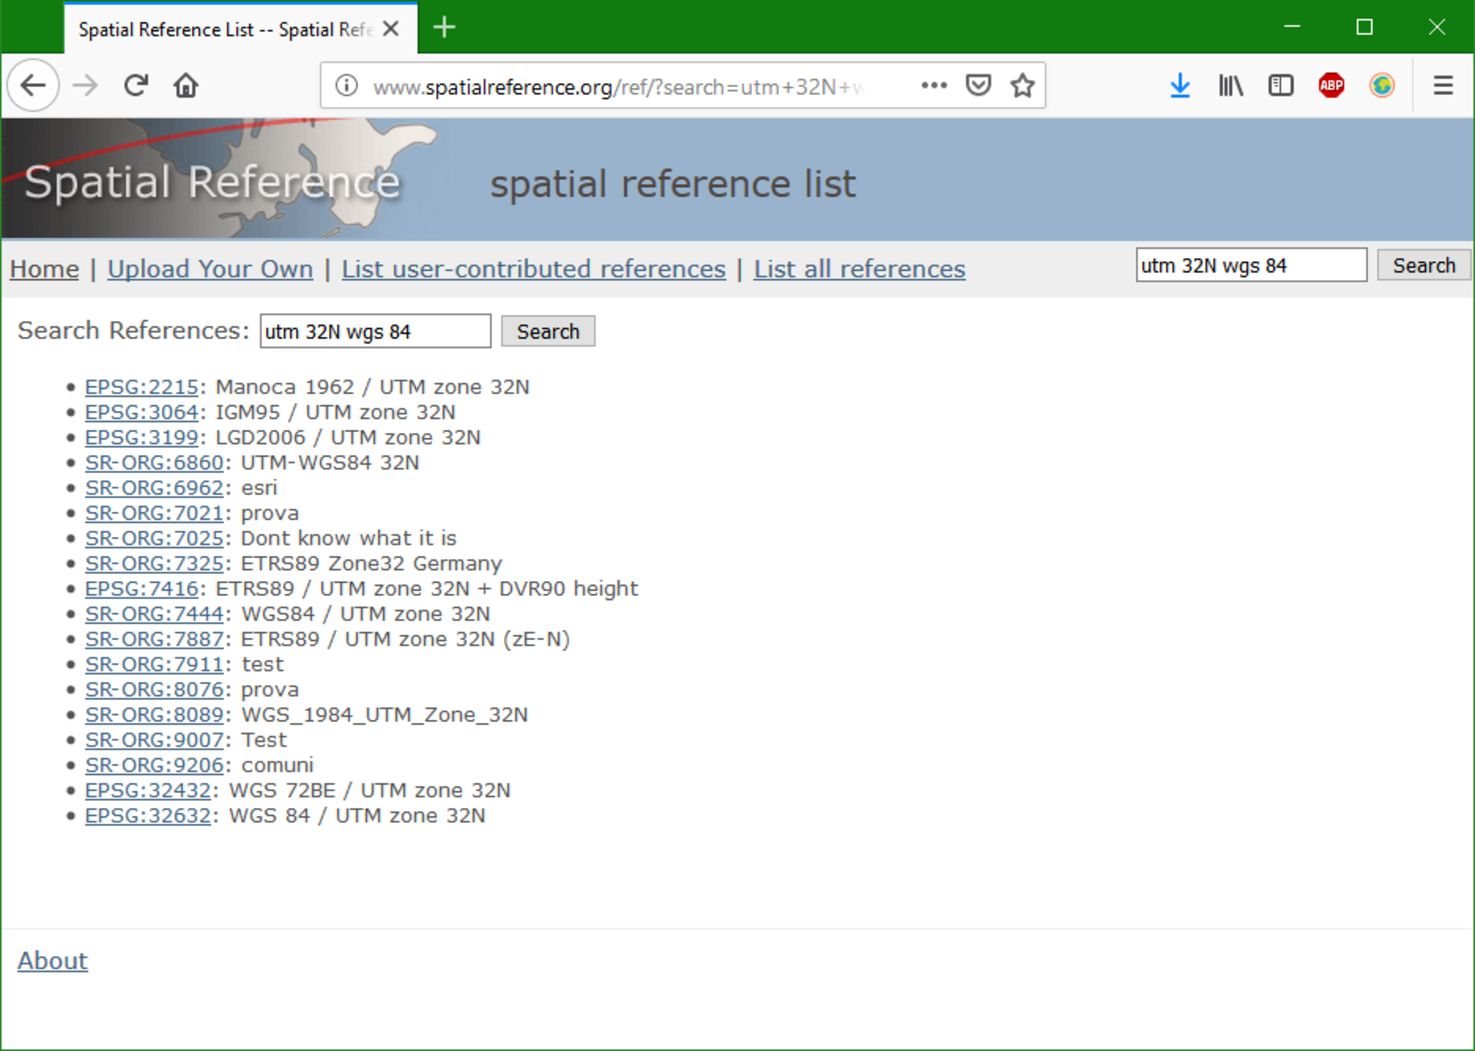
We need to take a look at
the EPSG codes. We will use EPSG: 32632 throughout this project - clicking on it will provide more details. Note that this is the same projection the boundingbox layer has and was used for setting the projection of our project when we loaded
the boundingbox layer as our first layer.
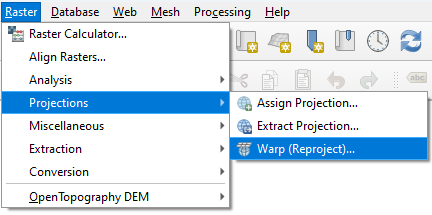
Now we are going to reproject the DEM from unprojected GCS (Lat/Lon WGS 84 - EPSG: 4326) to UTM Zone 32 North / WGS 84 (EPSG: 32632).
2. From the main menu choose Raster | Projections | Warp (Reproject).
3. In the Warp (reproject) window, choose the Project CRS: EPSG:32632 - WGS 84/UTM zone 32N as Target CRS.
4. Now complete the dialog:
- For the Resampling method we choose
Nearest Neighborto preserve the elevation values of the original files. - Set the No data value for output bands to
-9999because when the raster layer is reprojected there will be "no data" at the borders. In this way we define that "no data" has a value -9999 and will not be visualised and treated as "data". - Set the Output file resolution to
30m. - Browse to your exercise folder and name the output file
dem_reprojected.tif. Make sure you choose a GeoTIFF as output format.
The dialog should now look like the figure below.
Note the gdalwarp command that will be executed in the background.

5. Click Run to run the algorithm. After running,
click Close to close the window.
The re-projected DEM now appears in the map canvas.
This is a good time to save your project.