Tutorial: Field surveys using QGIS, Mergin and Input
2. Project preparation
2.1. Adding a raster background layer
In this section we'll add a Sentinel 2 True Colour image and repeat the steps for a Sentinel 2 False Colour image.
1. Open QGIS Desktop.
2. Go to the Browser panel.
3. Look for the Sentinel 2 subset that you've downloaded for this tutorial and drag it to the Map Canvas
The provided Sentinel 2 subset contains:
- Band 2 (Blue)
- Band 3 (Green)
- Band 4 (Red)
- Band 8 (Near Infrared)
In the file they are stored as band 1 - 4. To create a True Colour composite we need to use R = 3, G = 2 and B = 1.
Style the layer
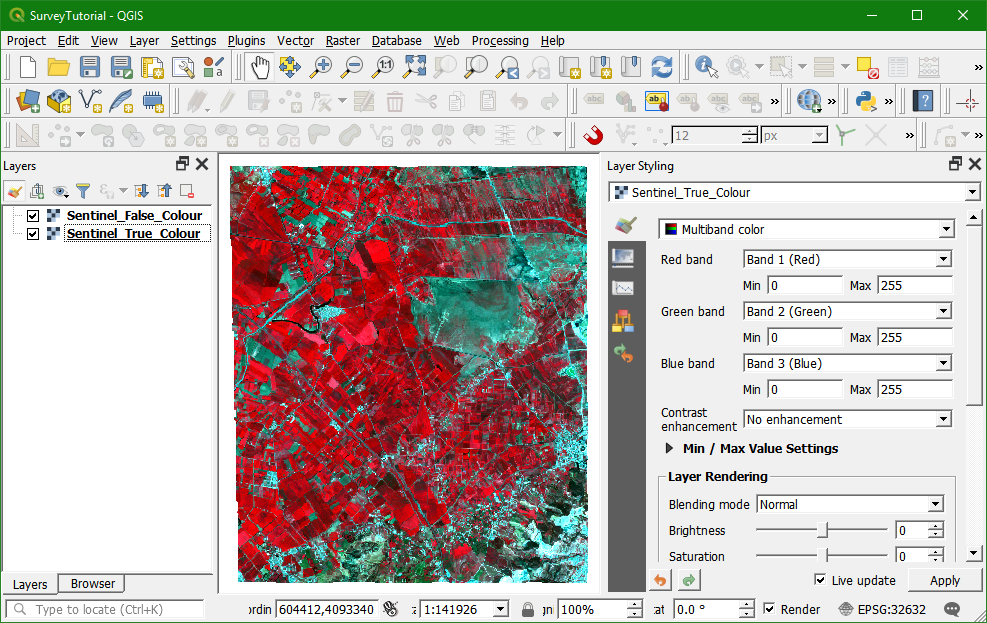
4. Go to the Layers panel.
5. Click on  to open the Layer Styling panel.
6. In the Multiband color renderer choose Band 3 for the Red band, Band 2 for the Green band and Band 1 for the Blue band.
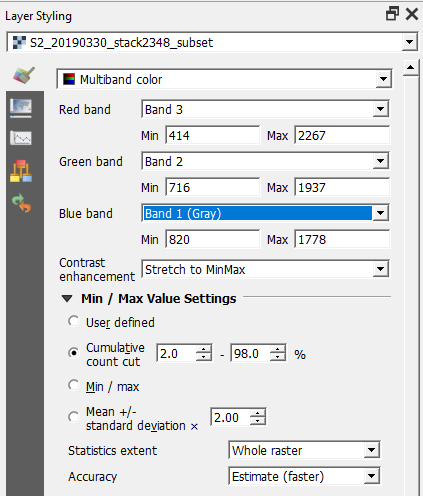
For this image the default settings are okay. This dialogue however, allows to stretch the colour. You can change the Min/Max settings and calculate it for the whole raster or the map canvas to increase the contrast. In this case we'll keep the defaults.
Create tiles
For more efficient use of the resources at your mobile phone you can best convert this GeoTiff to XYZ tiles in an .mbtiles file.
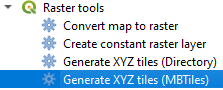
7. Go to the Processing Toolbox (if you don't see the Processing Toolbox panel, you can activiate it: in the Main Menu choose Processing | Toolbox) and double click Raster tools | Generate XYZ tiles (MBTiles).
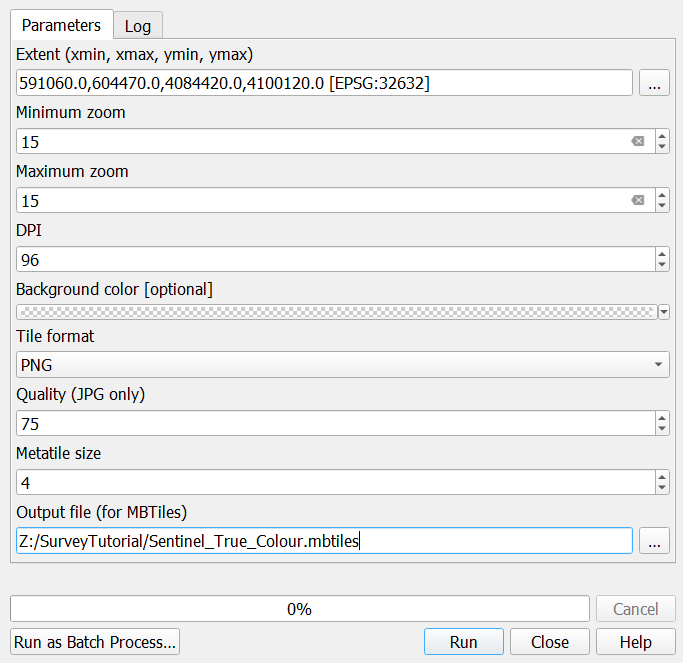
8. In the dialogue that opens click  and choose Use Layer Extent. Then choose the sentinel image.
9. Type for Minimum and Maximum Zoom 15. This gives the best compromise for this case. In other cases you can experiment with it. If you make the zoom level too high, the file will be very large. If you make it too small, you'll loose detail. If you give a range, the file will be bigger, but the performance for visualisation will be better.
10. Keep the rest at default and save the file in your project folder as: Sentinel_True_Colour.mbtiles.
11. Click Run.
12. Click Close when the calculation is finished.
13. Go to the Browser panel and drag the Sentinel_True_Colour.mbtiles raster layer to the Map Canvas.
14. Zoom in and compare the result with the original. In this case the result is okay. If not, you repeat the steps for other zoom levels to choose the best one.
15. Repeat the steps to create a Sentinel_False_Colour.mbtiles raster with bands R=4, G=3 and B=2.
16. Remove the S2_20190330_stack2348_subset layer from the Layers panel.
17. Save the project.
The procedure presented in this section is applicable to all offline raster layers that you want to use in your survey project.