Tutorial: Field surveys using QGIS, Mergin and Input
2. Project preparation
2.3. Adding a vector background layer
If you are using a vector layer as a background layer:
-
Ensure to use a simplified geometry version of your data. This will help with smooth map navigation.
-
All vector layers not intended to be used as survey layers, have to be set as read-only.
In this section we'll create a GeoPackage with a layer containing a polygon with the boundary of our study area. You could also create a Shapefile in a similar way.
We'll continue with the project from the previous section.
1. Make sure the True Color Sentinel image is visible and zoom to the extent.
2. Change the on-the-fly reprojection to EPSG:32632 that we're using in this area. Click on the EPSG code on the lower right of the screen and choose the right projection.
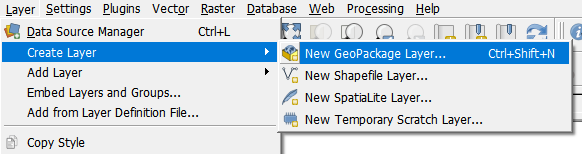
3. In the Main Menu go to Layer | Create Layer | New GeoPackage Layer....
4. Click the Browse button ![]() to go to your project folder and type a new name for a GeoPackage database, e.g. survey.gpkg.
to go to your project folder and type a new name for a GeoPackage database, e.g. survey.gpkg.
5. For Table name type Boundary. For Geometry type choose Multipolygon. Make sure the projection is set to EPSG:32632.
6. If you need attributes, you can add it here. A GeoPackage automatically adds a feature id to the attribute table, so you can also leave this open if you don't need attributes. In the next section we'll create the attributes for the survey layer.
7. Click OK to return to the Map Canvas.
Now an empty polygon vector layer with the name Boundary has been added to the Layers panel.
8. To start digitizing make sure the Boundary layer is on top and selected. Click the toggle editing button ![]() in the toolbar.
in the toolbar.
9. Click the Add polygon feature button ![]() and draw a polygon in the Map Canvas to indicate the border of your study area.
and draw a polygon in the Map Canvas to indicate the border of your study area.
10. Click right to close the polygon. A popup screen will ask to fill in the attributes. We keep the default and click OK.
11. Click the toggle editing button to stop editing and save the edits.
Now we need to style the polygon in such way that we can only see the border.
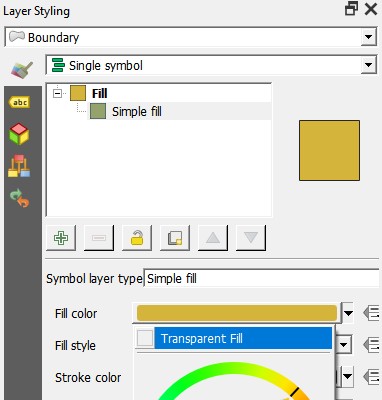
12. Click the ![]() button to open the Layer Styling panel.
button to open the Layer Styling panel.
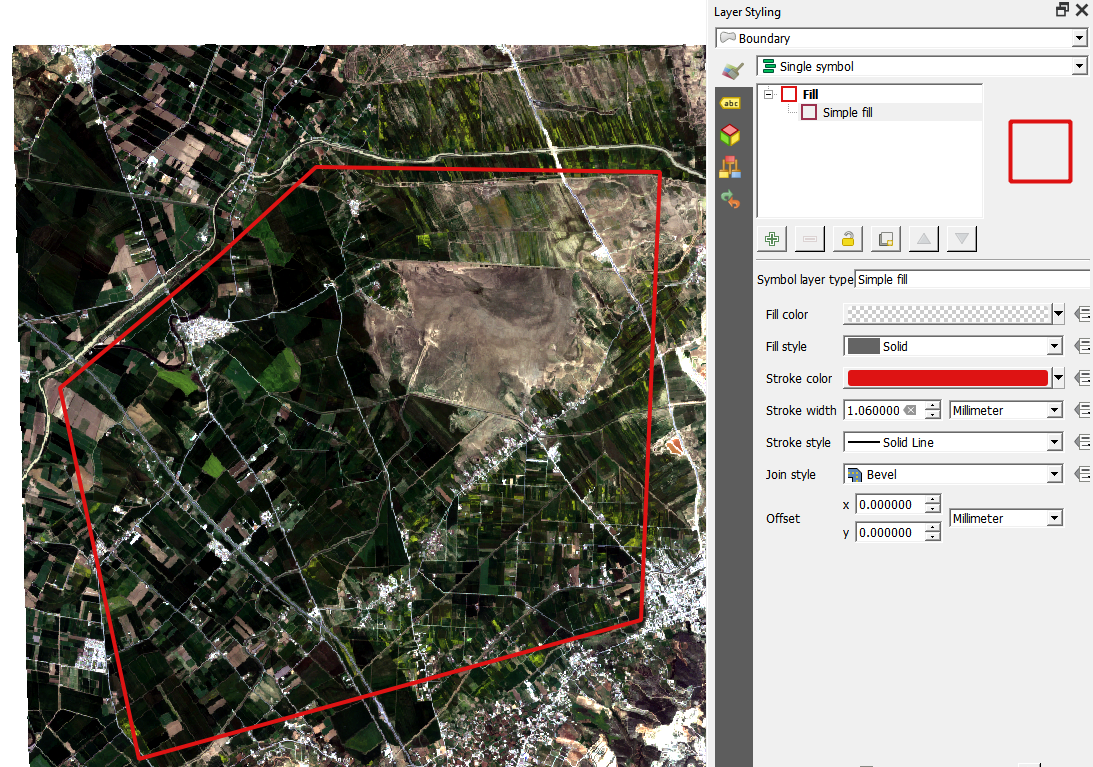
13. Click Simple fill and click the drop down arrow at Fill. Choose Transparent fill.
14. Choose for Stroke color red and a Stroke width of 1 mm.
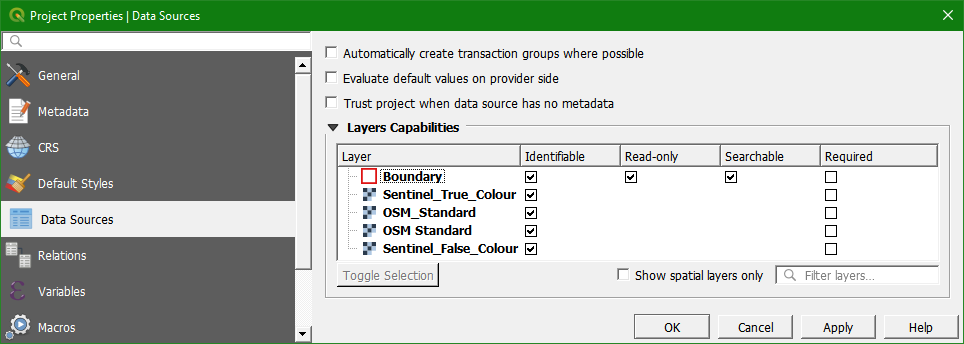
Because this isn't a survey layer, we need to make this vector layer read-only.
15. In the Main Menu select Project | Properties...
16. Select the Data Sources tab.
17. Check the box for Read-only for the Boundary layer.