Tutorial Stream and Catchment Delineation using PCRaster in QGIS
12. Styling the Resulting Catchment Area
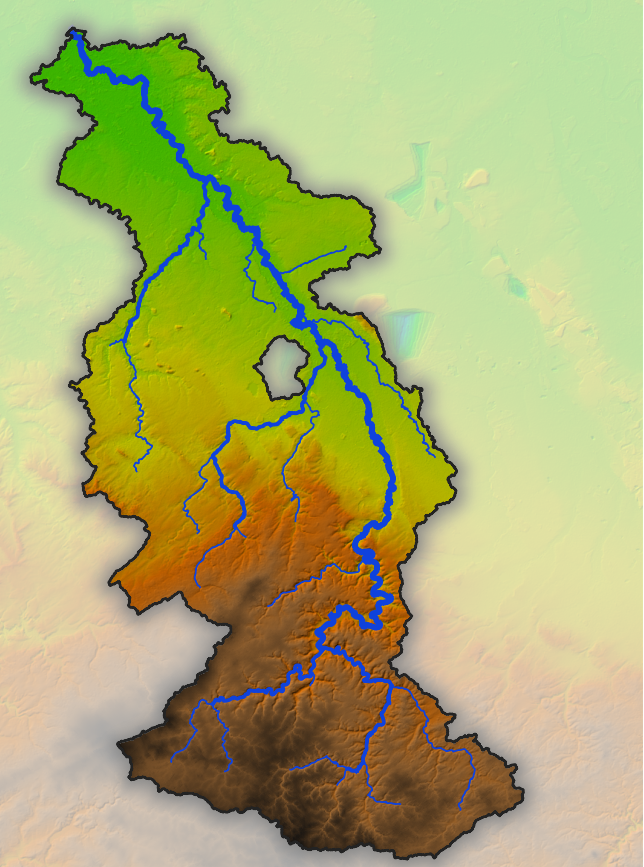
To show the results of your analysis you can use a technique named Inverted Polygon Shapeburst Fills to focus attention on the Rur Catchment.
1. Open the Layer Styling panel by clicking the ![]() button. Set the target layer to Rur_Catchment.
button. Set the target layer to Rur_Catchment.
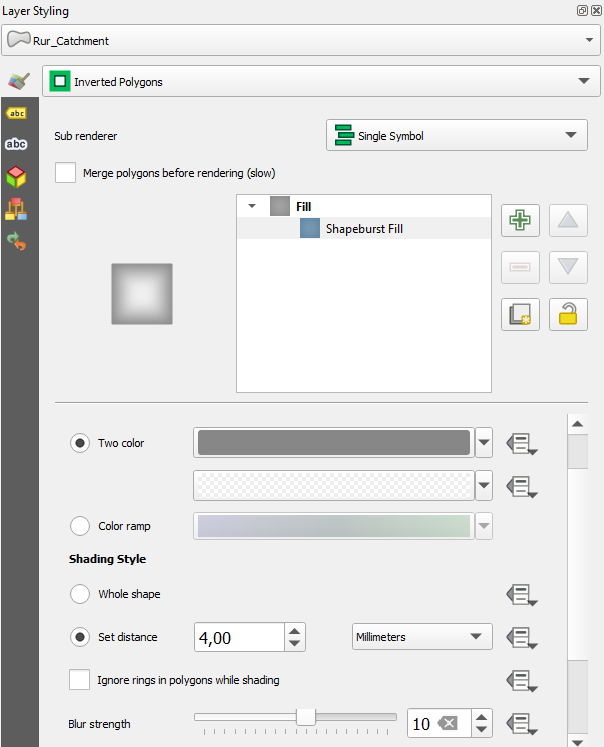
2. Change from a Single symbol renderer to an Inverted polygons renderer. This renders the data as the inverse of it's geometry, i.e. you'll style everything outside of the polygon. This creates a mask around the Rur valley.
3. Next select the Simple Fill component. Then change the Symbol layer type to Shapeburst fill. In the Gradient colors section use the default Two color method. Change the first color to an RGB value of 135 | 135 | 135. Change the second color to white with an opacity of 65%.
4. In the Shading style section, click the Set distance option and set the distance to 4 mm.
5. Increase the Blur strength to 10.
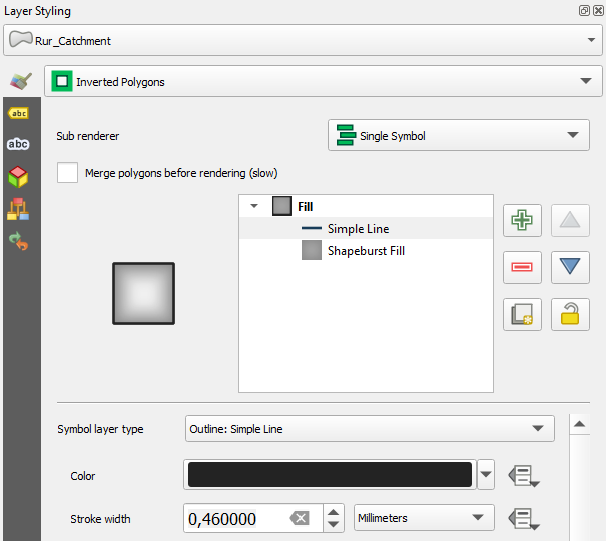
6. Finally at the top of the Layer Styling Panel select the Shapeburst fill component.
7. Click the Add symbol layer ![]() button. Change the new Simple fill renderer to a Symbol layer type of Outline: simple line. Give it a Color of black and a Stroke width of 0.46 mm.
button. Change the new Simple fill renderer to a Symbol layer type of Outline: simple line. Give it a Color of black and a Stroke width of 0.46 mm.
This gives us the nicely styled basin as shown in in the figure below. Note that the DEM on the picture is DEM_clipped with the corresponding hillshade. If we would have used the Rur_DEM layer (the one we have created in the previous section by clipping with the Rur_Catchment as mask layer), the inverted polygon shapeburst fill styling effect doesn't make sense. Clipping the DEM to the boundary is useful for further processing. For visualisation purposes and map design the inverted polygon shapeburst fill styling gives a nicer result.