PyQGIS Use Case: Stage Volume Curve
3. Create a Stage Volume Table with PyQGIS in QGIS
In the previous section we've calculated the volume corresponding to a specific elevation one by one.
In this section we're going to iteratively calculate the volume for a range of elevations and store the results in one table. For that purpose we need to write a PyQGIS script around the Raster Surface Volume tool.
All processing tools that you've run are stored in the history of the Processing Toolbox. Let's have a look and see how we can use that for our script.
1. In the Processing Toolbox click  to open the history.
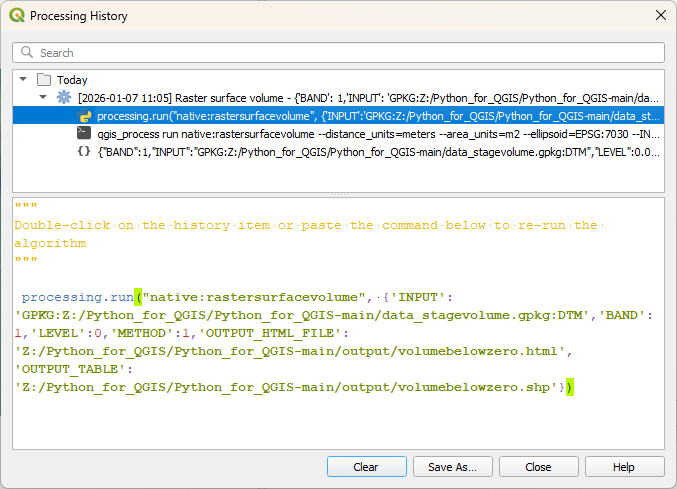
There you find what we did in the previous section. Try to read what's written after processing.run.
It contains the name of the tool: native: rastersurfacevolume. It contains a dictionary with all the inputs from the dialogue. That means that we can copy this and replace parts of the dictionary in a PyQGIS script with a variable. Here we should iterate for different LEVEL values from the minimum to the maximum elevation in the DTM.
2. Click Close to close the History dialogue.
Let's use Python and PyQGIS to use this algorithm to create a stage volume table. The instructions are in the Jupyter Notebook Stage_Volume_Table.ipynb that you can find in the downloaded files from the GitHub repository.
3. Click  to open the Jupyter Notebook panel and load the Stage_Volume_Table.ipynb notebook in the same way as you have learned in the previous tutorial.
4. Follow the steps in the Jupyter Notebook and return to this tutorial after finishing the steps.
Now we're going to use the same code in the QGIS Python Console.
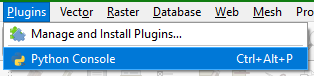
5. In the main menu choose Plugins | Python Console to open the Python Console.
6. In the Python Console click  to open the editor.
7. Go to this GitHub page: https://github.com/jvdkwast/PyQGIS_Hydro/blob/master/scripts/StageVolume.py
8. Copy the Python code to the editor and save the script as StageVolume.py.
Before running the script you might want to remove the files generated when you followed the Jupyter Notebook. You can also remove the additional DTM layer and the table, so you're back at the situation at the start of this tutorial. You can also simply revert to the project if you didn't save it since the start.
9. Click  to run the script.
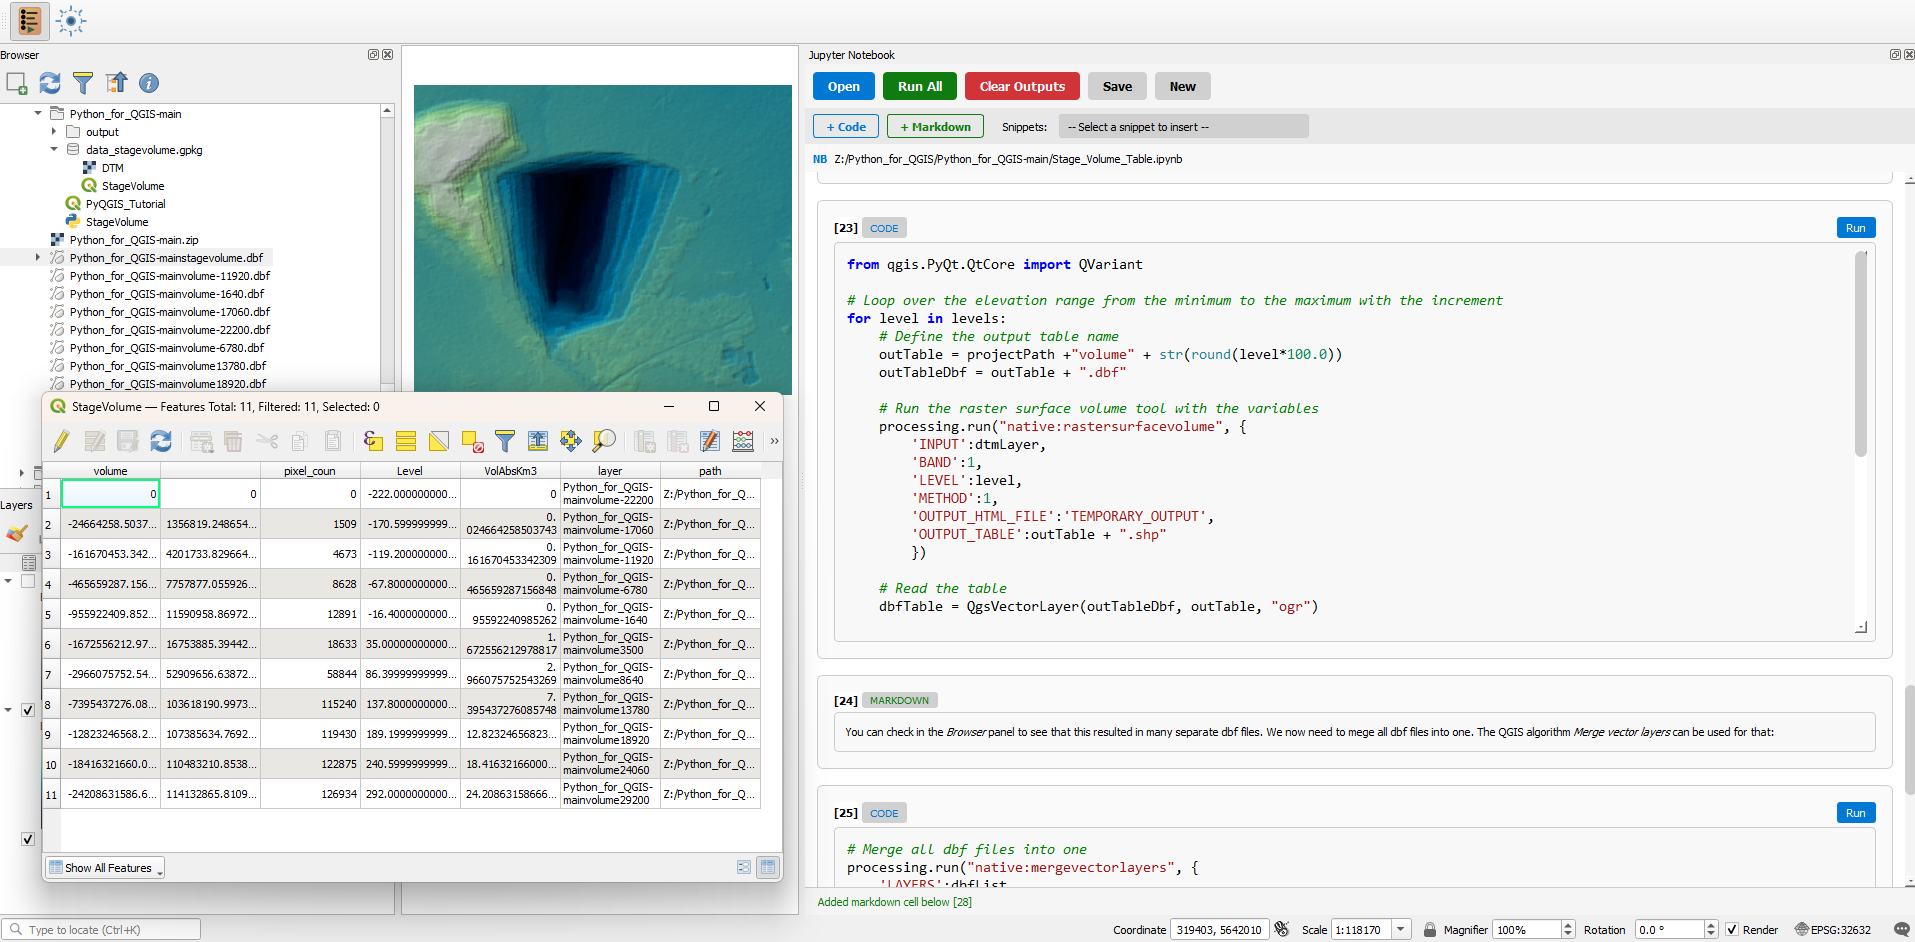
This is the result printed in the Python Console:
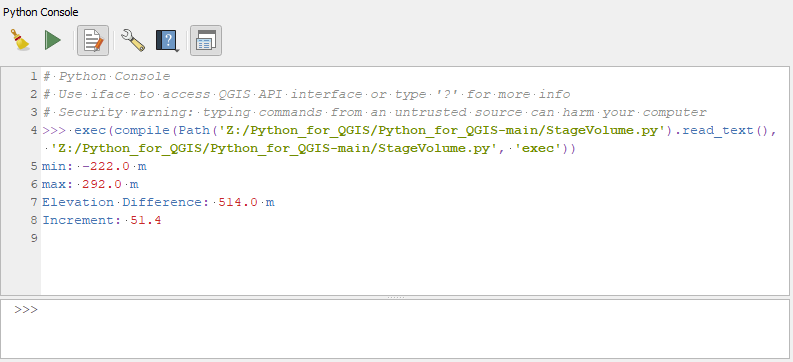
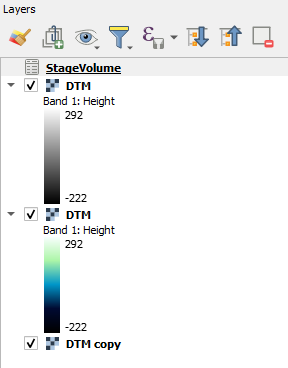
The script has also added a DTM layer and the StageVolume table to the Layers panel.
11. Click right on StageVolume and choose Open Attribute Table and inspect it.
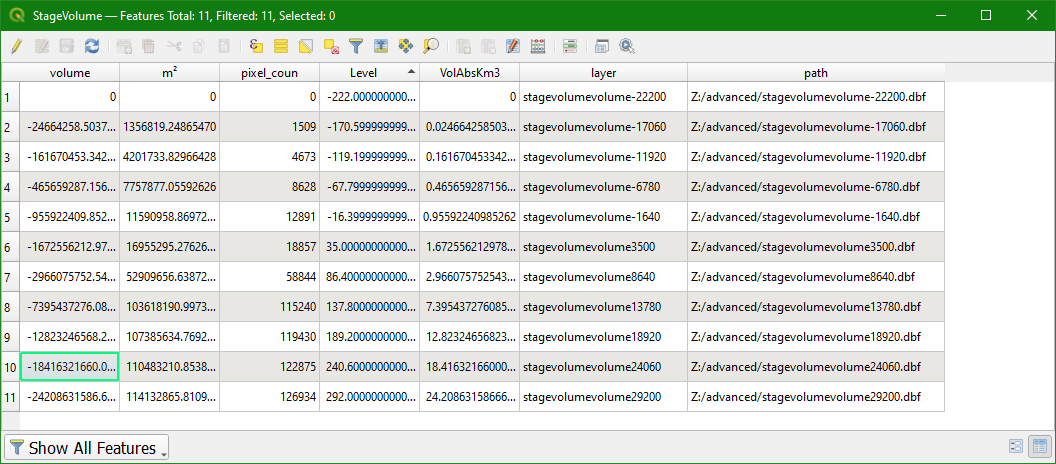
We have created the Stage Volume Table with the Level field in meters and the VolAbsKm3 field containing the volumes in km3.
In the next section we'll create the Stage Volume Curve using the Data Plotly plugin.
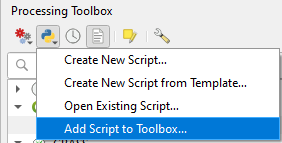
Note that you can also add the StageVolumeTool from GitHub to the Processing Toolbox. The tool then has a dialogue. You can download the tool from here: https://github.com/jvdkwast/PyQGIS_Hydro/blob/master/scripts/StageVolumeTool.py.
The format of this so-called QGIS Processing Script is different from the code that we just wrote. You can find more of these scripts in the QGIS Resources Hub. These scripts and other resources can be easily installed through the QGIS Hub plugin. The video below shows how that works.