Symbolizing Points by Varying Size
5. Adding the Ocean
The background is now white. Let's change it to a blue ocean.
The projection of the project is now in Geographic Coordinate System (WGS-84 with latitude/longitude coordinates in degrees, EPSG:4326). Let's first change this to the Equal Earth projection, which preserves the proportion of surface areas.
1. Click on the EPSG code in the lower right of the QGIS window.
The CRS tab of the Project Properties now opens.
2. Type Equal Earth at Filter.
It now shows several matches. Some of those projections are centered on Asia Pacific, some on the Americas. For Europe (=Greenwich) there are three. The first of those three pretends that the Earth is a perfect sphere (and it isn't, but maybe it doesn't matter on the map scale we're going to use). The second is based on WGS-84 as a description of the shape of the earth and comes from the European Petroleum Survey Group (EPSG). The third is actually the same, but comes from ESRI.
3. Let's choose EPSG:8857.
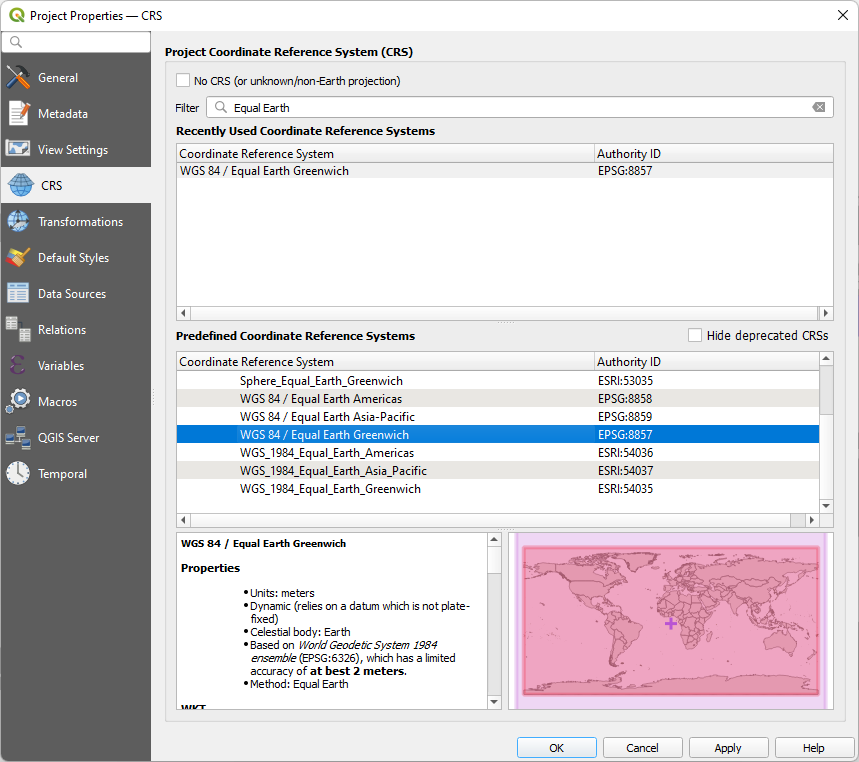
4. Click OK.
5. Now add the ne_110_ocean layer by dragging it from the Natural Earth GeoPackage in the Browser panel to the map canvas.
6. Drag it to the bottom in the Layers panel.
7. In the Layer Styling panel make sure that is the active layer and change the fill color to a subtle light blue that goes well with the rest of the map.
8. Change the Stroke Style to No Pen.
In the next section we'll add labels to the cities.