Symbolizing Points by Varying Size
6. Add Labels
It's time to add the labels.
1. In the Layer Styling panel make sure that the target layer is the layer with the cities and go to the Labels tab by clicking  .
.
2. Change from No Labels to Single Labels.
Bang! Your maps is full of labels!
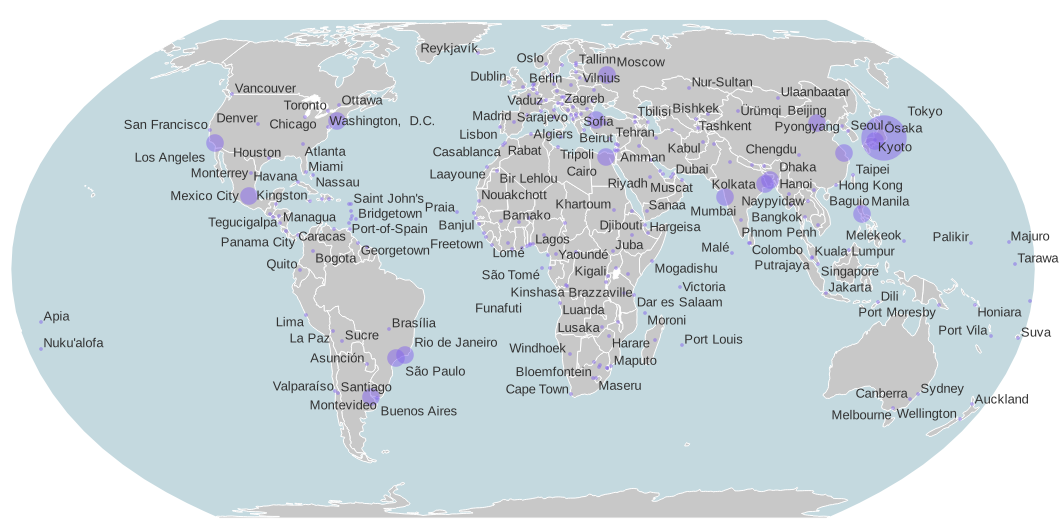
Well, that's a bit too much for our nice map.
Let's see what we've done, and what we can improve on.
First of all, the software has estimated that you will probably want to use the NAME field to display the name of the places, which is okay.
The default font can be improved.
3. Change the font to Calibri, 13 points. This is a nice sans serif font for readability.
In the map as it is now, there is actually nowhere a conflict between the black texts and the background. It is debatable whether a text buffer is necessary in this case. Nevertheless, we do it once, then at least you know where it is. And who knows,
if it doesn't help, it might not hurt either.
Now that we're on the second tab about Labeling in the Layer Styling panel, you've got NINE (!!!) extra tabs with settings there. So there is a lot to set up and understand.
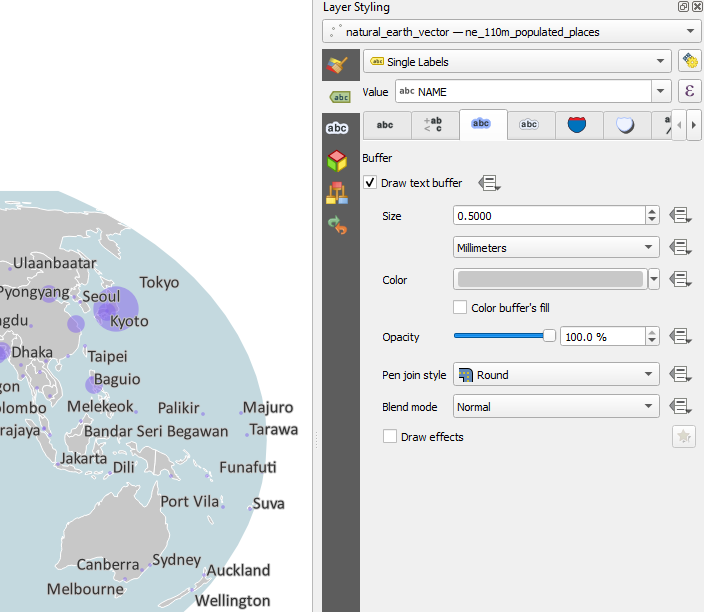
4. Go to the Buffer tab .
.
5. Check the box to Draw text buffer.
6. Because it's a bit too prominent, change the buffer Size to 0.5 mm.
7. Change the color of the buffer to hex code #c8c8c8. That's the same color as the countries in the background.
You probably also find the map too full. Nice labels, but way too many. Time to do something about that.
A simple and effective way to do something about this is to label only the big cities and leave the small ones without. For example,
we could set the limit at 10 million, but this is arbitrary. Another limit is also possible. For the sake of recognisability, we choose 10 million as the limit here, but try other cut-off values yourself to experiment.
8. In the Layer Styling panel go in the Label settings to the Rendering  tab.
tab.
9. Check the box before Show all labels for this layer (including colliding labels).
Yes, now it got worse, but wait...
10. Go to the Data defined override at Show Label. Use the drop down menu to select Edit....

11. Now write an expression that the population should be more than 10,000,000 for showing a label.
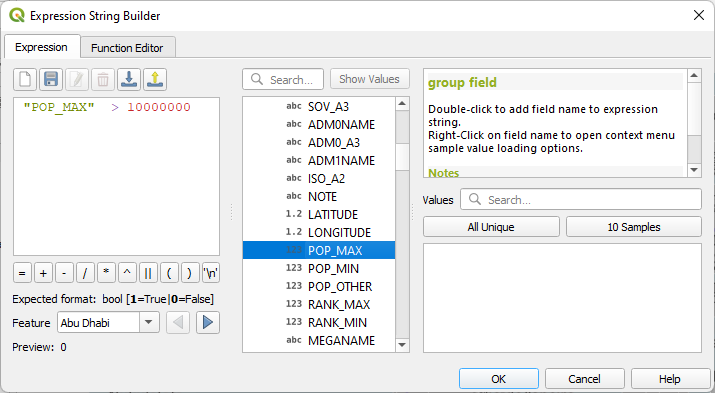
12. Click OK to apply and close the Expression String Builder dialog.
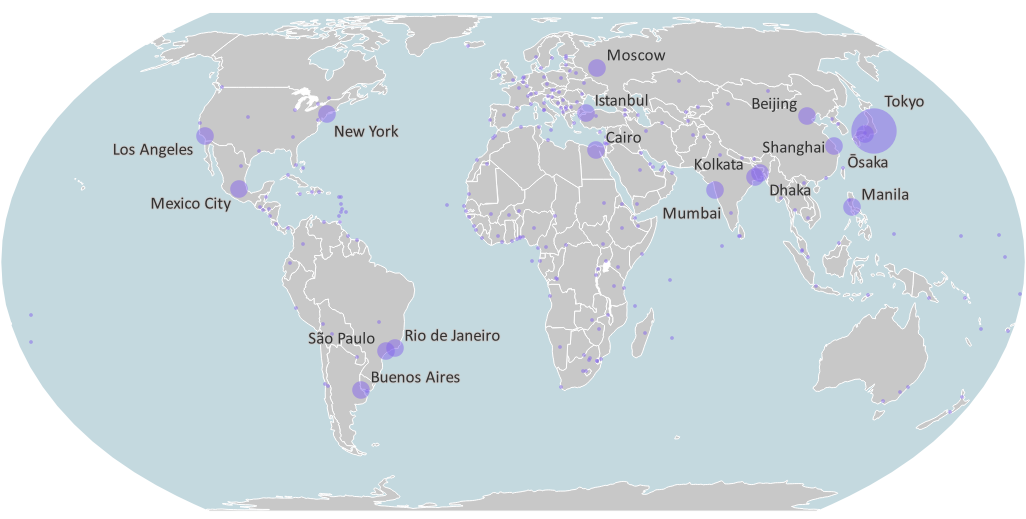
Now you have successfully generalized the number of labels!
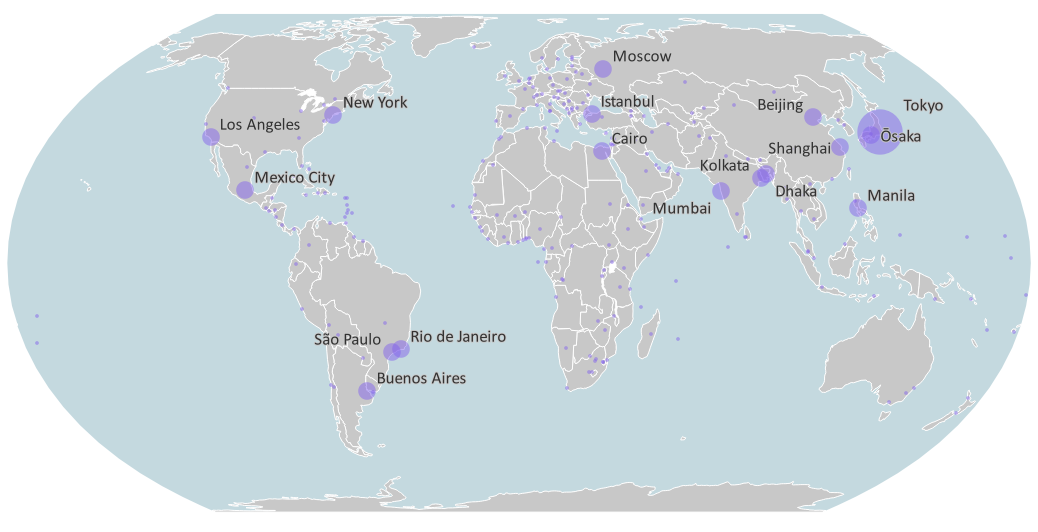
You may have noticed: especially at Osaka and Tokyo the labels don't look very nice now. They don't have much chance either: the circles overlap. Where should they go?
To solve that we can use some advanced settings, but that is going too
far for now. We're going to fix it manually.
We're going to use the Label Toolbar.

13. Click the Move a Label, Diagram or Callout icon  .
.
Your cursor now changes to a crosshair.
14. Click at the label that you would like to move, for example Tokyo.
You'll now see a popup window asking for choosing the primary key in the attribute table to join the edits to. This is asked only once.
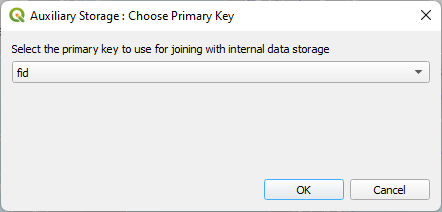
15. Accept the default fid field and click OK.
Now you can click on any label to move it. A green rectangle will appear around the label. Then you can click at its destination location.
16. Move labels in such a way that the result looks nice.
Watch this video to verify the steps until this point: