Tutorial Cartography for Map Figures in Academic Journals & Books
3. Hands On
3.5. Set Up The Print Layout Page
In QGIS, the print layout interface is where you compose your map. Typically, I will set up my layout before I start styling data (mainly because I just looked up my art specs and don't want to have to go find them later when I'm ready to finish up the map).
Open a new layout:
- In the main menu choose Project | New Print Layout....
- In the window that pops up, give your new layout a name. I'll call mine "Nature Specs" so later I'll know this layout was for my Nature submission with this data. Click OK.
- A new blank layout window should now be open.
Set the page size:
- Right click anywhere on the white page in the middle of the window
- Select Page Properties from the menu
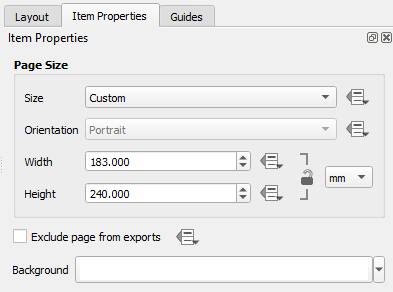
- On the panel on the right side of the screen, set the Size drop down to Custom, then set the Width to 183 mm and the Height to 240 mm for now - we'll shrink this later as needed. Note: there is a units drop down to the right of the Width and Height options.
- Click the Save button
 . This saves the whole project, not just the layout.
Now that this is set up, we can close this window and come back to it after we've styled the data.