Tutorial: Create a field data collection app with Mergin Maps
7. Setup the survey layers
7.1. Setup the Survey point layer
The default project already has a Survey point layer. You can use any vector layer for surveying, but here we'll add fields to the existing Survey point layer.
1. Open the attribute table of the Survey layer: in the Layers panel right-click on the Survey layer and choose Open Attribute Table from the context menu.
You can see that it already has some attributes: fid, date, notes, photo. Let's add a few more, related to crop mapping.
2. Click  to switch to editing mode.
3. Click  to add a new field.
Let's add a field for an observation number.
4. In the Add Field dialog type Obs for the Name, use Text (string) for type (in that way we can add alphanumeric codes for our observation numbers) and use a Length of 5 characters.
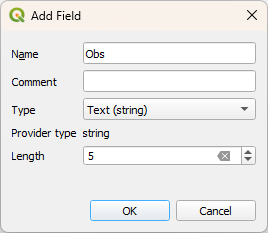
5. Click OK to add the new field to the attribute table.
6. Repeat this for the following attributes:
| Field name |
Type | Length |
|---|---|---|
| Name | Text (string) |
50 |
| LandCover | Text (string) |
50 |
| Crop | Text (string) |
50 |
| WaterSource | Text (string) | 50 |
| IrriMethod | Text (string) |
50 |
| Coverage | Decimal number (real) |
3 |
7. Click
to toggle off editing and save the changes.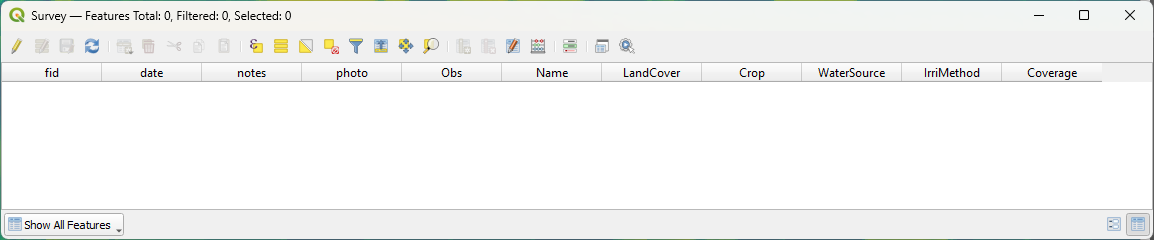
Now let's create the widgets for the observation form.
Mergin Maps supports many widgets. You can check them here.
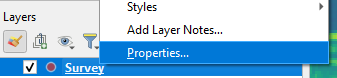
8. To setup the Form Widgets, right-click on the Survey layer in the Layers panel and choose Properties... from the context menu.
9. In the Layer Properties dialog go to the Attributes Form tab and choose Drag and Drop Designer from the drop-down menu.
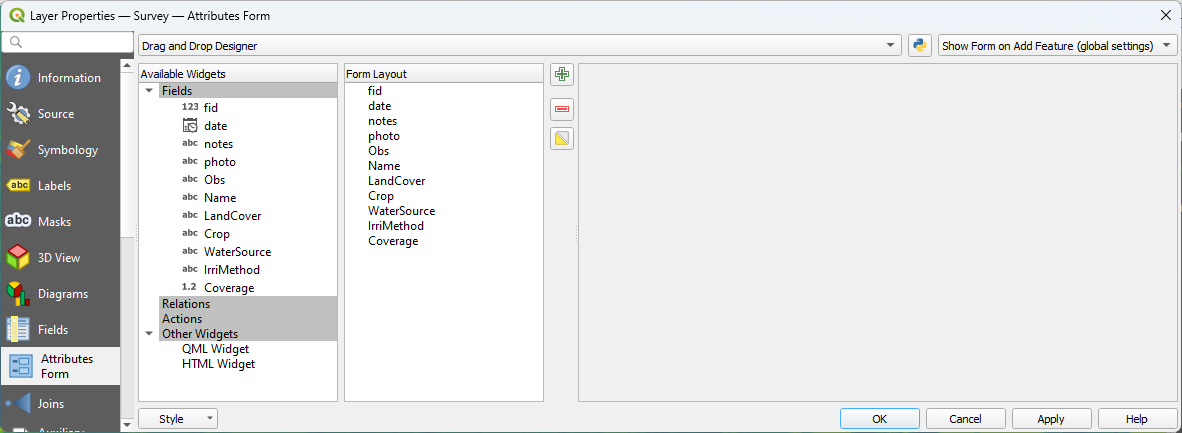
In this dialog we can interactively create our field form with the widgets.
10. First, we don't want to use the fid field. Select fid from the Form Layout panel and click the  icon.
icon.
11. Lets rearrange the items. You can drag and drop the items rearrange. Here we use this order:

Now we'll configure the form widgets.
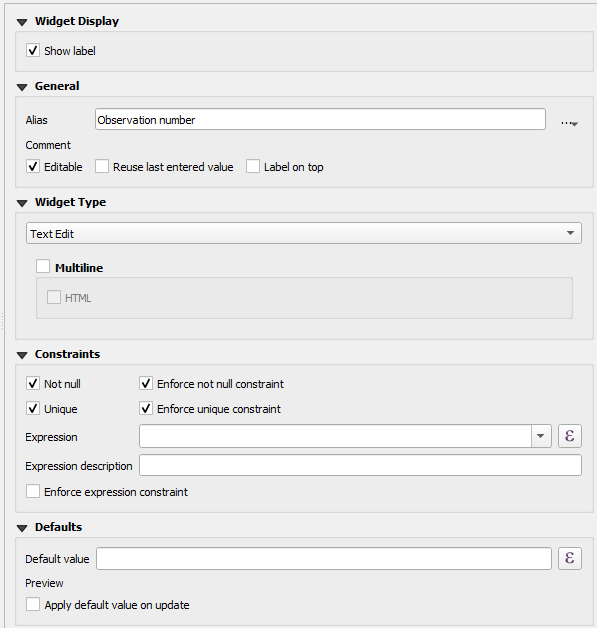
12. Click on Obs in the Form Layout panel.
Now you can see the widget settings in the right panel of the dialog.
13. We can give more human readable names to the fields using and alias. In the Alias field of Obs type Observation number.
14. Under Constraints we check the boxes for Not null and Unique, to make sure that a value is filled in and that the code is unique. Also check the boxes to enforce the constraints. Keep the rest as default.
15. Now click the date field in the Form Layout panel.
16. For Alias type Date/Time.
17. For Widget Display choose Custom and type dd-MM-yyyy HH:mm:sss for the format You can see the result in the Preview.
18. Set the Contraints to Not null.
19. Under Defaults we can set an expression so the current date and time are used. Type
$now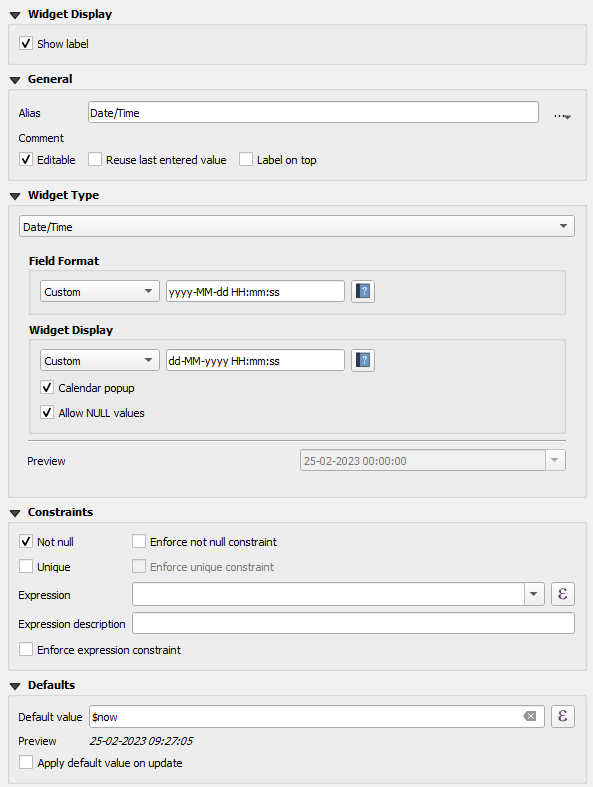
20. Now choose Name from the Form Layout. Use the following settings: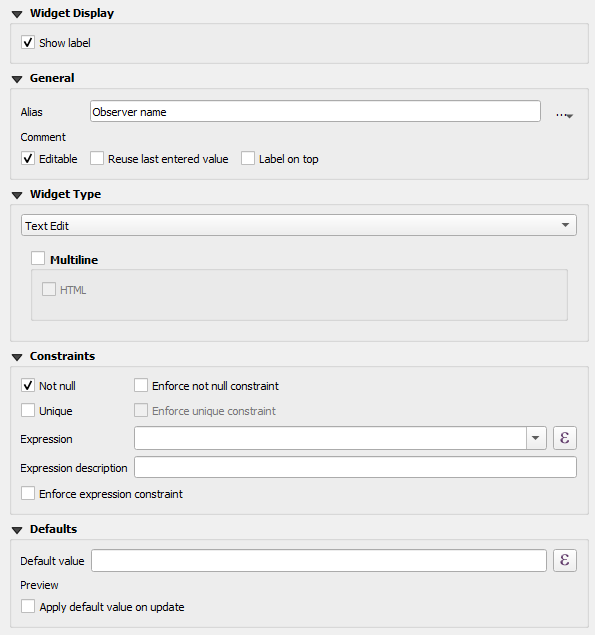
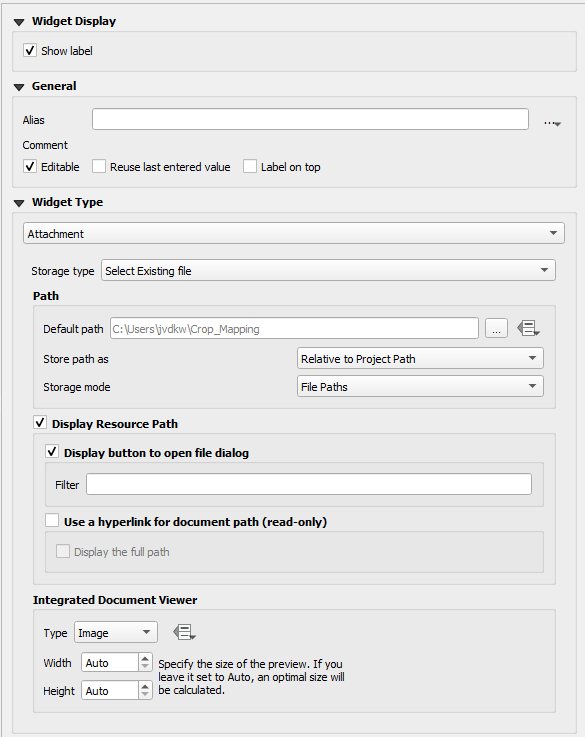
21. For the photo field we should keep the default settings, so the relative path to the picture is stored and the Integrated Document Viewer is used to show the image. Only type Picture at Alias.
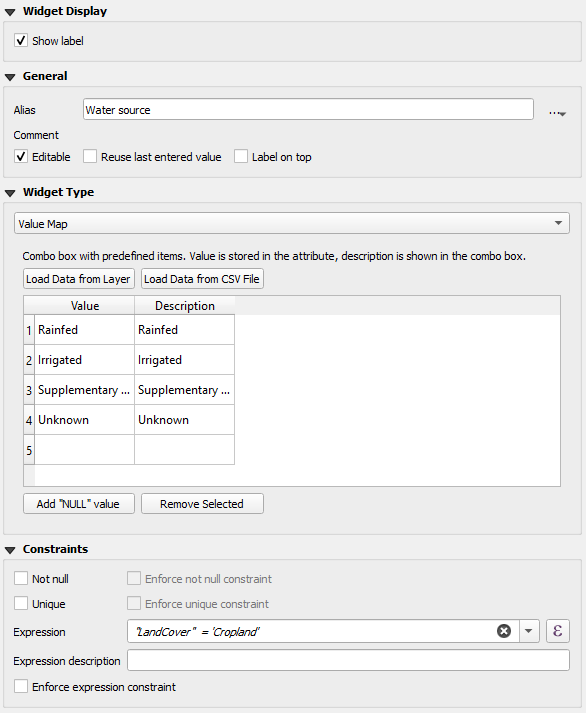
22. For LandCover type the Alias Land cover type.
For the land cover types we would like to use a drop-down menu. We can define that with the Value Map widget.
23. Under Widget Type choose Value Map and use the following Value/Description combinations:
| Value | Description |
|---|---|
| Cropland | Cropland |
| Tree Cover | Tree Cover |
| Shrubland | Shrubland |
| Grassland | Grassland |
| Wetland | Wetland |
| Artificial | Artificial |
| Bare soil | Bare soil |
| Fallow land | Fallow land |
| Seasonal water | Seasonal water |
| Permanent water | Permanent water |
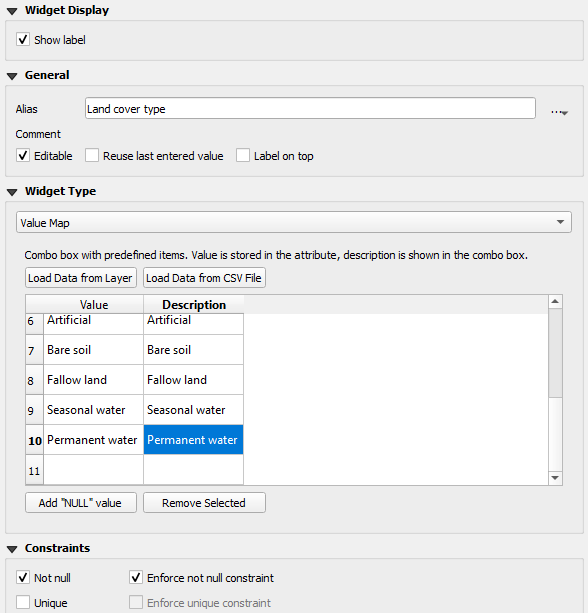
24. Use the Not Null Constraint.
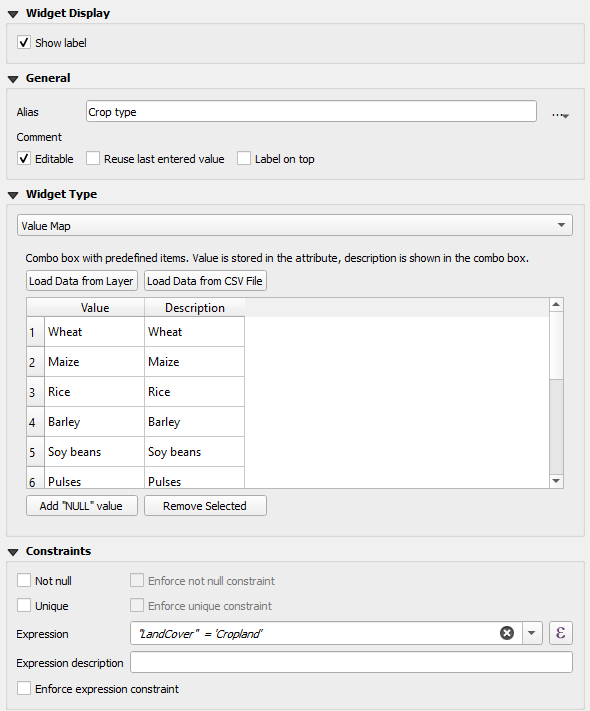
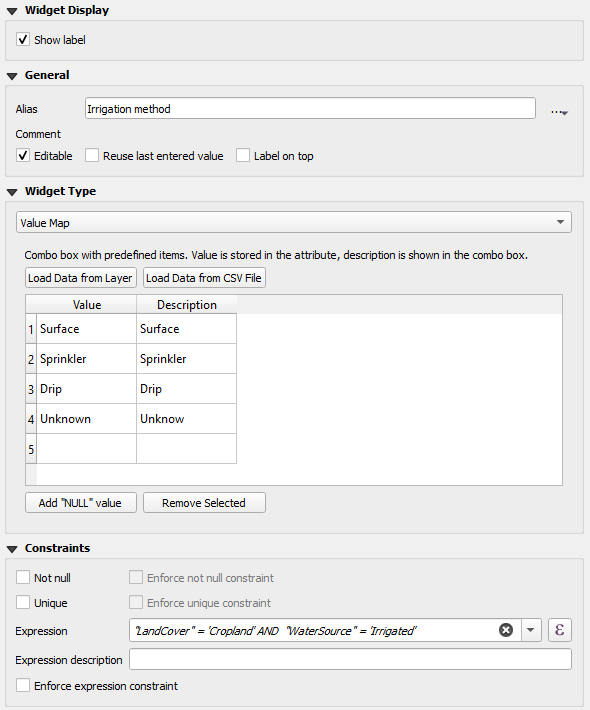
25. For Crop use the Alias Crop type.
26. Also here use the Value Map widget. Use the following Value/Description combinations:
| Value |
Description |
|---|---|
| Wheat | Wheat |
| Maize | Maize |
| Rice | Rice |
| Barley | Barley |
| Soy beans | Soy beans |
| Pulses | Pulses |
| Cotton | Cotton |
| Potatoes | Potatoes |
| Alfalfa | Alfalfa |
| Sorghum | Sorghum |
| Other | Other |
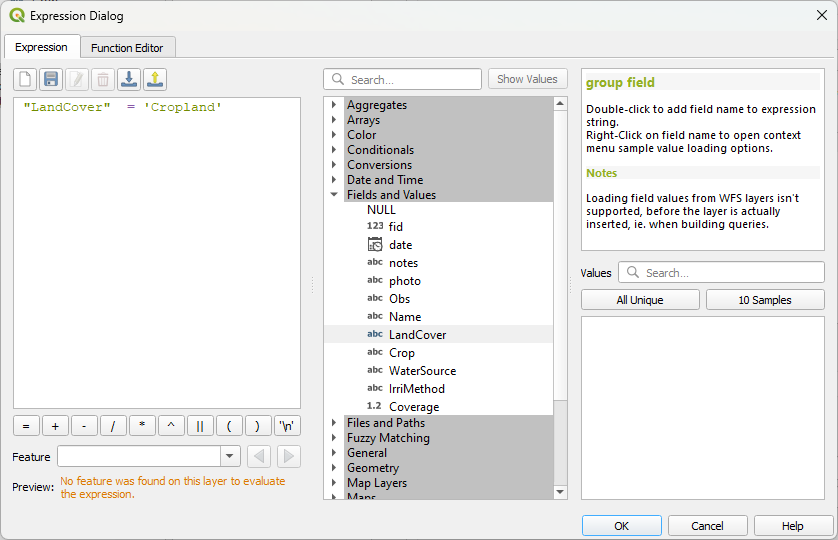
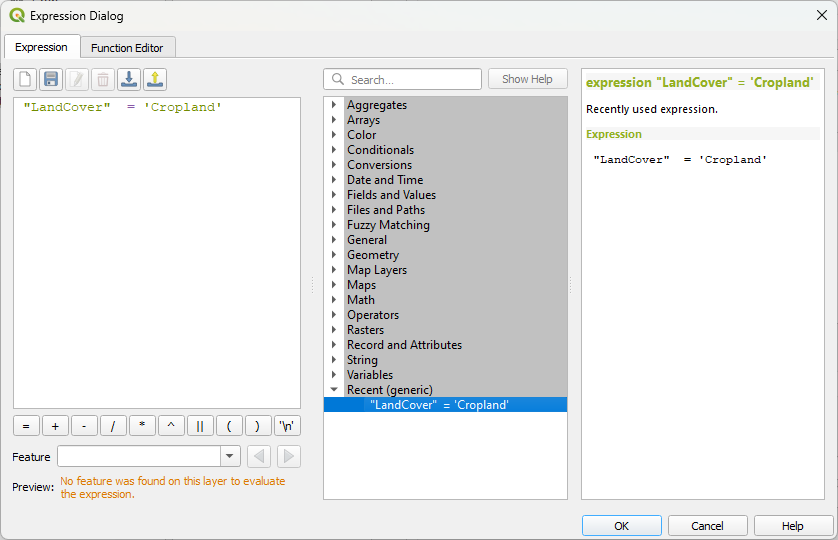
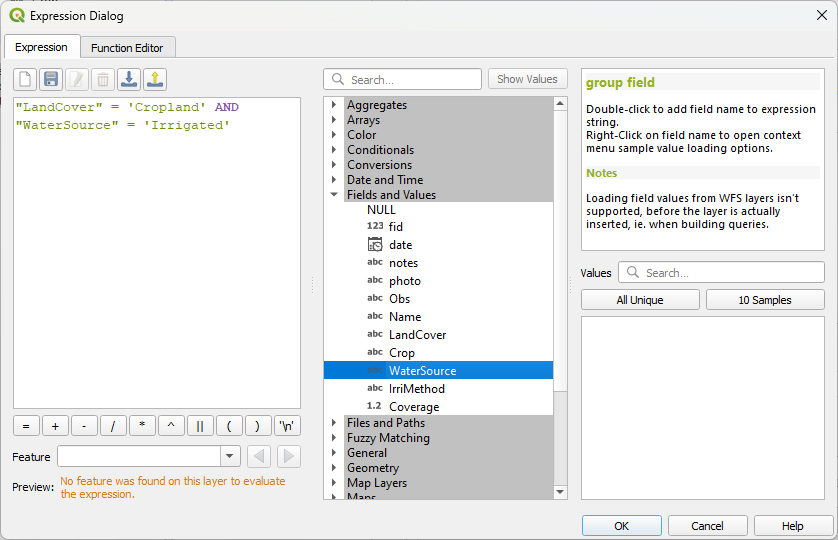
 to open the Expression Dialog.
"LandCover" = 'Cropland'
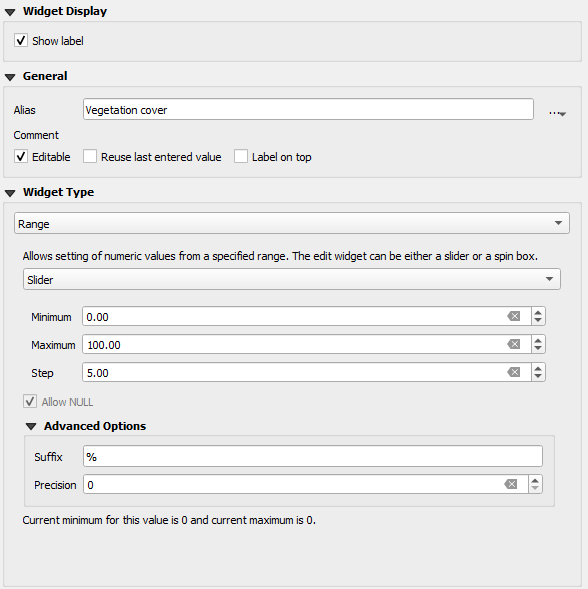


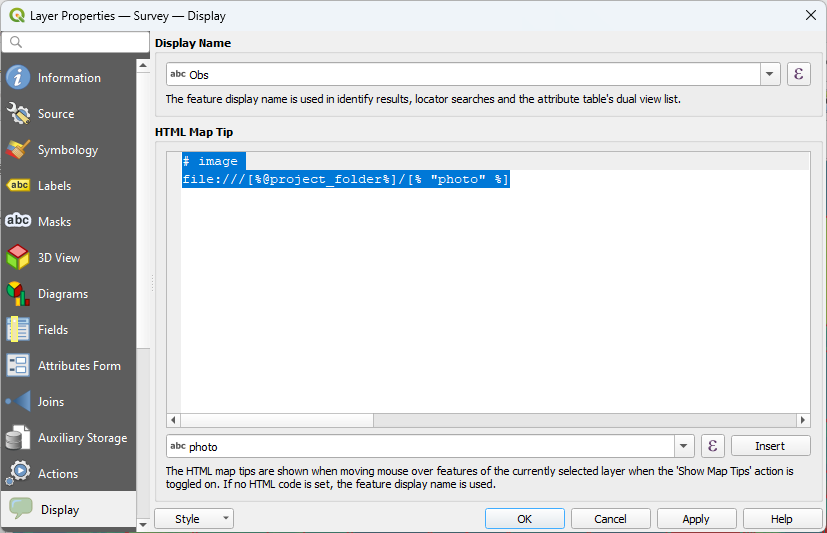
# image
file:///[%@project_folder%]/[% "photo" %]