Tutorial: Create a field data collection app with Mergin Maps
7. Setup the survey layers
7.2. Setup the Parcels polygon layer
We'll add a second survey layer with the parcel polygons, so we can update the crops with our field obervations.
1. Make sure you're zoomed to the study are (use the Smaller study area Spatial Bookmark if necessary).
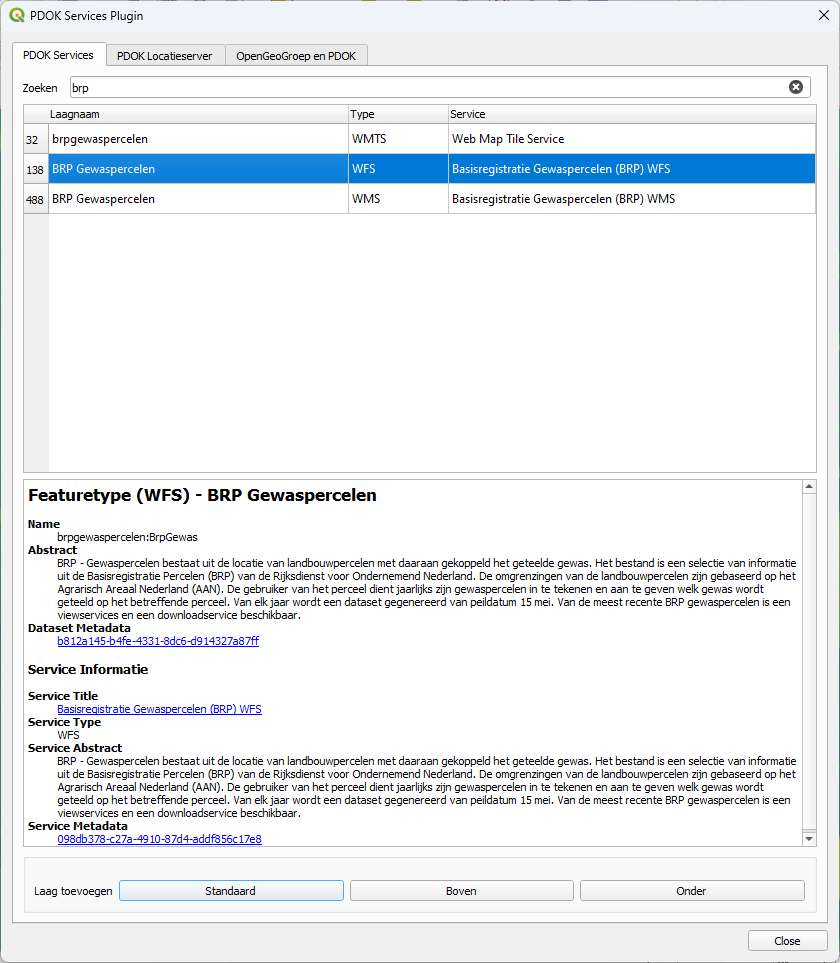
2. From the PDOK Services plugin add BRP Gewaspercelen in the WFS format to your project. Use Boven to add it to the top of the Layers panel.
We would like to edit the layer, so we'll save it as new GeoPackage layer. It is good practice to add a separate GeoPackage for each survey layer. For more good practice information check this page.
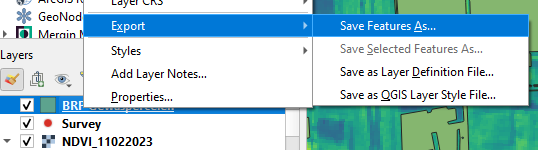
3. In the Layers panel right-click on the BRP Gewaspercelen layer and choose Export | Save Features As... from the context menu.
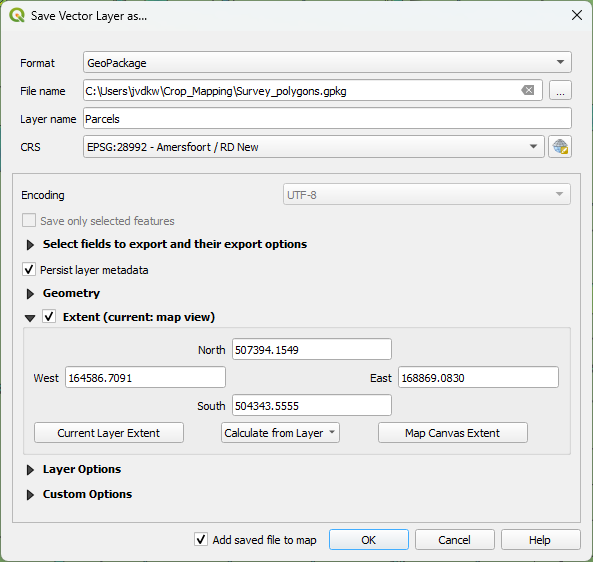
4. In the dialog, make sure that the Format is GeoPackage. Use  to browse to the folder of your project and save the new GeoPackage with the name Survey_polygons.gpkg and type Parcels as Layer name. For Extent click Map Canvas Extent, so only the parcels in the study area will be exported.
5. Click OK and wait until the Parcels layer is added to the map canvas. Then close the dialog.
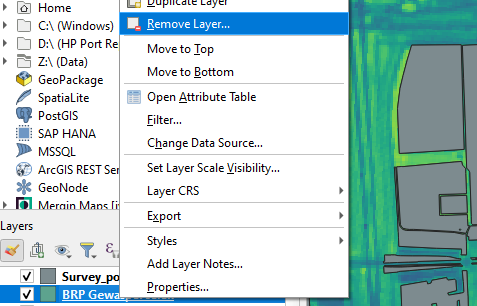
6. Remove the BRP Gewaspercelen WFS layer from the Layers panel: right-click on BRP Gewaspercelen and choose Remove Layer... from the context menu. Click OK to confirm.
Mergin Maps will use the same style as defined in QGIS. Let's style the Parcels polygons with an outline colour.
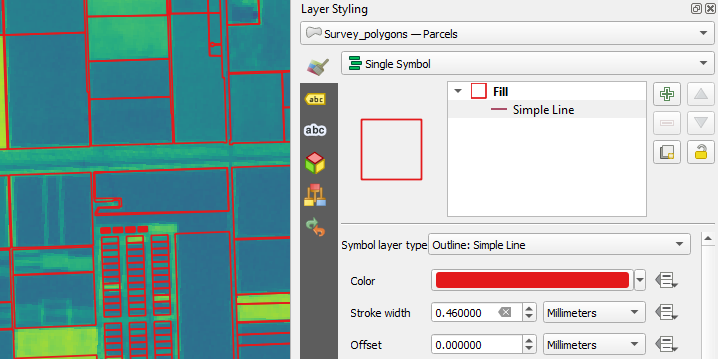
7. Go to the Layer Styling panel and make sure that the Parcels layer is active.
8. Keep the Single Symbol renderer, but change the Symbol layer type from Simple fill to Outline: Simple Line. Choose a red colour with a Stroke width of 0.46 mm.
Also for this layer we can setup the widgets.
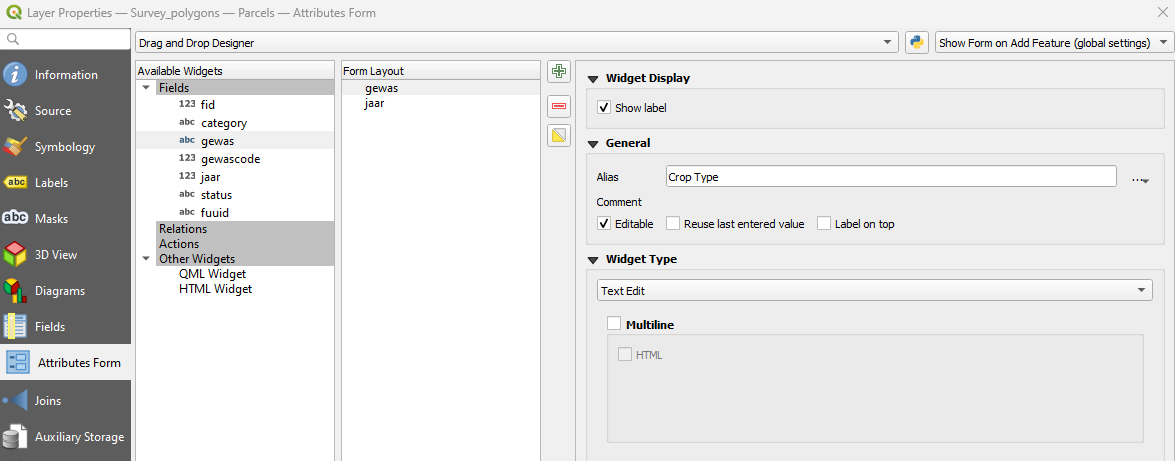
9. Go to the Layer properties of the Parcels layer.
10. At the Attributes Form tab, choose the Drag and Drop Designer from the drop down menu.
11. Remove all fields, except gewas and jaar.
12. For gewas use the following settings:
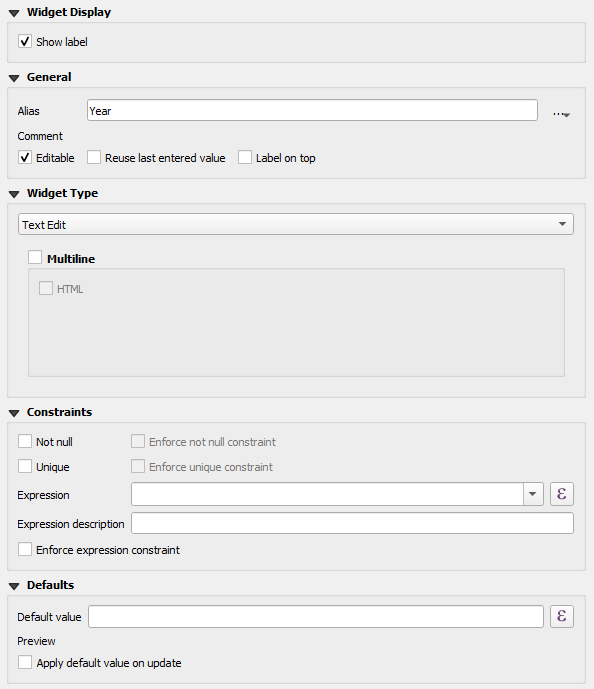
13. For jaar use the following settings:
14. Click OK to apply and close the dialog.