
Tutorial: Stream and Catchment Delineation
3. Download DEM
For the Rur study area, we will download the tiles from the SRTM 1 Arc-Second global data set. Since the end of 2014 a 1-arc second global digital elevation model (approximately 30 meters at the equator) has been released as open data. Most parts of the
world have been covered by this dataset ranging from 54 degrees south to 60 degrees north latitude. A description of the SRTM data products can be found here.
The following steps explain
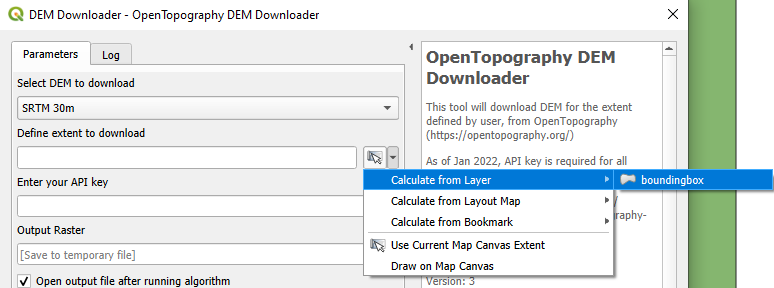
how to download the SRTM DEM tiles for the study area using the OpenTopography DEM Downloader plugin. With the plugin you can download DEMs from OpenTopography.org for a user-selected extent.
1. Start QGIS Desktop. We’ll start with a new project. In the Browser panel, add the folder with the data for this lesson to the Favorites as you learned in the previous lesson.
2. Drag the boundingbox.shp layer from the Browser panel to the map canvas.
This polygon defines the boundary of our initial analysis. Normally you have to create such a polygon yourself or use the map canvas coordinates. We need this to clip the DEM to the study area. Note that the projection of the project (on-the-fly reprojection) is now set to the
projection of the boundingbox layer. You can check it in the lower right corner of the screen.

We will work in this projection during this exercise.
3. Install the OpenTopography DEM Downloader plugin from the Plugins Manager. Go to the main menu and choose Plugins | Manage and Install Plugins....

4. In the Plugins Manager search for OpenTopography and install the plugin.

 button in the toolbar.
 to copy the API key.
 to browse to a folder where you want to store the data for this project. Remember to stick to the good practice instructions for file and folder names (no spaces, accents, -, etc.). Always use the
  button in QGIS dialogs to choose the output location! Name the file SRTM.tif.
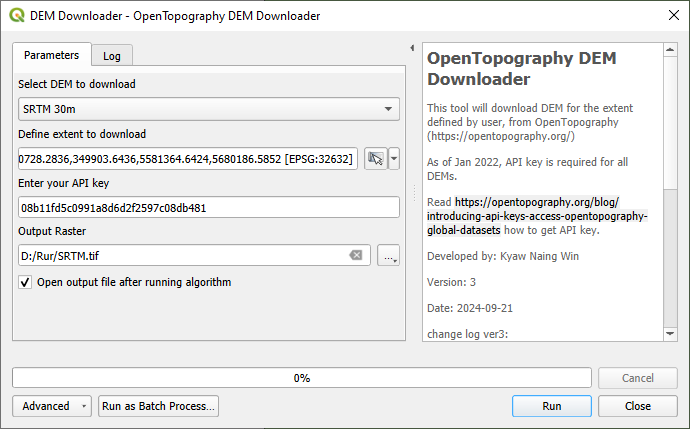
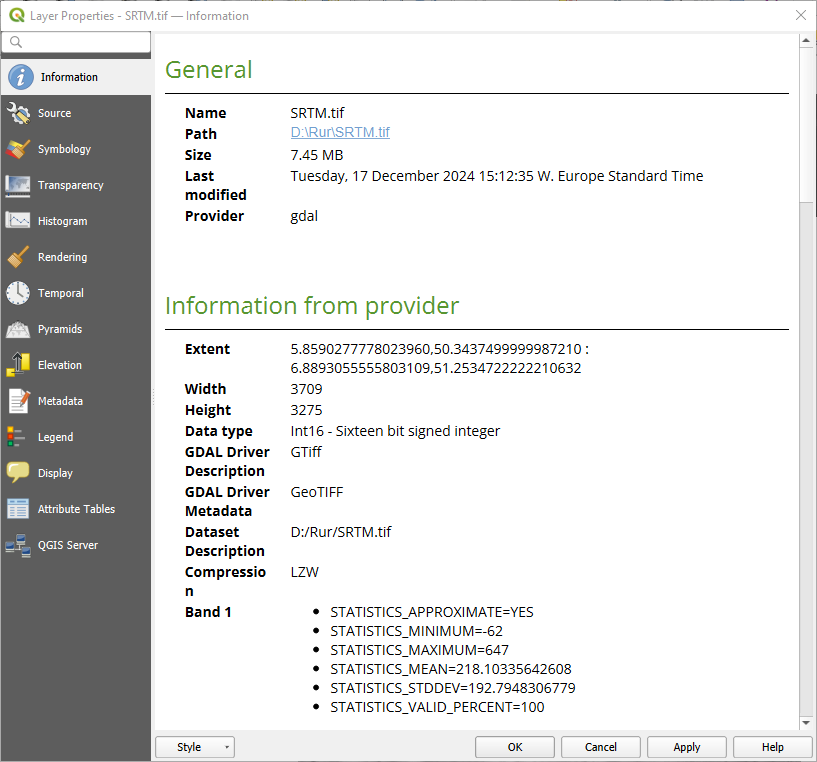
- What is the projection?
- What are the map units?
Watch this video to check the steps: