Tutorial: Interpolate Point Clouds to Rasters
2. Clip point cloud data
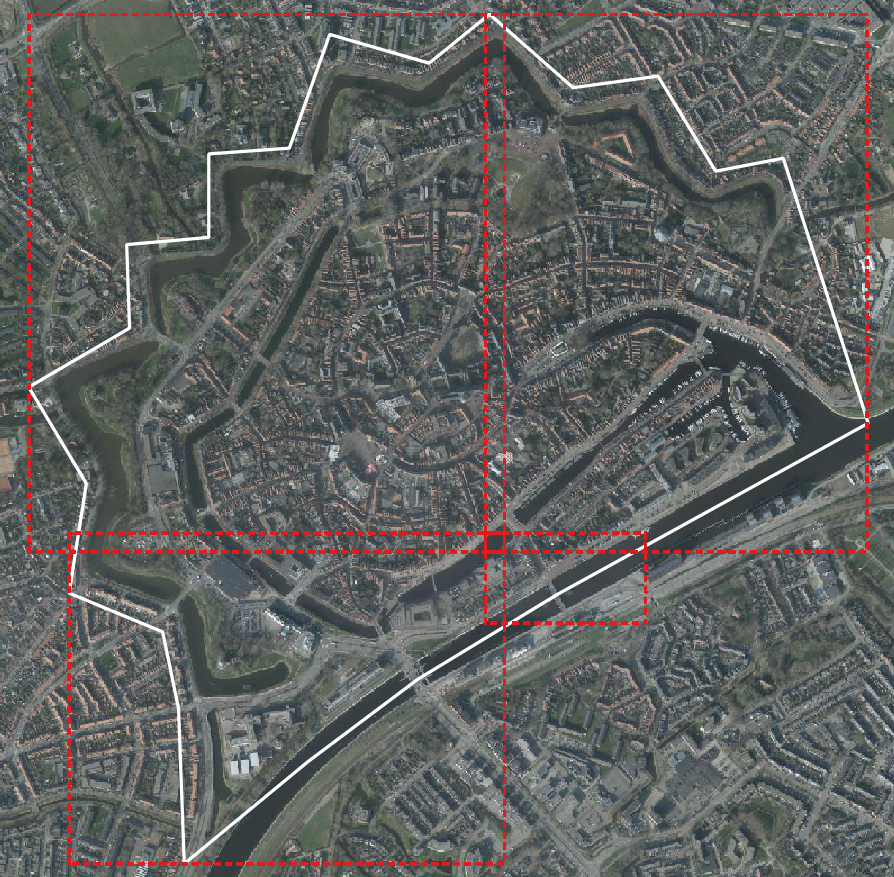
Let's first clip our point cloud layer to an area of interest. In this example, we'll digitize a polygon around the historic center of Middelburg and use that to clip the VPC layer of the previous tutorial.
1. Open QGIS Desktop with the project from the previous tutorial or load a point cloud layer into an empty project.
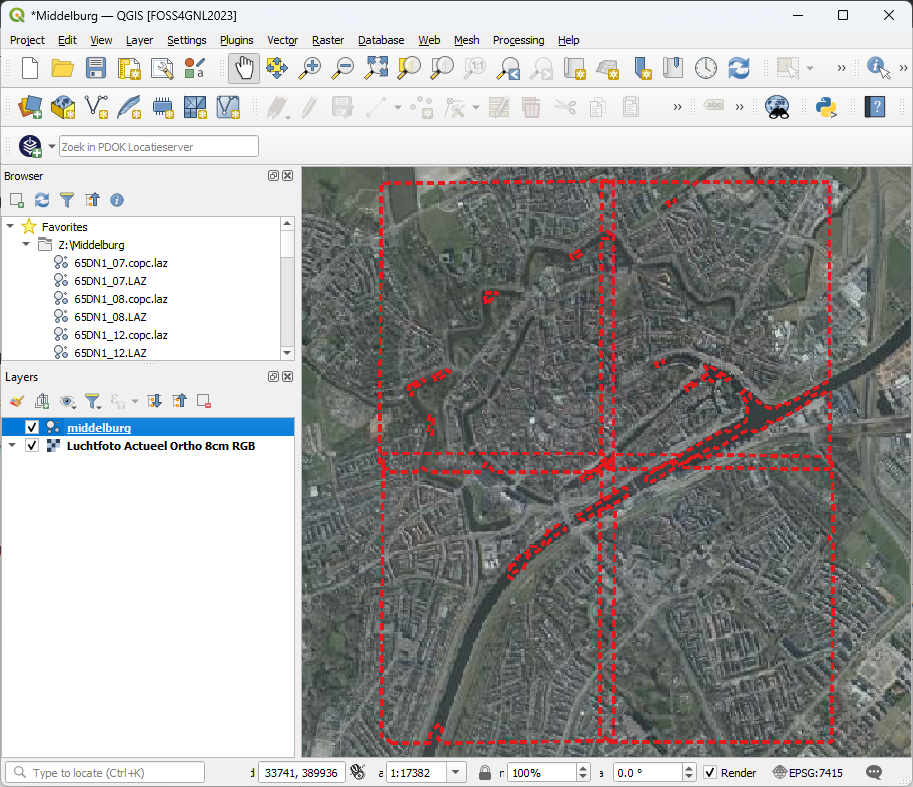
We'll show the aerial photograph in the background, because that's easy for digitizing our area of interest. Alternatively, you can use the OpenStreetMap layer that you can drag from the Browser panel, under XYZ layers, and drop it in the map canvas.
Because we only need a polygon to clip the point cloud layer and we'll not use it further, we're going to create a temporary scratch layer.
2. In the main toolbar, click  to create a temporary scratch layer.
3. In the New Temporary Scratch Layer dialog, type Area of interest as the Layer name, choose Polygon as the Geometry type and change the CRS to the project CRS, in this case EPSG:7415.
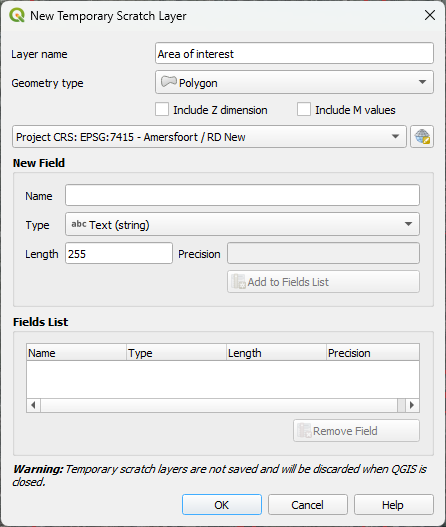
We don't need any attributes.
4. Click OK to create the empty polygon scratch layer.
The layer is automatically set to editing mode, so we can start digitizing the polygon.
5. Click  to add a polygon feature.
6. Digitize a polygon around your area of interest. In this example, we'll create a polygon for the historic center of Middelburg. With left-click you can add vertices, with backspace you can delete the last vertex and with right-click you close the polygon.
7. After digitizing the polygon, click  in the toolbar to toggle editing off and confirm that you want to save the edits.
Let's style the polygon with a white boundary without a fill colour.
8. In the Layers panel, click  to open the Layer Styling panel.
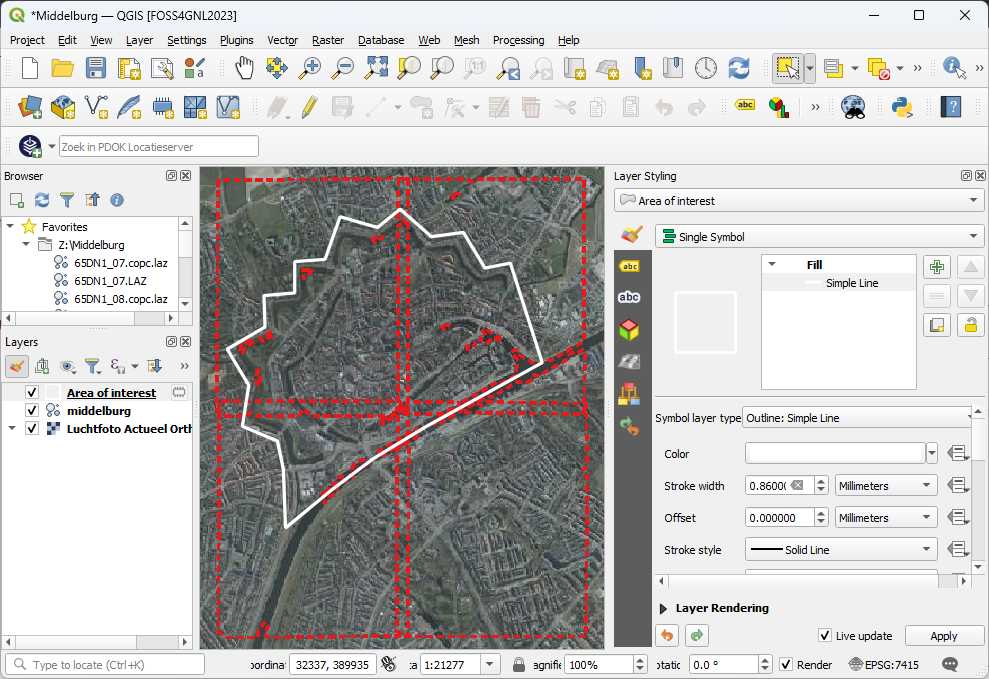
9. Make sure that the Area of interest layer is the active layer and click on Simple fill.
10. Change the Symbol layer type to Outline: Simple line.
11. Change the colour to white and the Stroke width to 0.86 mm.
The result now looks like this:
Now we're ready to clip the point cloud layer with the digitized polygon.
12. Click  to open the Processing Toolbox panel.
13. Go to the Point cloud data management | Clip tool.
14. In the Clip dialog set the Input layer to the point cloud layer you want to clip, e.g. middelburg and choose Area of interest as the layer for Clipping polygons. Save the result in the VPC format, e.g. middelburg_center.vpc.
Note that until version 3.42, you can only save to the VPC format, because the input layer is in the VPC format! However, in 3.44.x it should be possible to save to COPC.
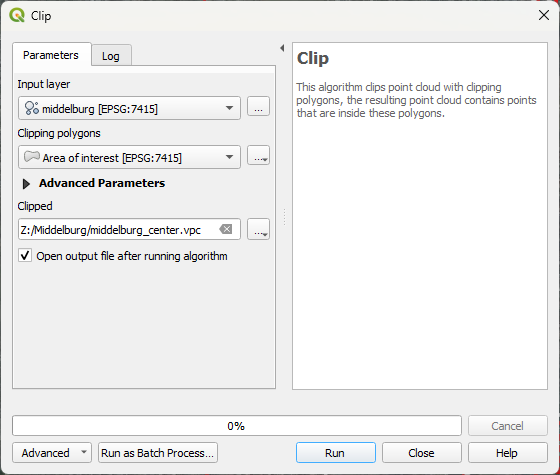
15. Click Run. Click Close after completion.
Note that you will only see the bounding boxes in red, because we're using the VPC format. If you hide the aerial photograph, you'll not see the RGB points. This is not a problem, because this is an intermediate result, before we start interpolating the points for our area of interest, which we'll do in the next chapter.
16. Save the Area of interest polygon by clicking  . We'll need the file later in the pdal wrench tutorial. Save it as boundary.shp.