Tutorial: Interpolate Point Clouds to Rasters
3. Interpolate with IDW
In this chapter we're going to interpolate the point cloud data to raster using the Inverse Distance Weighting (IDW) method. IDW will assign elevations to unknown locations, based on a weighted average of the elevations of known points. The weights are determined by an exponential decay function with the distance to a known point.
1. In the Processing Toolbox go to Point cloud conversion | Export to raster.
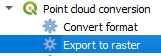
2. In the Export to Raster dialog, choose the clipped VPC layer (e.g. middelburg_center) as Input layer and the Z field as Attribute. Keep the Resolution of the density raster at 1 m and the Tile size for parallel runs at 1000 m. Save the result as DSM_IDW_1m.tif.
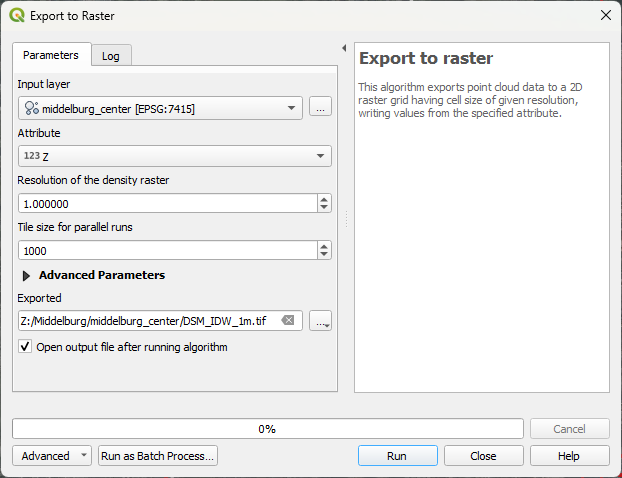
3. Click Run. Click Close after processing.
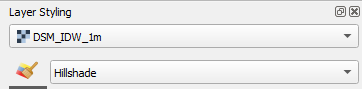
4. In the Layers panel, hide all layers except DSM_IDW_1m.
5. Go to the Layer Styling panel and change the renderer to Hillshade.
6. At the bottom of the Layer Styling panel change the Resampling Zoomed in to Bilinear and check the box for Early resampling.

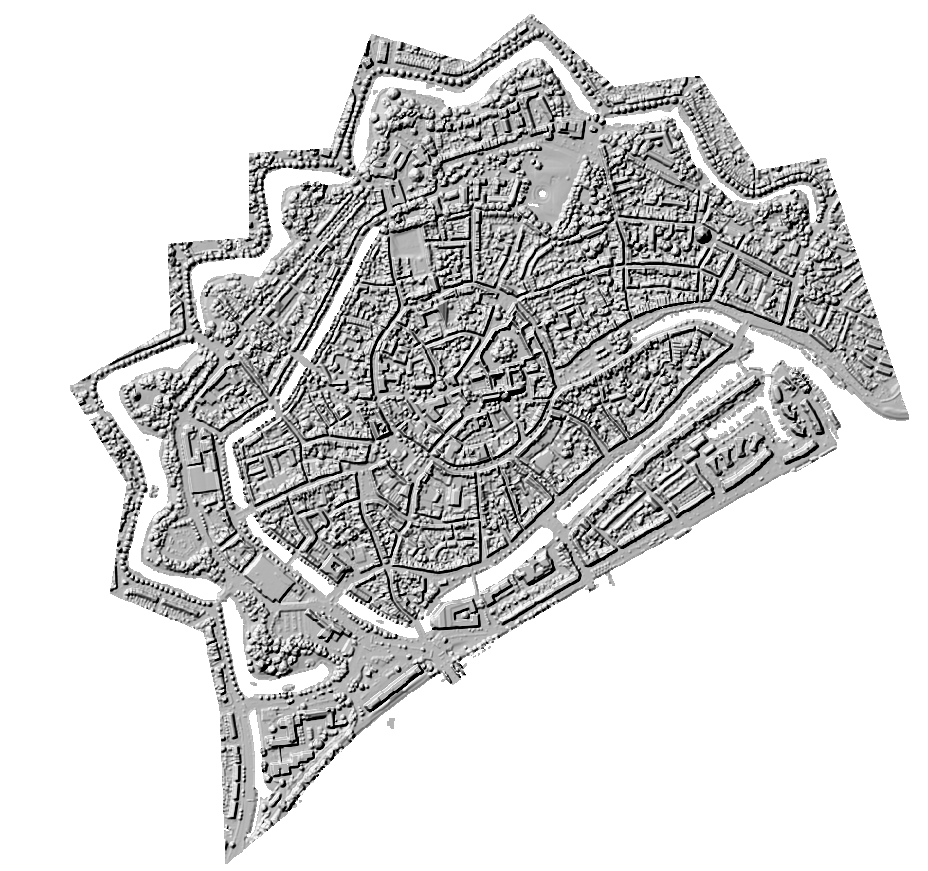
7. Zoom in on the raster and check the result.
8. Repeat the same procedure for a Resolution of the density raster of 0.5 m , 0.25 m and 0.1 m. Save the output as DSM_IDW_05m.tif, DSM_IDW_025m.tif and DSM_IDW_01m.tif respectively.
TIP: Click the history  icon in the Processing Toolbox and double-click last tool you've used today. Now you only have to change the Resolution of the density raster and the output file name. You can also copy the style of the 1 m result and paste it to the higher resolution results. Right-click on the layer and choose Styles in the context menu.

9. Compare the results by (un)hiding the layers. What do you see?
- Which resolution gives the best results?
Next, we'll use this resolution for another interpolation method.