
Tutorial: WaPLUGIN User Interface
Conditions d’achèvement
3. WaPOR2 Catalog Tab
In this chapter we will explore the WaPOR2 Catalog tab of the WaPLUGIN.
1. Go to the WaPOR2 Catalog Tab in the WaPLUGIN.
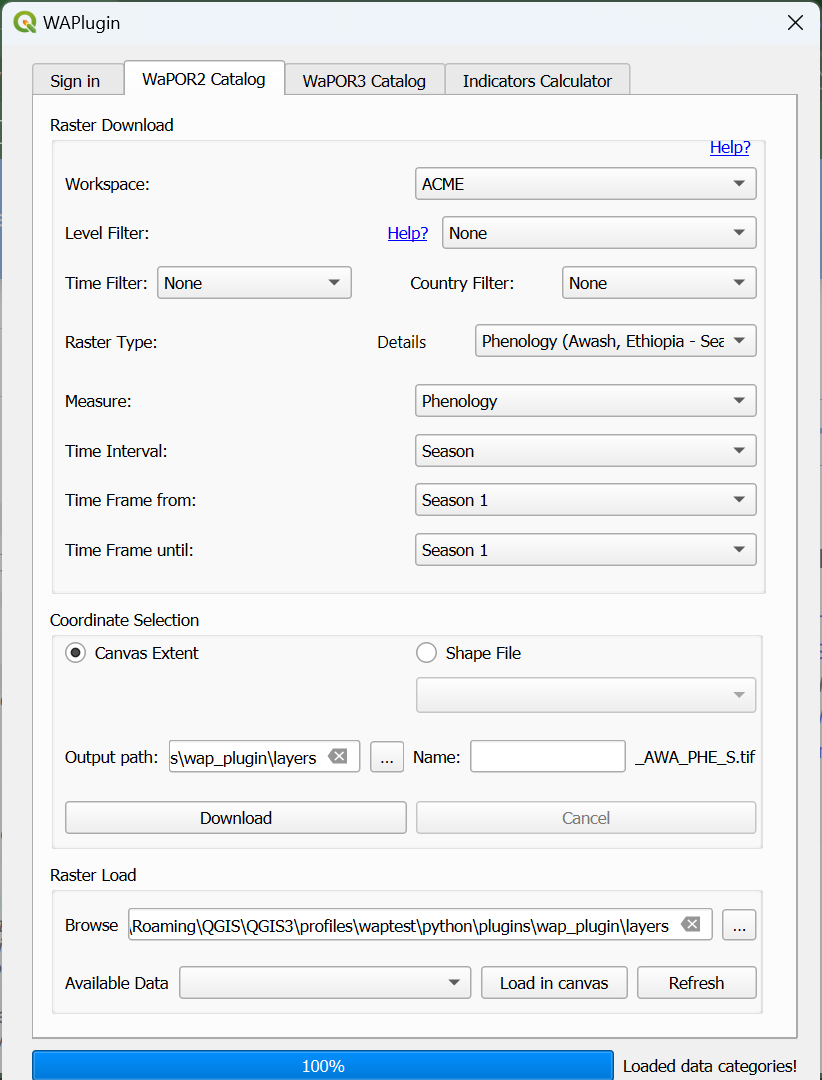

2. Select the workspace from the dropdown menu and choose WaPOR_ 2 (note that other datasets are available but not relevant for this workshop).

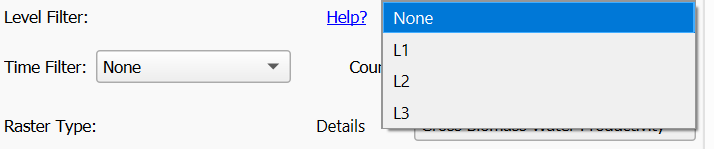
- L1: Continental
- L2: National
- L3: Sub-national
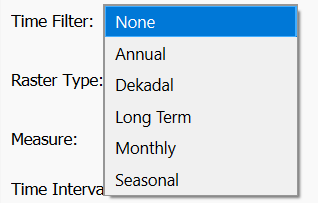
4. Apply the time filter to select the time step, choosing between daily, dekadal, monthly, seasonal, or annual data.
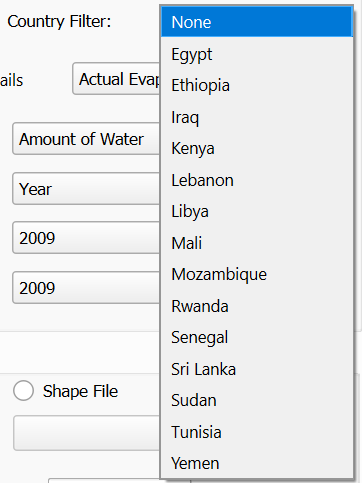
5. Optionally, filter by Country using the dropdown menu, which provides a list of WaPOR V2 partner countries (Not all filters need to be applied simultaneously). This filter only works for Level 3 data.
6. Select the Raster Type from the dropdown menu, displaying the available layers based on your previous selections.
7. Use the Details button next to the Raster Type dropdown to view a full description of the dataset, including conversion factors required for correcting downloaded data. (More detailed information is available in the FAO WaPOR Database Methodology Report.)
8. Define the Time Frame by selecting the start and end dates for the raster download. The buttons will be automatically populated once the layer type or time filter is selected (Download multiple rasters at once).
9. Define the spatial extent of your raster download using one of the following options:
- Canvas Extent: Limit the extent to the visible QGIS map canvas area.
- Shapefile: Use the dropdown to select a shapefile from your project and clip the data accordingly. (For L3 data, ensure the map canvas is zoomed in on the study area or country of interest. It’s recommended to use the QuickMapServices plugin to easily access basemaps and locate your study area.)
10. If needed, you can change the output path using the Output Path option.
By default, the downloaded data will be saved as [Name] [level] [place] [raster type] [time filter].tif. The [Name] can be customized by the user.
11. After setting the necessary parameters, click the Download button.
12. Monitor the progress bar to track the status of your raster download.
13. Once the download is complete, navigate to the Raster Load Section to load the downloaded data into QGIS.
14.The folder containing the downloaded data is automatically set to the path of the layers folder created by the plugin.
15. In the Available Data dropdown menu, select the rasters you want to load into the QGIS map canvas.
16. Click the Load in Canvas button to display the selected rasters in the map canvas (Use the Refresh button to update the list when new datasets are downloaded.)
