
Share your results!
Requisitos de finalización
fffff
1. Show us your maps
1.3. Create a Map
We're going to create a map in the Print Layout.
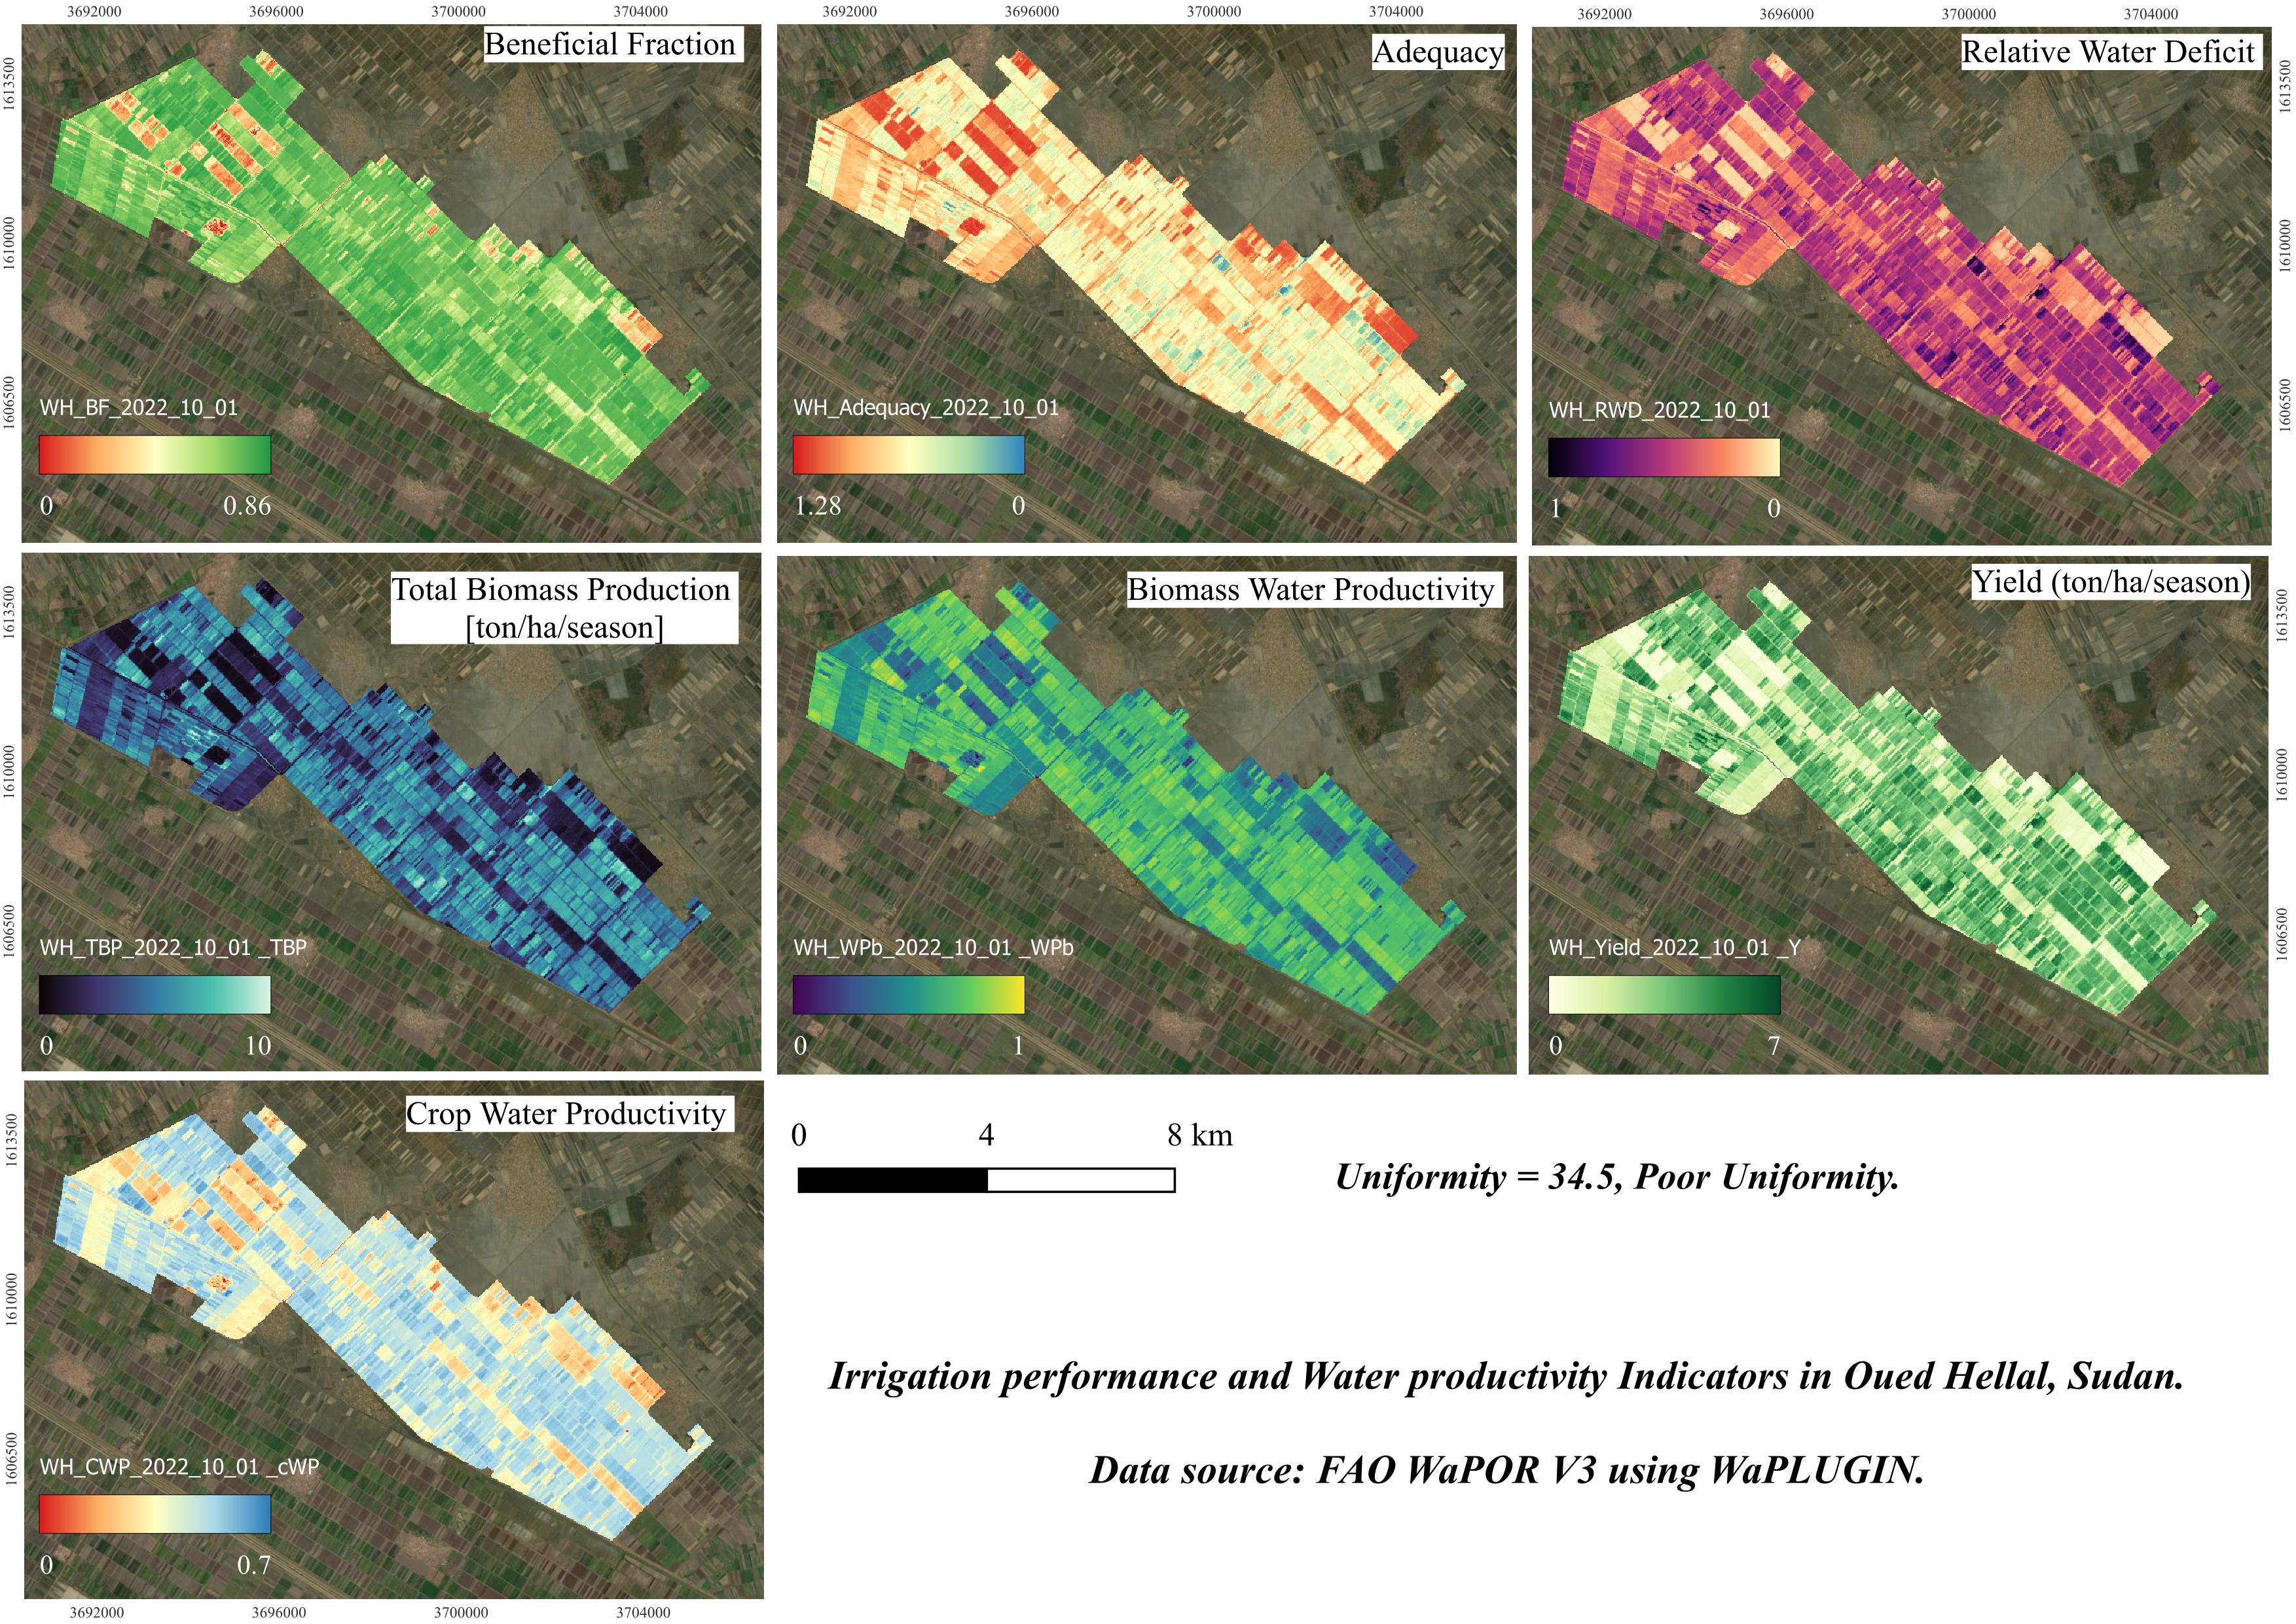
1. To create a map, go in the main menu to Project | New Print Layout and give the layout a name (e.g., Oued Hellal Indicators Map).
2. In the Print Layout window, click on the Add Map tool in the toolbar.
3. Drag the mouse to create a map frame in the layout, which will display the view from your QGIS project.
4. Choose the Add Label tool to
include a title for your map (e.g., Water Productivity and
Indicators in Oued Hellal).
tool to
include a title for your map (e.g., Water Productivity and
Indicators in Oued Hellal).
 button, which will display the color
ramps for the indicators. Customize the legend to display only the
relevant layers.
button, which will display the color
ramps for the indicators. Customize the legend to display only the
relevant layers.
 tool and placing it at the bottom of the map.
8. Choose a file name (e.g., Oued_Hellal_Indicators_Map) and save the map to your computer.
1. To create a map, go in the main menu to Project | New Print Layout and give the layout a name (e.g., Oued Hellal Indicators Map).
2. In the Print Layout window, click on the Add Map
3. Drag the mouse to create a map frame in the layout, which will display the view from your QGIS project.
4. Choose the Add Label
- You can customize the font,
size, and color in the Item Properties panel.
- You can adjust the title
and format the legend using the Item Properties panel.
- In Item Properties, you can adjust the units (e.g., meters or kilometers) and the scale.
8. Choose a file name (e.g., Oued_Hellal_Indicators_Map) and save the map to your computer.