
Tutorial: Editing Point Clouds
3. Change the classification of points
Let's start editing.
1. Navigate so that you get an oblique view of the misclassified tower.
2. Click the Show Editing Toolbar button ![]() .
.
3. Click the Toggle Editing button ![]() to enable editing.
to enable editing.
4. The workflow choosing the Attribute you will be editing and then select the Value you will be assigning to selected points. After setting the Attribute and Value, use the select tool(s) to assign the new values to specific points.
5. Here you will set the Classification value to Building.
![]()
Notice that you can select any attribute. Here we are working with the Classification attribute, but all the point cloud attributes are available to you.
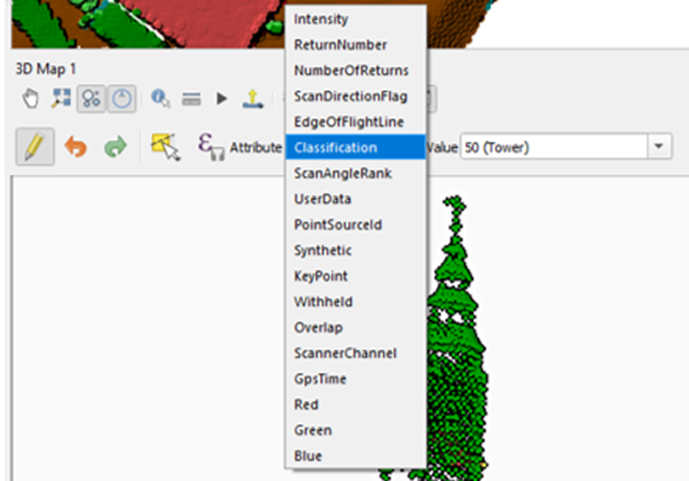
You can also create a new classification attribute value. For example, you can type in the Value box a new Classification value. If you wanted to create a new classification for towers with a value of 50 you would type 50() into the value box.
![]()
At that point you will then need to add that class to your 2D rendering by clicking the Add button ![]() . You will find this below the classification in the Layer Styling panel. After adding the new class, assign a color and a Legend value. In this example, any points you assign as Tower will be shown in hot pink.
. You will find this below the classification in the Layer Styling panel. After adding the new class, assign a color and a Legend value. In this example, any points you assign as Tower will be shown in hot pink.
![]()
6. Using the Change Point Cloud Attribute button ![]() . select the tower points. Use the same steps you use to digitize: left-click to add vertices and right-click to finish.
. select the tower points. Use the same steps you use to digitize: left-click to add vertices and right-click to finish.
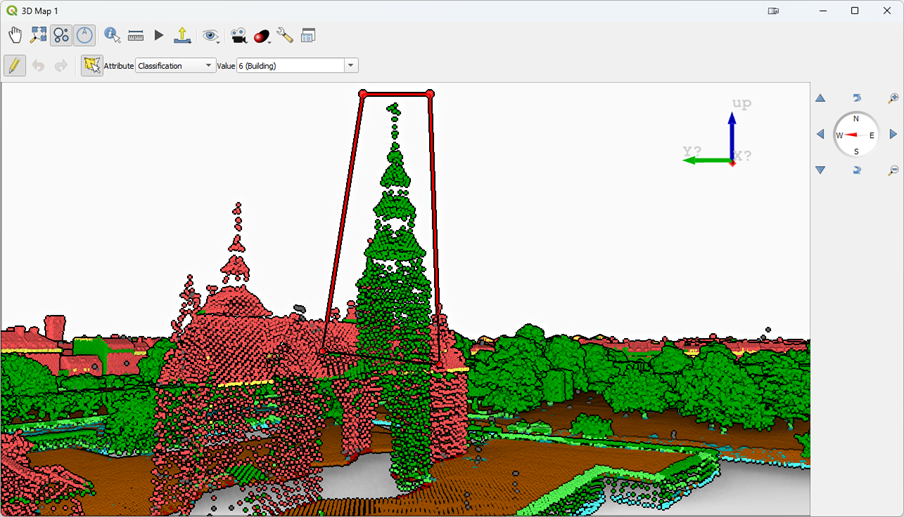
7. After you finish the points will be reclassified to Building.
8. If you aren’t satisfied with the selection of points you have changed you can click the Undo button ![]() or Ctrl-Z.
or Ctrl-Z.
In the next section, you'll learn how to constrain the selection of points.