Fire Risk Map
Learn how to create a Fire Risk Map using QGIS and remote rensing.
2. Data and Preparation
2.1. New Project and Coordinate System
Before we start on the data, we need to set up our QGIS project and add the correct coordinate system. A coordinate system is a framework that uses numbers (coordinates) to define the position of features on the Earth, and it is essential for accurately mapping, analysing, and combining spatial data. There are many different coordinate systems, each designed for specific regions or purposes, to ensure accurate representation of spatial data. Learn more about a coordinate system here. When starting a new project in QGIS, these steps are always important to follow before you do anything else.
In this module, we will use the coordinate system EPSG:32752 – WGS 84/UTM Zone 52S . This is the most suitable for the area in which we will do our analysis. This coordinate system belongs to the UTM (Universal Transverse Mercator) system, which divides the Earth into zones. Zone 52S covers part of the southern hemisphere, including Seram Island in Indonesia, which will be our study area.
It is important to use the same coordinate system for each map layer so that they fit together properly. Using different coordinate systems for different layers can result in errors in location or distance measurements, which affects the reliability of the analysis.
Start a New Project and Set the Coordinate System
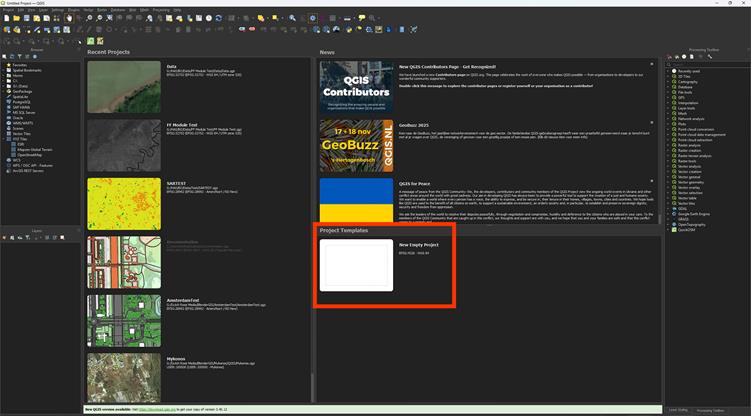
1. In QGIS, go to Project > New to create a new empty project.
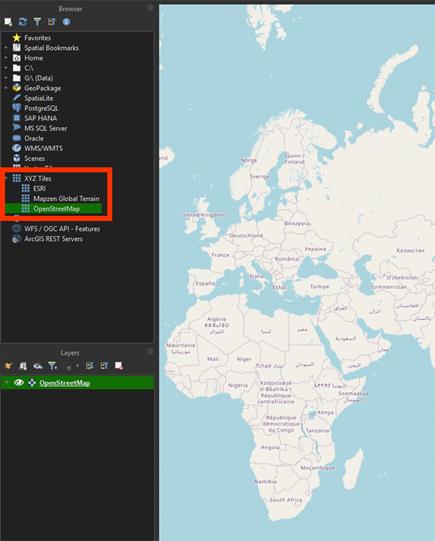
When starting a project, it’s helpful to add a basemap. This provides visual context and makes it easier to locate and understand the area you are working with. OpenStreetMap is already provided in QGIS, so it’s an easy way to add our basemap.
2. Scroll in the Browser to XYZ Tiles and double-click on the OpenStreetMap layer or drag it in.
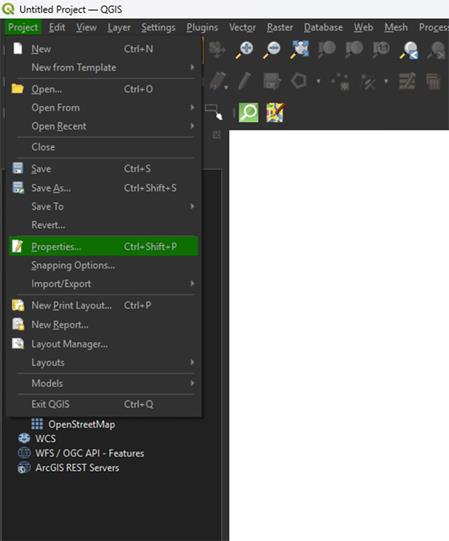
3. Then go to Project > Properties, and go to the CRS (Coordinate Reference System) tab.
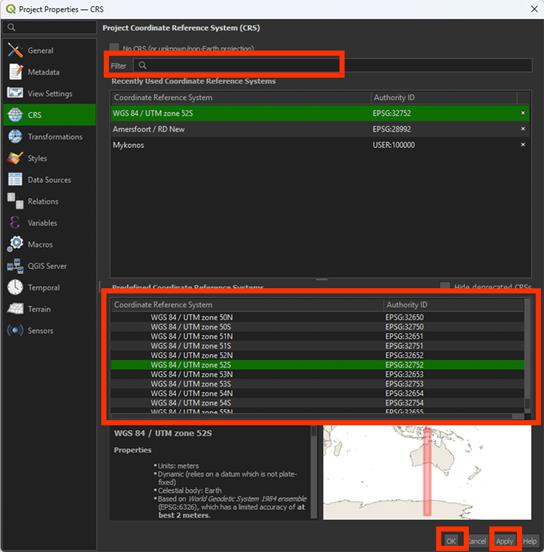
4. Search for EPSG:32752 – WGS 84 / UTM zone 52S.
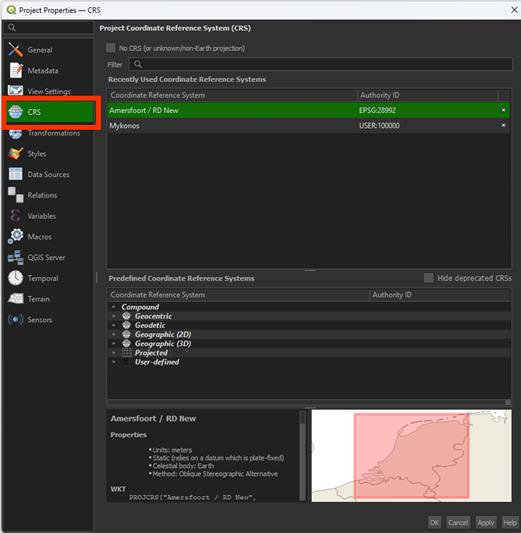
5. Select it and click Apply and then OK.
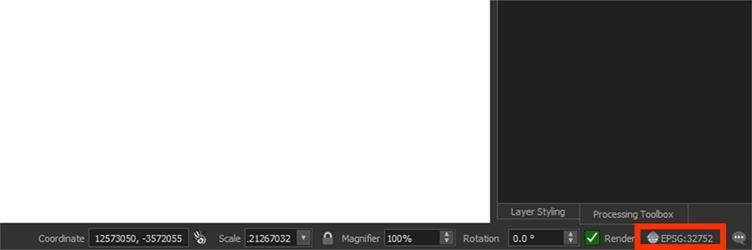
You will now see the coordinate system updated in the bottom-right corner of the QGIS window.
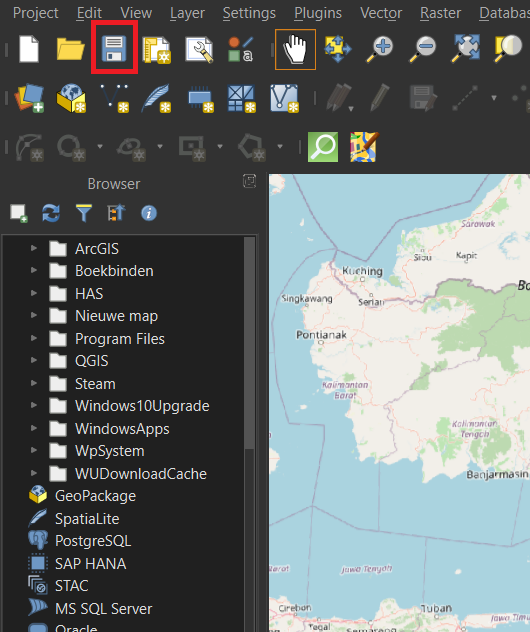
6. Click on Project and Save as. Find the correct location and give the file a proper name.
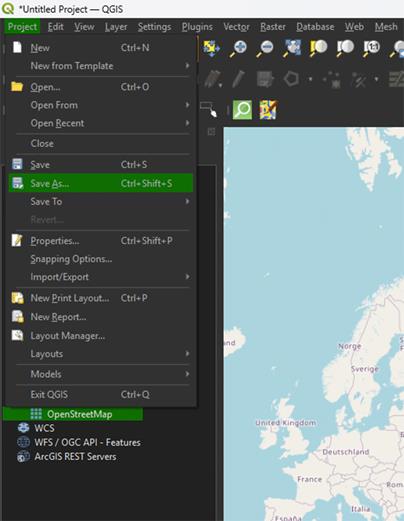
Make sure you save your project often, to prevent losing your progress. You can press the save icon on the top left or press ctrl + s.