
Preprocessing a DEM and calculate flow direction
4. Styling the DEM and Generating Contours
4.2. Render the DEM as Hillshade
Now you will further improve the visualization by rendering the DEM as a hillshade raster.
1. Right-click on the dem_subset layer and select Duplicate Layer from the context menu.
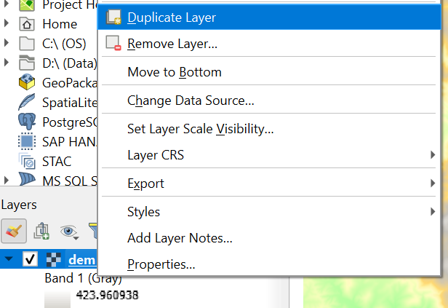
This creates a copy of the dem_subset layer called dem_subset copy.
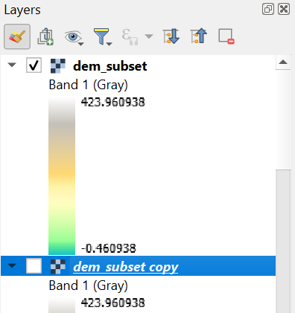
2. Rename the dem_subset copy layer to hillshade. You can do this by clicking right on the layer name and choosing Rename Layer from the context menu.
3. Move the hillshade layer so that it lies above the dem_subset layer in the Layers panel and make sure it’s visible and selected.
4. In the Layer Styling panel, which should still be open, make sure that the hillshade layer is now selected. In the drop-down list change Singleband pseudocolor to Hillshade.
Now the hillshade layer is visualized with a shading. Which direction is the illumination coming from? Is this possible in reality?
Hillshade gives the best results with an artificial illumination in the northwest, which in reality cannot exist in the Northern Hemisphere. If you move the dial in the Layer Styling panel to the southwest, you will see an inverted relief.
5. Zoom in on the map canvas so we can see the hillshades in more detail.
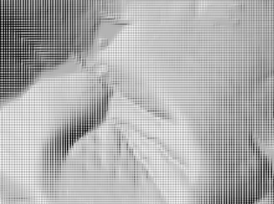
You’ll see a blocky pattern. This is because the default resampling method for both Zoomed in and Zoomed out is Nearest Neighbor. This method is fine for categorical data. However, elevation is considered continuous data.
6. In the Resampling section of the Layer Styling panel choose a Zoomed in resampling method of Bilinear. For Zoomed out you can choose the same. You can also check the box for Early resampling.
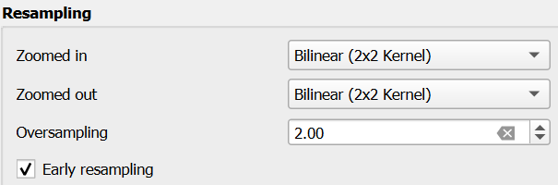
You can now see the smoothing effect in the map canvas.
In the next section, we're going to blend the DEM colours with the hillshade.