
Preprocessing a DEM and calculate flow direction
4. Styling the DEM and Generating Contours
4.4. Generating Contours
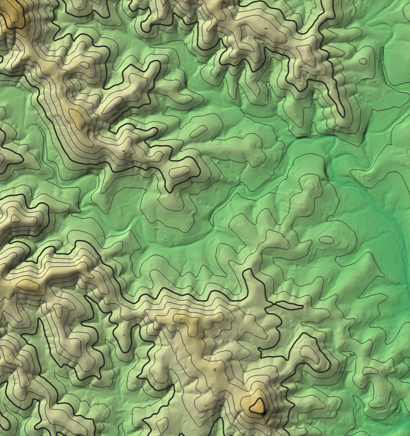
You can also render elevation data as contours.
1. Duplicate the hillshade layer and turn it on. Name this layer contours and drag it to the top of the Layers panel.
2. Make this contours layer the target in the Layer Styling panel.
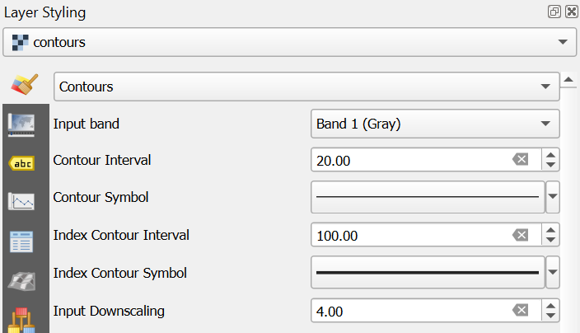
3. Switch the renderer from Hillshade to Contours.
4. Set the Contour Interval to 20.
5. Set the Index Contour Interval to 100.
6. Click the Index Contour Symbol.
7. Select Simple Line.
8. Increase the Stroke width to 0.66.
You can also apply a Blending mode to this contour renderer.
Since you duplicated the hillshade layer it inherited the Blending mode setting of Multiply.
First see how the contours look with no blending.
9. Set the Blending mode to Normal.
10. Now change it to Overlay.

Feel free to experiment with others to see how they change the appearance.
Finally, it will be easy to keep these layers together in a group that we can easily switch on or off.
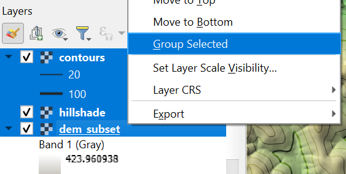
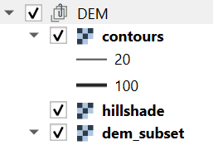
11. Select contours, hillshade and dem_subset in the Layers panel and click right. Choose Group Selected from the context menu.
12. Name the group DEM.
Now we're going to prepare the DEM for hydrological analysis.