
For our study of Rotterdam, we need the boundary polygon of the municipality. For that purpose, we first need to download a vector layer with all municipalities of the Netherlands, select Rotterdam and export it to a new vector layer for our database. We need a WFS (Web Feature Service) to get the vector data.
1. In the toolbar, click on  to open the PDOK Services Plugin dialog.
2. There, search for Gemeenten, WFS, the newest version. Use the Zoeken field, which means search in Dutch.

3. Click Boven to add the layer to the top of the Layers panel.
4. Click Close and wait until the layer loads.
Now we need to select the municipality of Rotterdam.
5. In the toolbar click Select Features by Value....

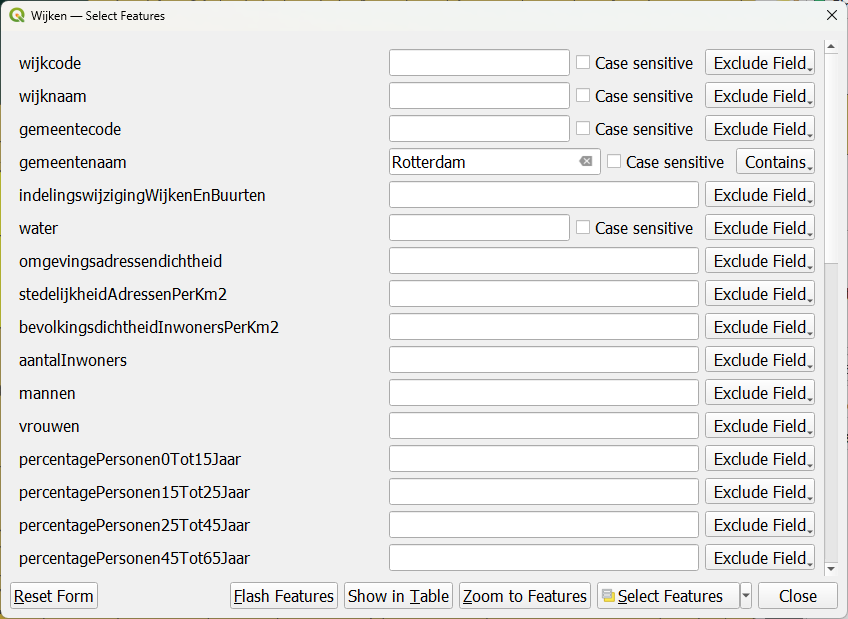
6. In the Select Features dialog type Rotterdam at gemeentenaam (municipality name). If you start typing it will automatically complete and you can select the name.
7. At water type NEE. This is to select only the land part of the municipality and not extend it into the sea.

You can see that this layer has a lot of attributes. It is census data. We'll look at that later.
8. Click Select Features to select this polygon.
9. Click Close to close the dialog.
Now you'll see that one polygon is highlighted in yellow. That's the municipality boundary polygon of Rotterdam.

Now we need to export the selection to a database where we want to store our data for Rotterdam.
10. In the Layers panel, right-click on the Gemeenten layer and choose Export | Save Selected Features As....

11. In the Save Vector Layer as dialog, make sure to choose the GeoPackage format. Then use the Browse  button to browse to the folder where you want to store your GeoPackage. Save it as Rotterdam.gpkg. Change the Layer name to municipality boundary.

12. Leave the rest as default and click OK.
13. In the Select Transformation dialog click OK to accept the default.

This appears, because the projection of the project is different from the layer. The project projection is Pseudo Mercator (EPSG:3857), which is the projection of the online layers we've loaded before. The municipality layer is in the Dutch projection, EPSG: 28992 and has to be on-the-fly reprojected to Pseudo Mercator.
To work in the correct projection, also visually in the map canvas, we'll now change the on-the-fly reprojection to the Dutch projection.
14. In the lower right of the window, click on the EPSG code.

15. In the Project Properties - CRS dialog type 28992 at Filter. This is the EPSG code of the Dutch projection.
16. Select Amersfoort / RD New under Predefined Coordinate Reference Systems.
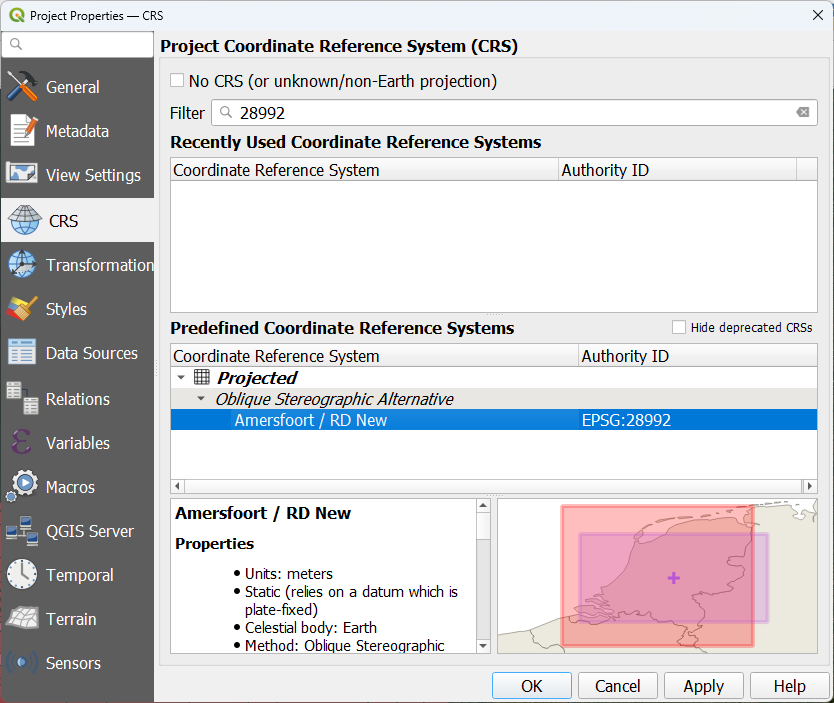
17. Click OK to apply and close the dialog.
Now the map canvas in the Dutch projection.
Let's clean up a bit before we continue.
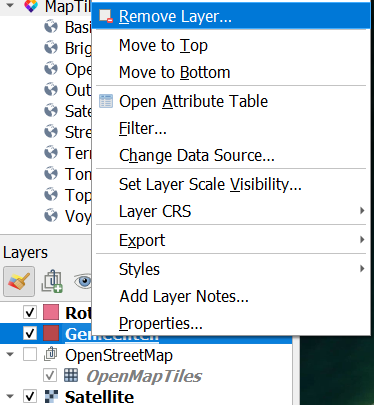
18. In the Layers panel, right-click on the Gemeenten layer and choose Remove layer... from the context menu. In the popup, click OK to confirm.
Now the layer with all municipalities of the Netherlands is removed.
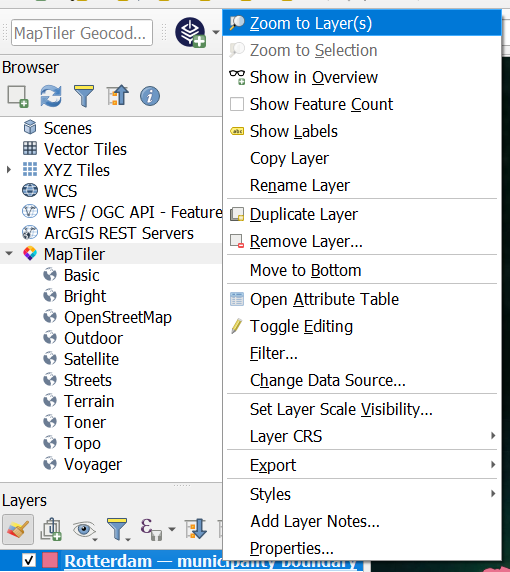
19. In the Layers panel, right-click on the Rotterdam - municipality boundary layer and choose Zoom to Layer(s).
Let's now style the boundary with a line.
20. Go to the Layer Styling panel. Make sure that the Rotterdam - municipality boundary layer is the active layer.
21. Select Simple Fill.
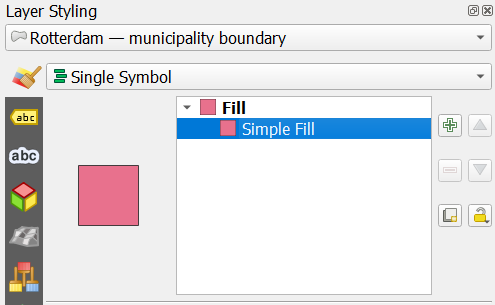
22. Change it the Symbol Layer Type to Outline: Simple line. Change the color to red and give it a thickness of 0.66 mm.

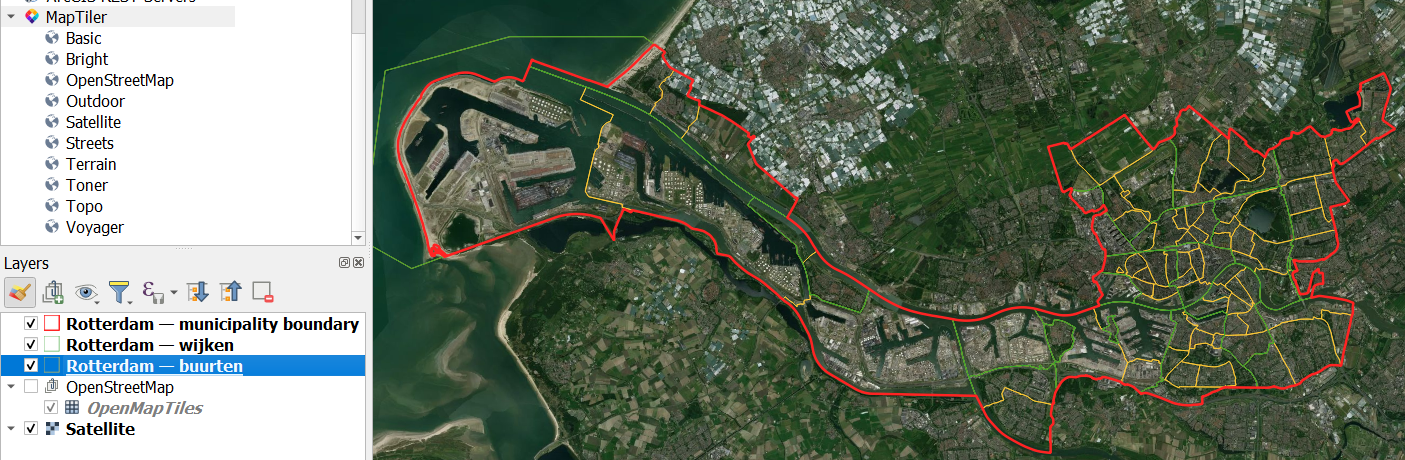
23. Repeat this for the WFS layer Wijken (quarters) and Buurten (neighbourhoods).
After loading the WFS you select the features based on Gemeentenaam Rotterdam and export them to the database with layer names quarter and neighbourhoods. Style them with different line colours and thickness.
In the end your map canvas should look like this:
Now is a good moment to save your project. Regularly save your project to avoid data losses.
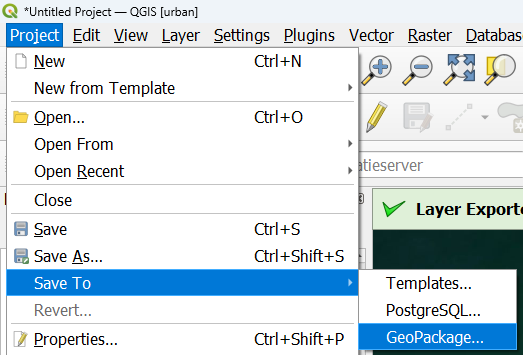
23. In the main menu, go to Project | Save To | GeoPackage....
24. In the Save project to GeoPackage popup dialog, use the  button to locate your GeoPackage (Rotterdam.gpkg) and save the project as Rotterdam.
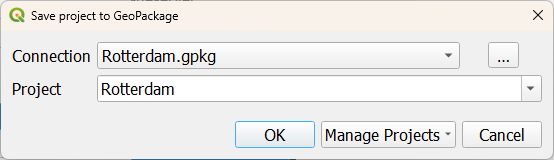
25. Click OK.
Next, we'll add the Digital Surface Model and Digital Terrain Models.