
Tutorial: GIS for adaptation
3. Spatial metrics
3.1. Raster class areas
Let's get a table with the surface areas of each land-use class in our land-use raster.
1. Open the Count Raster Cells tool.

2. In the Count Raster Cells dialog, choose LGN2022_Rotterdam as Raster layer and save the result to your GeoPackage with the table name land use count.

3. Click Run. Click Close when processing is completed.
4. Open the land use count attribute table.
The Value field is the class number that you can find in your land-use layer. Number is the number of pixels.
To get the surface area, we need to multiply the number of pixels with the raster resolution. The resolution is 5 m, so the one pixel is 5 x 5 = 25 m2.
5. Click  to open the Field Calculator. This will automatically toggle to Editing Mode.
6. In the Field Calculator dialog, Create a new field with Area (m2) as the Output field name and Decimal number (real) as Output field type.
Here we can't use $area in the expression, because the table has no geometry. It's just a table, not a vector GIS layer.
7. In the middle panel expand Fields and Values and double-click on Number to add it to the expression. Then click  and type 25 to have the following expression:
"Number" * 25
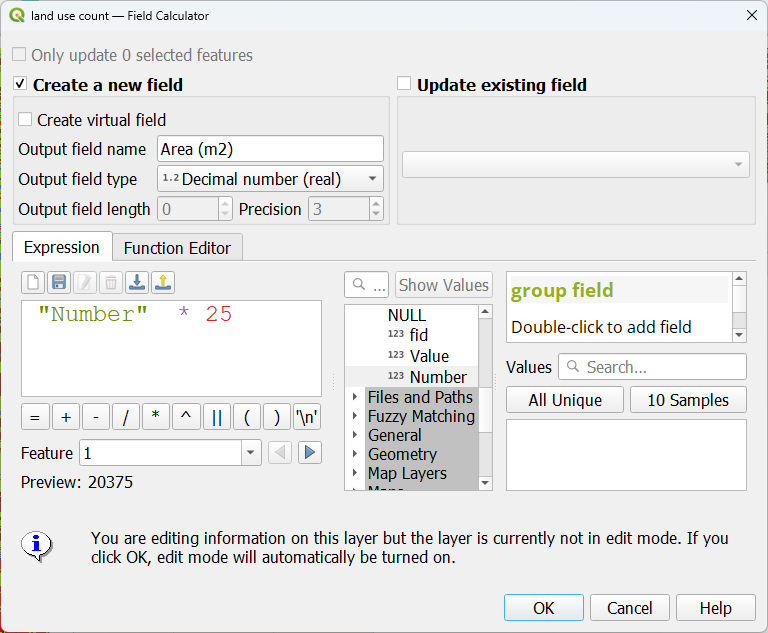
8. Click OK.
9. Click  to toggle off editing mode and confirm that you want to save the edits.
10. Now click on the Area (m2) field name two times so that it sorts the rows from large to small.

- Which are the four largest land-use classes (names) in Rotterdam?