
مادة تدريبية: تجهيز بيانات من خرائط ورقية
8. Verify the Georeferenced Map
You can verify the result by checking the coordinates at the grid nodes that you used as GCPs.

The Map CRS shows the coordinates in the projection of the project (i.e. EPSG:26718), the second field shows the coordinates in the Geographic Coordinate System (i.e. EPSG:4326), with coordinates in decimal degrees of longitude and latitude.
2. Read the coordinates from the side of the map and verify if they correspond with these coordinates. Repeat for the GCP nodes.
Another way to verify the result is to use a web map as a backdrop. The QuickMapServices plugin provides easy access to many web maps such as Google Satellite and OpenStreetMap.
Plugins are third-party additions to QGIS. They can be installed through the Plugins manager. You need an internet connection to connect to the Plugins repository.
3. Choose from the main menu: Plugins | Manage and Install Plugins...

4. Search for QuickMapServices.
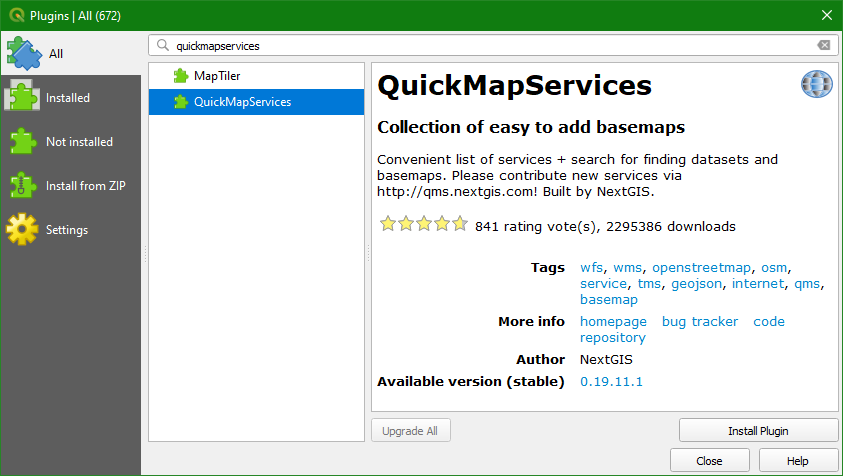
5. Click Install Plugin. Click Close after installing.
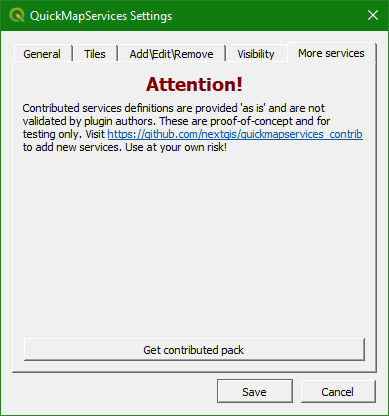
6. In oder to get access to more online resources choose Web | QuickMapServices plugin | Settings from the main menu. Next, choose the More services tab and click Get contributed pack. Click OK in the popup and Save in the dialogue when the contributed pack is installed.
7. Go to the main menu and choose Web | QuickMapServices plugin and select Google | Google Terrain and then OSM | OSM Standard. Compare the georeferenced map with Google Terrain and OpenStreetMap.
To help with this comparison you will employ a Blending Mode. Blending modes determine how two layers interact visually. When a blending mode is applied to a layer it will be blended with the layer below.
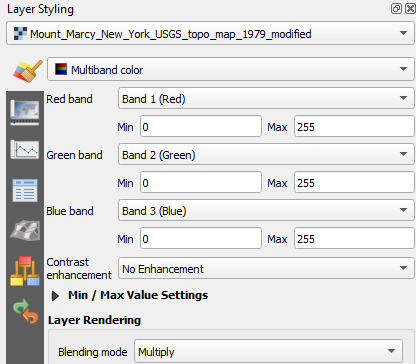
8. Open the Layer Styling panel by clicking the ![]() button. Set the target layer to
button. Set the target layer to Mount_Marcy_New_York_USGS_topo_map_1979_modified.
9. In the panel, choose Blending mode Multiply.
Blending modes allow for more elegant rendering between GIS layers. They can be much more powerful than simply adjusting layer opacity. Blending modes allow for effects where the full intensity of an underlying layer is still visible through the layer
above. There are thirteen blending modes available. A nice overview can be found in this blog by Helen McKenzie.
10. After comparing the georeferenced map with the online layers, change the blending of Mount_Marcy_New_York_USGS_topo_map_1979_modified back to normal. We are going to use this layer in the next sections as a backdrop to digitize vectors. You
can uncheck the Google Terrain and OSM Standard layers.
This is a good time to save your QGIS project (.qgz file).
11. From the main menu, choose Project | Save as... and save it as Exercise_1.qgz in the same folder where you have stored the data.
The project file contains references to all layers (not the data itself), styles, projections, extent and zoom level of the map canvas. Save your project regularly!
Watch this video to check the steps in this chapter: